
 DC/OS Documentation
You can create and administer jobs for the DC/OS cluster in any of the following ways:
- interactively with the DC/OS UI
- interactively or programmatically with the DC/OS CLI
- directly through calls to the DC/OS application programming interface (API for job-related operations
The DC/OS UI provides access to a subset of the job-related functionality provided through the dcos job CLI and Jobs API. For more advanced job configurations and activity, use the CLI dcos job commands or the Jobs API.
The DC/OS application programming interface (API) provides underlying functionality that you can access through the DC/OS UI and CLI. In most cases, you would only use the API directly if you are integrating the functionality with a custom program or automation script.
Managing jobs with the DC/OS UI
You can manage the most common job-related activity interactively through the DC/OS UI. For example, you can add, modify, run, and remove jobs directly from the Jobs tab in the UI.
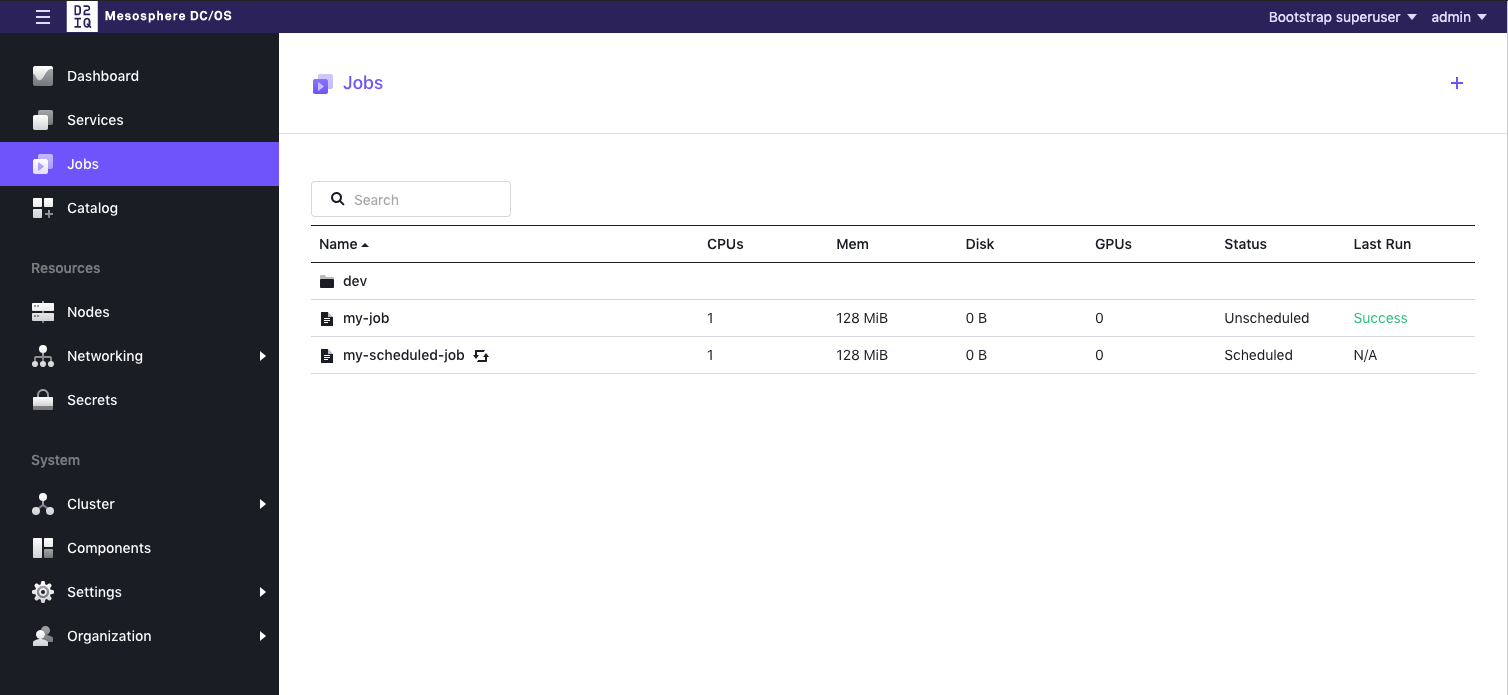
Figure 1 - Jobs tab and jobs list
Split screen
Note: In all Jobs UI configuration screens, you can choose to view the UI alone, or split the screen between the UI and a JSON Editor window. In the following discussion of the Jobs configuration options, you see the split screen to see how they work together, but you may always choose to use the UI by itself. To invoke the JSON Editor, select JSON Editor toggle switch next to the Submit button.
Edits made to either interface will be immediately reflected in the other. For example, if you enter a value in any field in the left hand UI, it will be added to the JSON file on the right hand.
To dismiss the JSON Editor screen, select the toggle again.
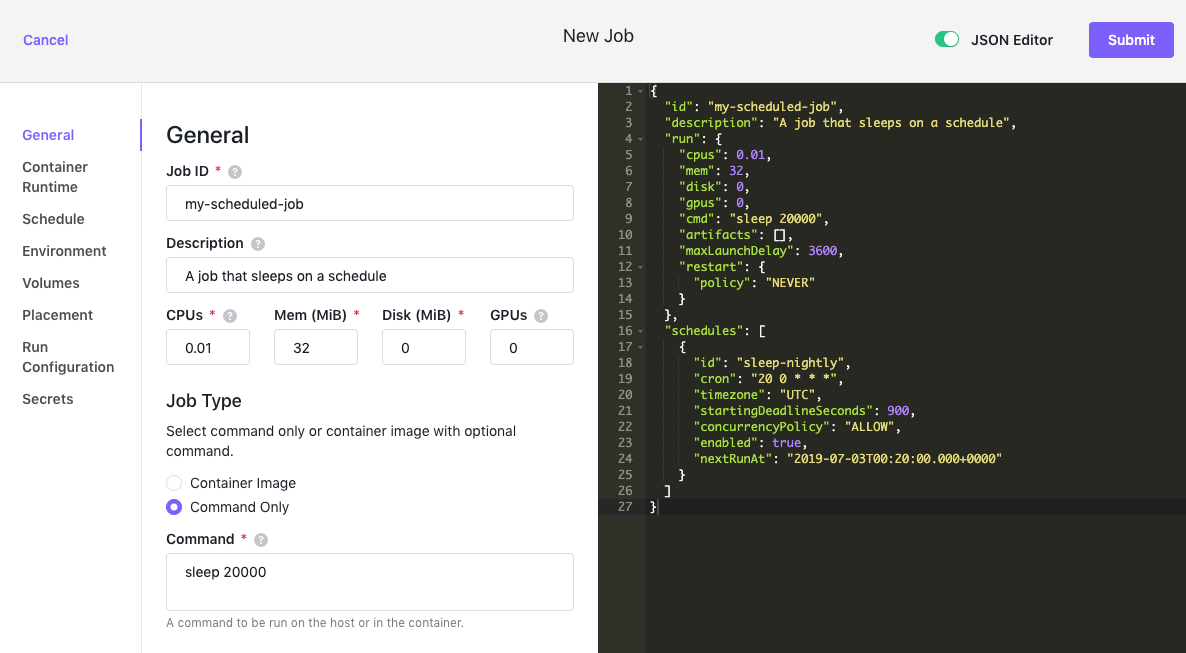
Figure 2 - Split screen
Add a job
There are two ways to create a job in the DC/OS UI.
- If you have no jobs configured, the Jobs screen will contain a notice that you have no active jobs, and will display a Create a Job button.
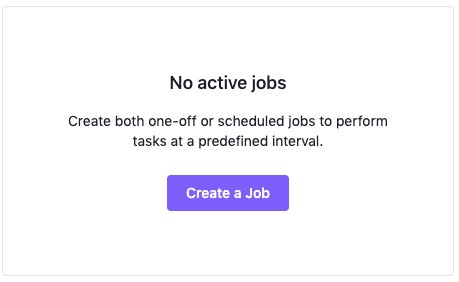
Figure 3 - Create a Job button
- Regardless of whether you have active jobs or not, you can always select the + sign in the upper right corner to create a new job.

Figure 4 - Select plus sign
A configuration screen for a new job appears. Note: this screen is the same as that used for editing jobs.
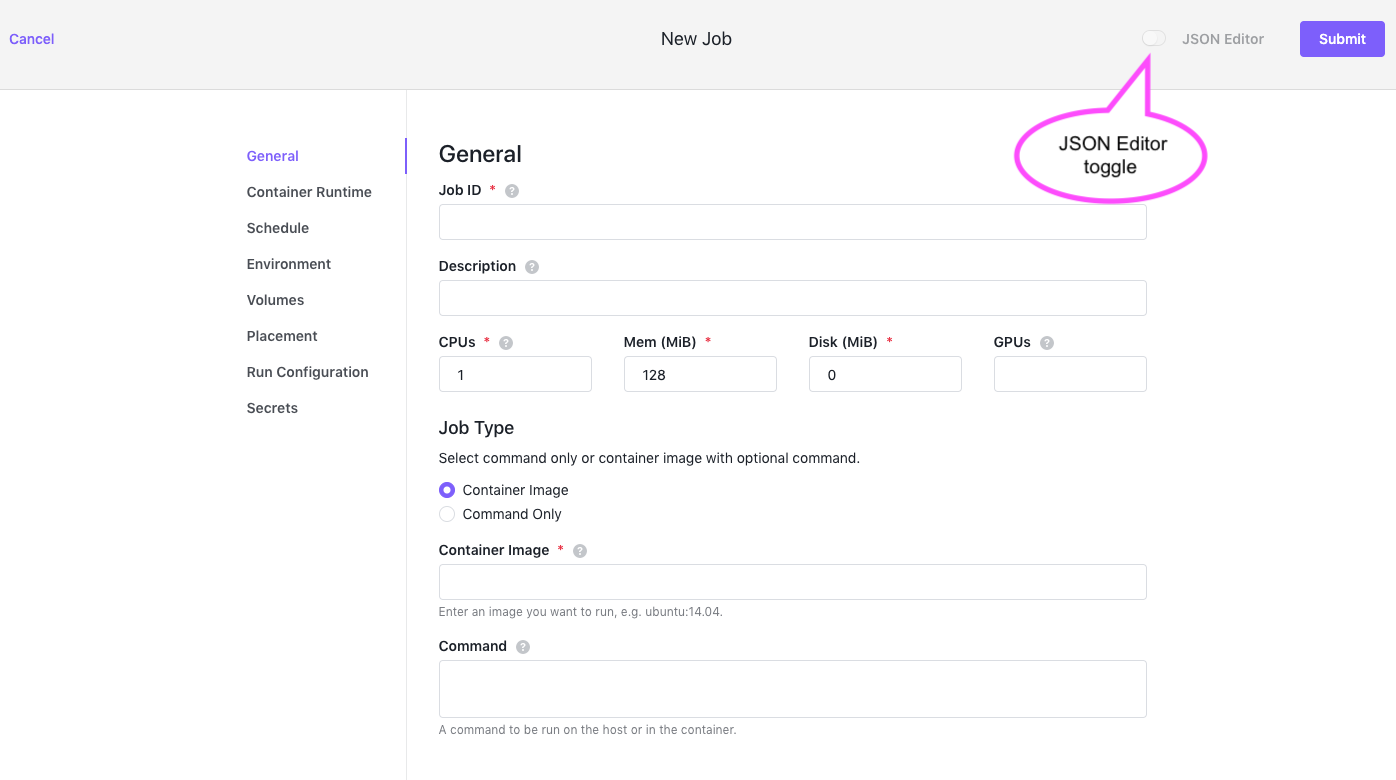
Figure 5 - Job configuration screen
Configuring a job
You will see eight tabs on the left hand side of the screen. These help you name, configure and manage your job:
| Name | Description |
|---|---|
| General | Sets the most basic job settings, such as the job identifier, CPU, memory and disk requirements. |
| Container Runtime | Specifies whether the job runs using the Universal Container Runtime or the Docker Engine. |
| Schedule | Sets up a schedule for your job. You can use the cron format. |
| Dependencies | Specifies that a job runs after another job. |
| Environment | Specifies environment variables to be attached to each instance of your job. |
| Volumes | Configures a stateful job by setting up a persistent volume. |
| Placement | Specifies the placement of agent nodes in regions and zones for high availability, or to expand capacity to new regions. |
| Run Configuration | Advanced settings for the job. |
| Secrets | Sets up a Secret Store to secure important values like private keys, API tokens, and so forth. |
Detailed information about the parameters and values for each of the configuration screens can be found in the Jobs documentation.
General
Select General to edit the most basic job settings, such as the job identifier, CPU, memory, and disk requirements.
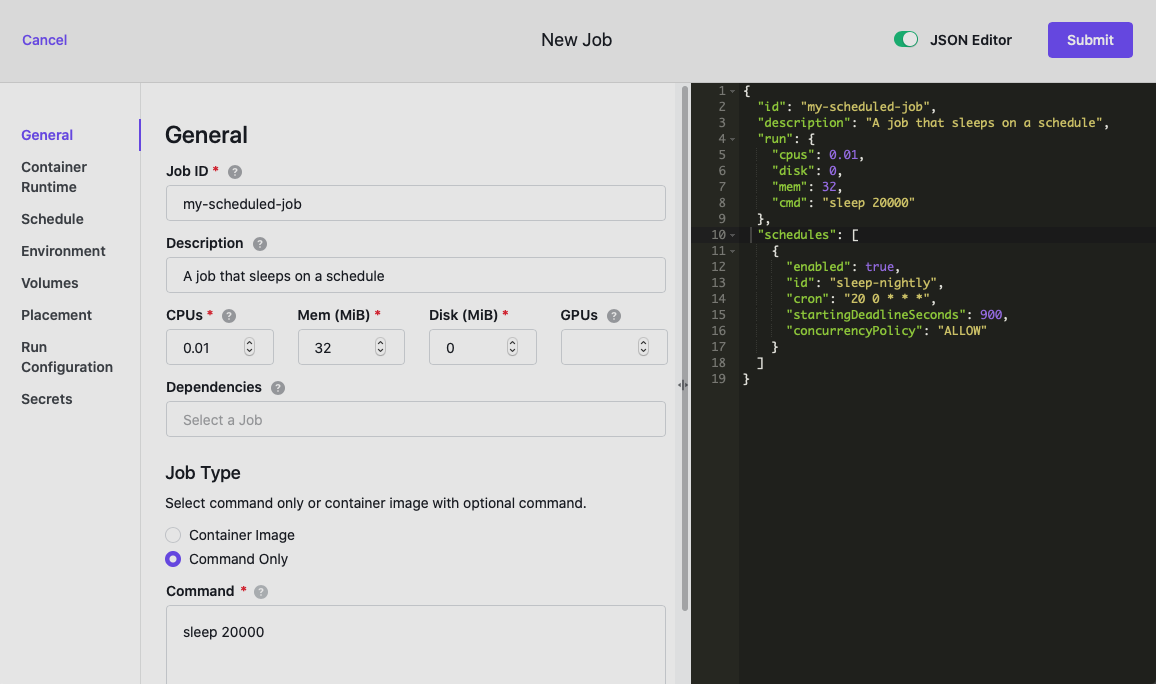
Figure 6 - General configuration tab
The parameters for this tab and the values allowed are found in the Jobs documentation of the UI.
Container Runtime
Select Container Runtime to specify whether the container for the new job runs using the Universal Container Runtime or the Docker engine. We support the Universal Container Runtime (UCR) and the Docker Engine.
UCR
Universal Container Runtime uses the native Mesos engine and supports GPU resources. This is the recommended selection.
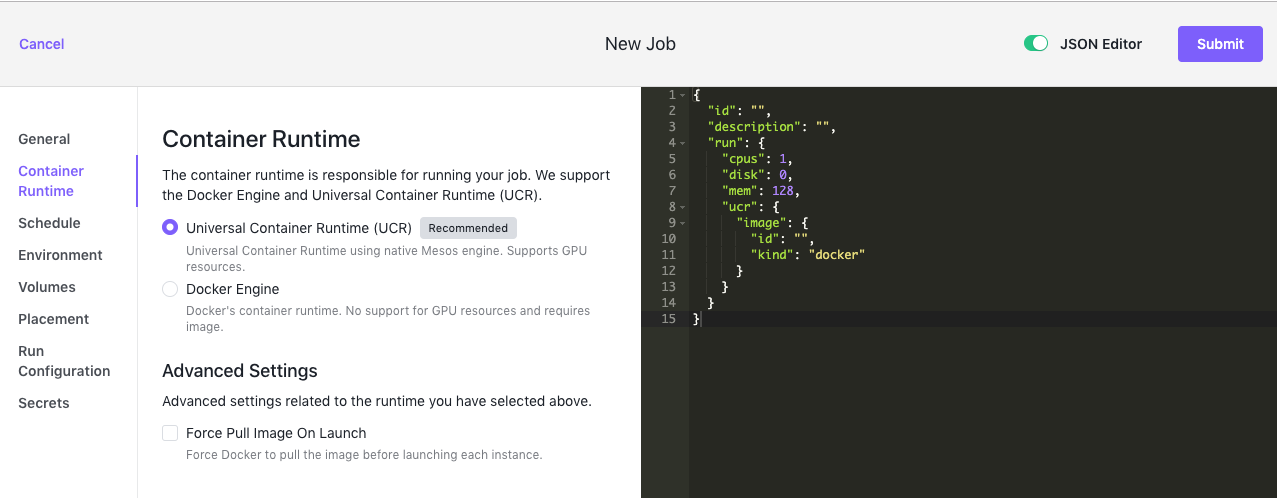
Figure 7 - Jobs > Container Runtime tab
Docker Engine
The Docker Engine is Docker’s container runtime. It requires an image and does not support GPU resources.
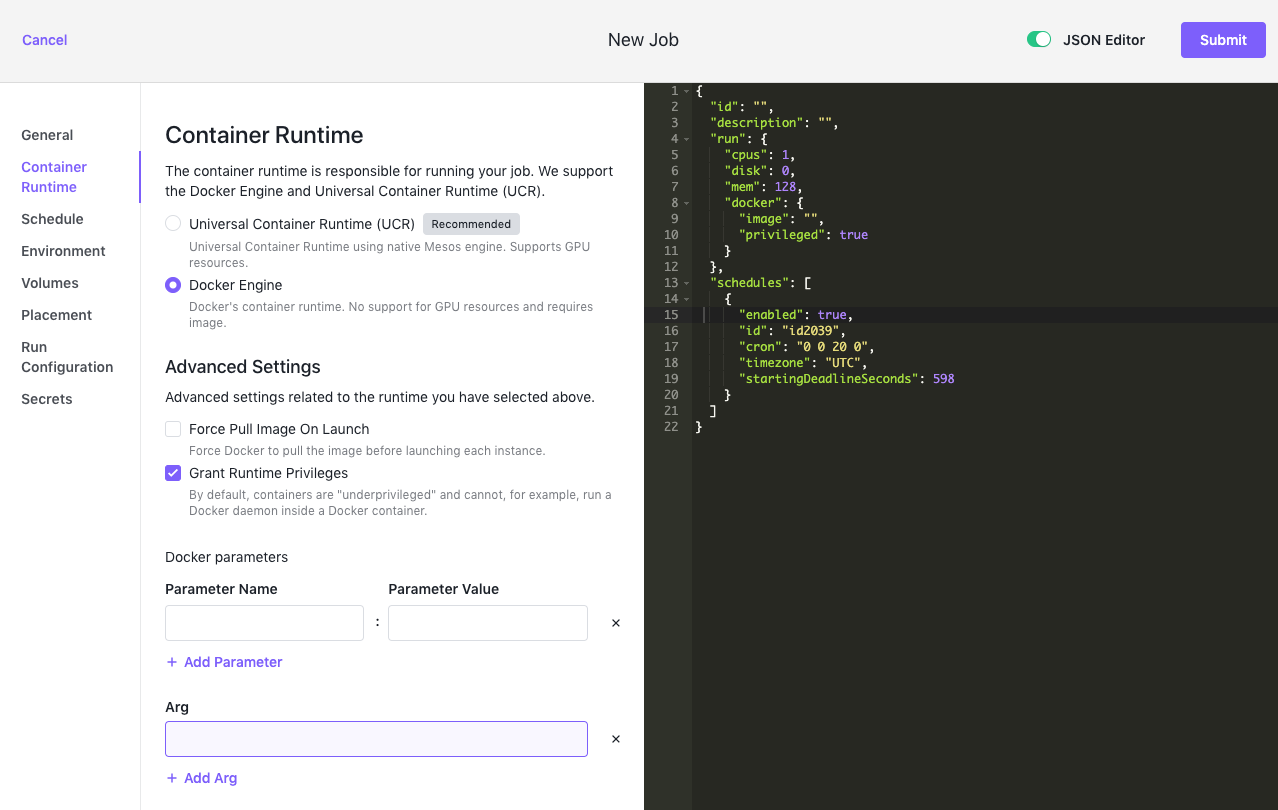
Figure 8 - Jobs > Container Runtime > Docker Engine tab
The parameters for this tab and the values allowed are found in the Jobs documentation of the UI.
Schedule
You can set up jobs with a scheduler using the cron format. Select Schedule to specify a schedule for when the job runs.
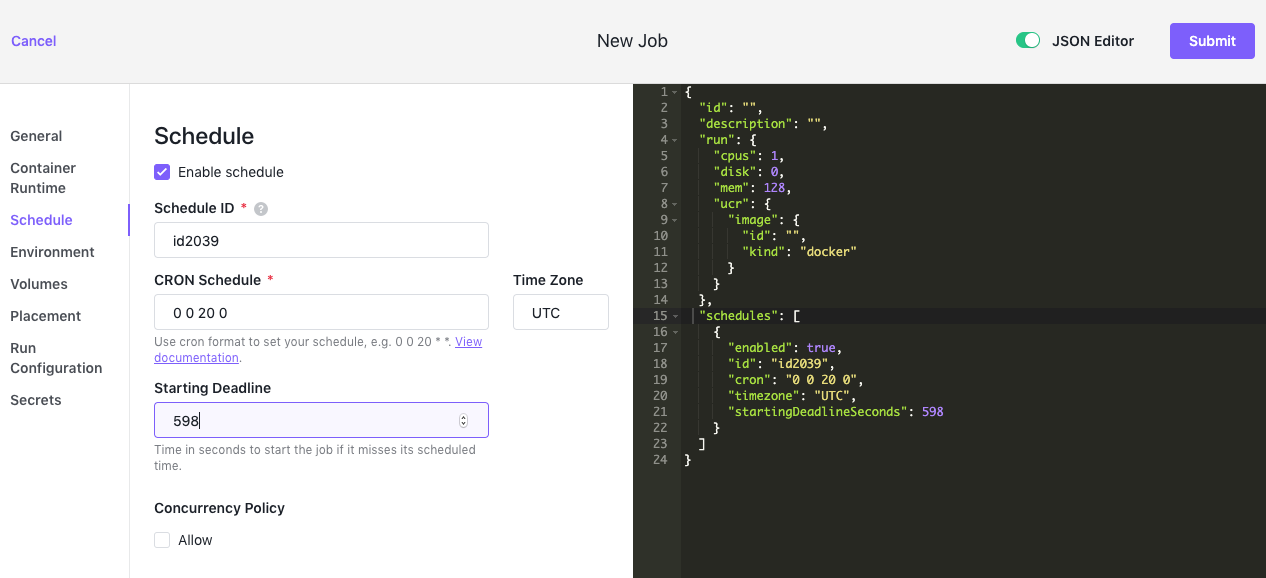
Figure 9 - Jobs > Schedule tab
The parameters for this tab and the values allowed are found in the Jobs documentation of the UI.
After you define the schedule, you can activate or deactivate it by selecting or deselecting the Enable Schedule option. You can also modify or remove the schedule when needed after you have submitted the new job definition.
Environment
Select Environment to configure any environment values to be attached to each instance of your job that is launched.
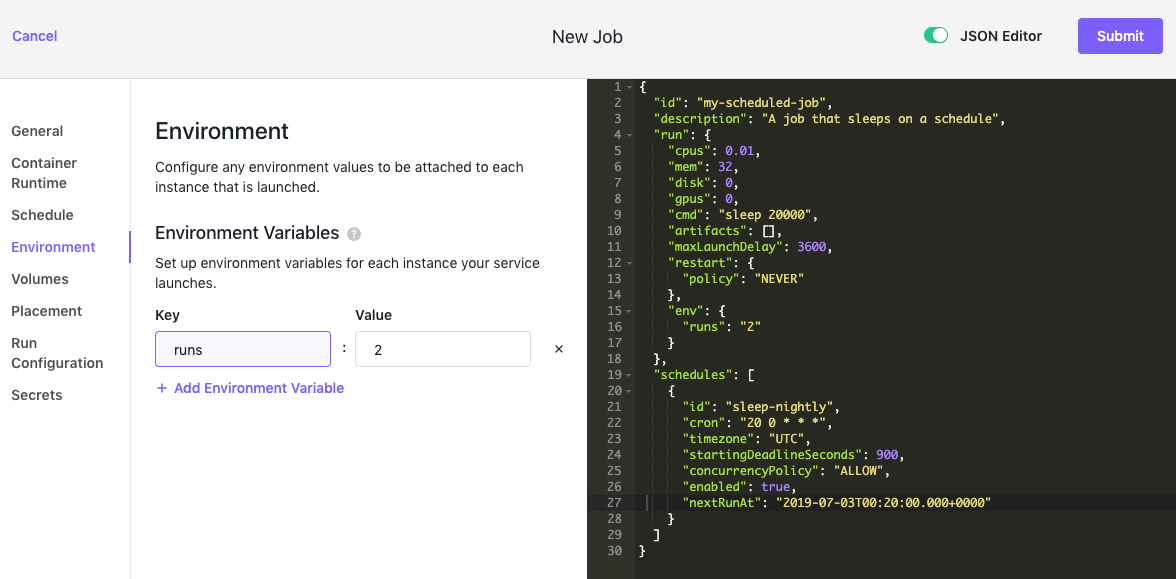
Figure 10 - Jobs > Environment tab
The parameters for this tab and the values allowed are found in the Jobs documentation of the UI.
Dependencies
You can configure a job to run whenever one or more jobs succeeded. This “dependent job” cannot have a schedule. It runs whenever all its dependencies have a later successful run than itself. Metronome does not support cyclic dependencies.
Example
- Dependency
Aruns at the hour and needs 15 minutes to complete - Dependency
Bruns every 30 minutes and needs 20 minutes to complete - Job
Ztakes about 8 minutes to complete and depends onAandB:{ "id": "Z", "dependencies": [{"id": "A"}, {"id": "B"}], ... }
The schedule would look like this:
12:00 - Scheduling A and B
12:15 - A finishes
12:20 - B finishes
12:20 - Scheduling Z
12:28 - Z finishes
12:30 - Scheduling B
12:50 - B finishes - note that Z is not scheduled now as not all dependencies have a newer success than Z)
13:00 - Scheduling A and B
Volumes
Select the Volumes tab to create a stateful job by configuring a persistent volume. Persistent volumes enable instances to be restarted without data loss.
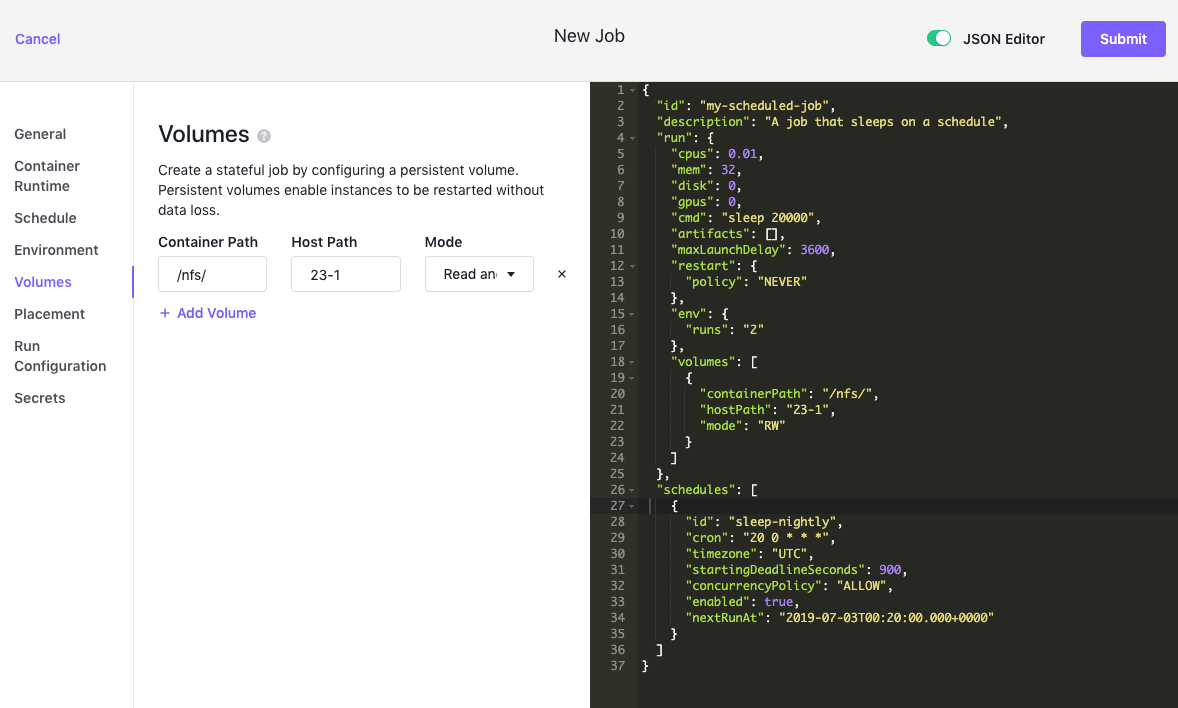
Figure 11 - Jobs > Volumes tab
The parameters for this tab and the values allowed are found in the Jobs documentation of the UI.
Placement
You can configure the placement of agent nodes in regions and zones for high availability, or to expand capacity to new regions when necessary.
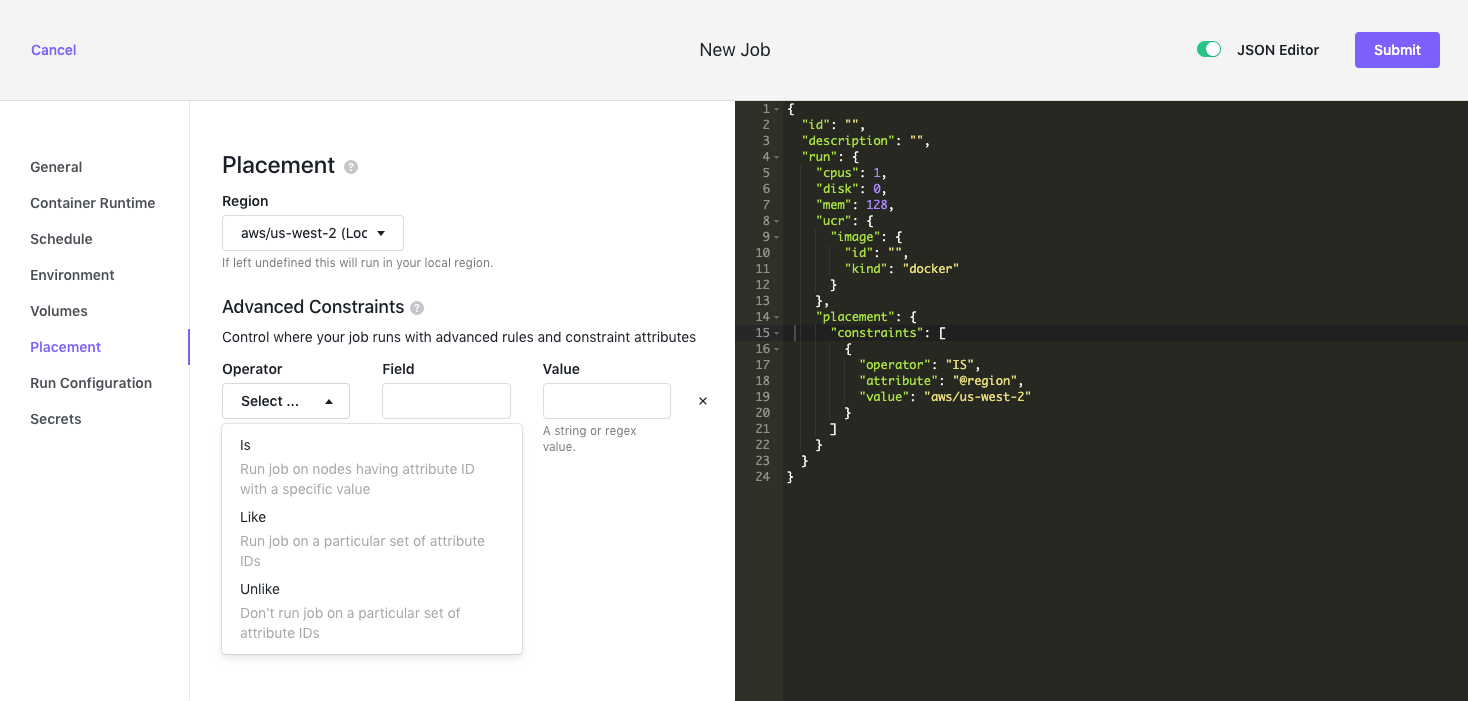
Figure 12 - Jobs > Placement tab
The parameters for this tab and the values allowed are found in the Jobs documentation of the UI.
Run Configuration
Select Run Configuration to specify advanced settings for the new job.
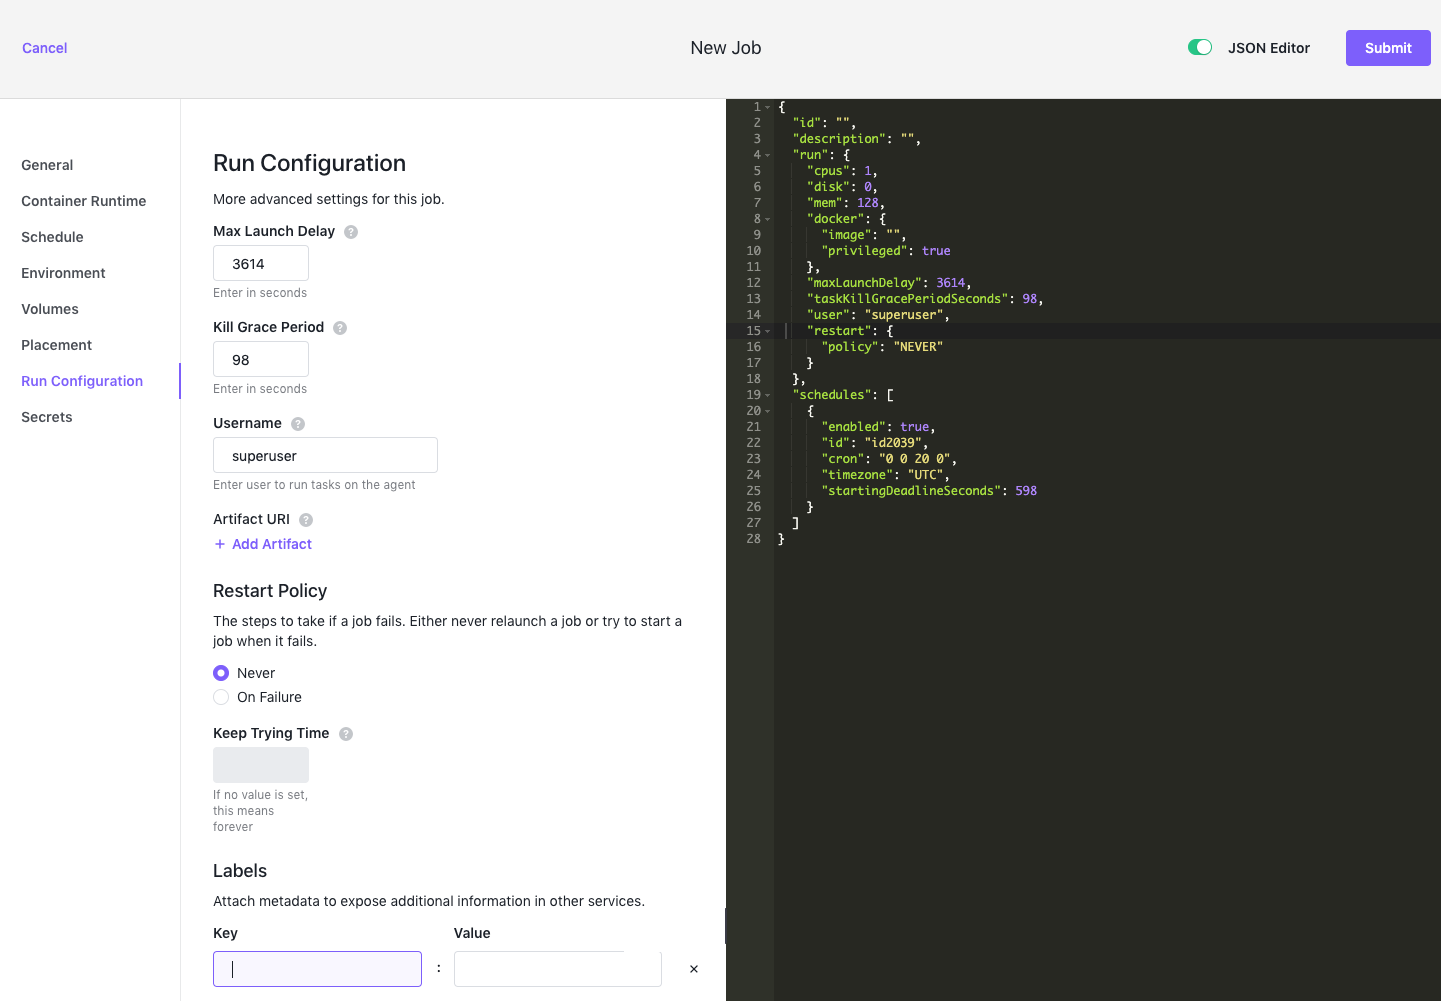
Figure 13 - Jobs > Run Configuration tab
The parameters for this tab and the values allowed are found in the Jobs documentation of the UI.
Secrets
Select the DC/OS Secret Store to secure important values like private keys, API tokens, and database passwords.
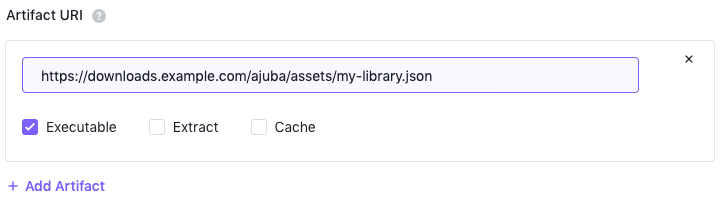
Figure 14 - Secrets tab
The parameters for this tab and the values allowed are found in the Jobs documentation of the UI.
Network
Networking information can be specified using the JSON tab. See the following example for how networks are defined for jobs:
```json
{
"id": "networking-job",
"description": "A job that outputs network info and sleeps",
"run": {
"cmd": "ip a; sleep 60",
"docker": {
"image": "alpine"
},
"networks": [{"mode": "container", "name": "dcos"}],
"cpus": 0.01,
"mem": 32,
"disk": 0
}
}
```
The networks field functions identically to Marathon's, and supports the following parameters:
* **mode** - The network mode. Valid values are `container`, `container/bridge` and `host`. The default value is `host`. There is little value in using `container/bridge` for jobs, but it is still supported.
* **name** - The name of the container network to join. It is an error to specify this field with mode `host` or `container/bridge`.
* **labels** - Key-value string arguments to pass to the networking plugin. It is an error to specify this with mode `host`.
Jobs do not support port mapping.
## Submit
1. Select **Submit** to create the job.
1. Verify that you have added the new job by selecting **Jobs**.

Figure 15. Jobs list
## Add a job to a job group
You can add a job to a an existing job group or create a new job group when you create the job. Use periods in your job ID to nest the job in a group. For example, if you add a job using the job ID `marketing.myjob`, the new `myjob` is created in the `marketing` job group. In DC/OS Enterprise, you can use job groups to implement fine-grained user access.
For more information about controlling access to jobs through job groups, see [Granting access to jobs](/mesosphere/dcos/2.2/deploying-jobs/job-groups/).
## View, modify, or remove a specific job
You can view and modify job-related information, including details about the run history and configuration settings interactively through the DC/OS UI. From the **Jobs** tab, select the name of your job. You can then use the menu on the upper right to edit, run, disable, or delete a selected job.
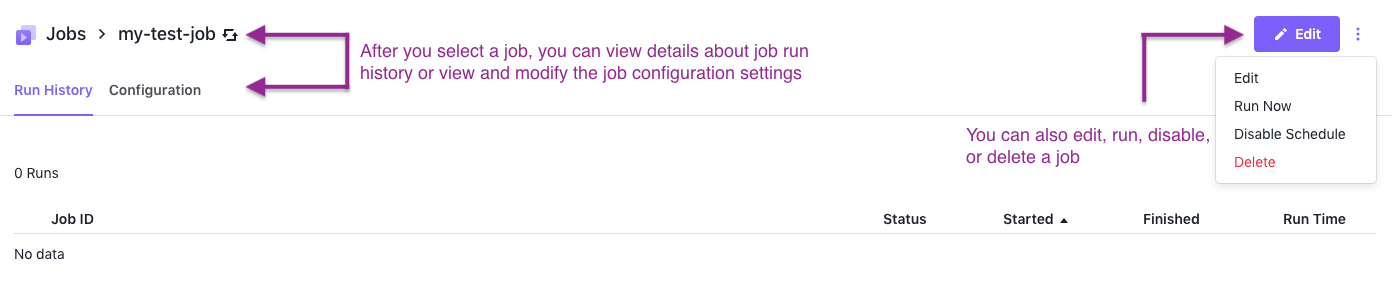
Figure 16. Viewing and modifying job details
While the job is running, you can select the job instance to drill down to **Details**, **Files**, and **Logs** data.
You can see that the **Edit Job** screen contains the same configuration tabs as the **New Job** screen:

Figure 17 - General configuration tab in **Edit Job** screen
<a name="cli"></a>
# Managing jobs with the DC/OS CLI
You can create and manage jobs from the DC/OS CLI using `dcos job` commands. To see a full list of available commands with usage information, run `dcos job --help` or consult the [CLI documentation](/mesosphere/dcos/2.2/cli/command-reference/dcos-job/).
<a name="cli-add-job"></a>
## Create a JSON file for a new job
1. Open a new file in a text editor to create a job file in JSON format.
1. In the new file, specify the basic parameters required to define the job, including the following:
- the job `id` you use to manage the job
- the specific command to run
- the CPU, memory, and disk requirements
- the job schedule
For example, the JSON file for a new job might look similar to this:
```json
{
"id": "myjob",
"description": "A job that sleeps regularly",
"run": {
"cmd": "sleep 20000",
"cpus": 0.01,
"mem": 32,
"disk": 0
},
"schedules": [
{
"id": "sleep-schedule",
"enabled": true,
"cron": "20 0 * * *",
"concurrencyPolicy": "ALLOW"
}
]
}
```
1. Save the JSON file for the new job using an easily-identifiable file name. For example, you might save the job information as `mysleepjob.json`.
1. Add the job by running a command similar to the following:
```bash
dcos job add <myjob>.json
```
For example:
```bash
dcos job add mysleepjob.json
```
1. Verify that you have added the new job by running a command similar to the following:
```bash
dcos job list
```
The command displays the list of jobs similar to the following:
```bash
ID STATUS LAST RUN
mysleepjob Scheduled N/A
mypingjob Running N/A
```
## Set a concurrency policy for scheduled jobs
If you use a schedule to start a job, you can define a concurrency policy for the job. A concurrency policy determines whether a new job run instance is triggered if there's already a job instance running.
For example, assume you have a job scheduled to start every day at 3:00AM, and you have set the concurrency policy for the job set to FORBID. If there is an instance of that job already running at 3:00AM--either because a previously-triggered job run is still active or has been triggered manually outside of the schedule--the scheduled start time will not trigger a new job to run. If there are no jobs running at the next scheduled start time, a new job instance starts and runs as scheduled.
If you want to allow scheduled jobs to be triggered while other instances of the same job are running, you can set the `concurrencyPolicy` to ALLOW.
## Create a schedule-only JSON file
If you specify a schedule for a job in the JSON file for that job, you can assign one schedule for the job to run under.
If you want to use the same schedule for more than one job, however, you can create a separate JSON file specifically for the schedule. You can then use the `dcos job schedule add <job-id> <schedule-file>` command to associate a job with the schedule.
1. Open a file in a text editor to [create a new job](#cli-add-job) file in JSON format, if necessary.
You must use the job `id` you define for the job to associate a schedule JSON file with the job. To prevent schedule conflicts or unexpected job runs, do not define schedule parameters for a job if you want to use the schedule-only JSON file to control when a job runs.
1. Open a new file in a text editor to create the schedule you want to use in JSON format.
For example, the JSON file for a new schedule looks similar to this:
```json
{
"concurrencyPolicy": "ALLOW",
"cron": "20 0 * * *",
"enabled": true,
"id": "nightly",
"nextRunAt": "2016-07-26T00:20:00.000+0000",
"startingDeadlineSeconds": 900,
"timezone": "UTC"
}
```
1. Save the JSON file for the new schedule using an easily-identifiable file name. For example, save the schedule information as `my-cron-def.json`.
1. Associate the job with the schedule by running a command similar to the following:
```bash
dcos job schedule add <job-id> <schedule-file>
```
For example:
```bash
dcos job schedule add mytestjob my-cron-def.json
```
If you attempt to add a schedule definition to a job that already has a schedule defined, the command displays an error similar to the following:
```
Error: 409 - requirement failed: A schedule with id nightly already exists
```
1. Verify that you have added the new job schedule by running a command similar to the following:
```bash
dcos job schedule show mytestjob
```
This command displays schedule information for the specified job similar to the following:
```bash
ID CRON ENABLED NEXT RUN CONCURRENCY POLICY
nightly 20 0 * * * True 2019-04-11T00:20:00.000+0000 ALLOW
```
## Start a job from the command line
You can trigger a job to run:
- manually on-demand
- automatically based on a schedule you have defined
- programmatically through automation with or without a schedule
You can use any of these approaches to start a job instance that is referred to as a job run. For example, you can use the DC/OS CLI to start jobs regardless of whether you have defined a schedule or not. Starting a job manually from the command-line is similar to starting a job by selecting **Run now** using the DC/OS UI.
To start a job run on-demand outside of any scheduled job activity, run a command similar to the following:
```bash
dcos job run <job-id>
For example, if the job id is mytestjob, run:
dcos job run mytestjob
Starting a job manually from the command-line or through the DC/OS UI triggers a new job run each time the command is executed. Jobs that are triggered manually on-demand ignore concurrency policy settings.
If a schedule is used to start a job, however, the job’s concurrency policy determines whether a new job run instance is triggered. Being able to control whether jobs run concurrently is one of the main differences between triggering a job to run manually or using a schedule.
Remove a job from the command-line
You can remove a job using the command-line program dcos job remove <job-id> as long as the job does not have any active job instances running. If a job has any currently active running instances, you must stop all of the currently-active jobs. After you stop all running job instances, you can remove the job using the dcos job remove <job-id> command.
To remove a job:
-
Check the status of active jobs by running a command similar to the following:
dcos job list -
Stop all running job instances for the job you want to delete and remove the job by running the following command:
dcos job remove <job-id> --stop-current-job-runs -
Verify that you have removed the specified job by running the following command:
dcos job list
Modify a job from the command line
To modify your job, update your JSON job file, then run
dcos job update <job-file>.json
Modify a job’s schedule
You can update the schedule of your job in two ways, depending if your job has a schedule specified in the <job-file>.json or if your job’s schedule is kept in a separate file.
Modify a job with a schedule
Modify the schedules parameter of your <job-file>.json. Then run
dcos job update <job-file>.json
Modify a job with a separate schedule file
Modify <schedule-file>.json. Then, run one of the following commands:
dcos job schedule add <job-id> <schedule-file>.json
dcos job schedule remove <job-id> <schedule-id>
dcos job schedule update <job-id> <schedule-file>.json
View job details
List all jobs:
dcos job list
List all previous runs of your job:
dcos job history <job-id>
To view details about your job, run:
dcos job show <job-id>
To view details about your job’s schedule, run:
dcos job schedule show <job-id>
View job logs
To view the log for your job:
dcos task log --completed <job-id>
To get the log for a specific job run, use a job run ID from dcos job history <job-id>
dcos task log --completed <job-run-id>
Managing jobs with the DC/OS API
You can create and manage jobs through calls to the Jobs API endpoints. This section highlights the most common tasks you perform through job-related API calls. For more complete information about the Jobs API, see the Jobs API reference information.
Preparing to use API cals
The code examples in this section illustrate how to include Jobs API calls to perform job-related tasks with the client URL (cURL) program. For detailed information about using curl command, see the curl man page.
In addition, one important difference between using the DC/OS CLI or UI and the API is how you configure the job schedule. The DC/OS CLI and UI support a combined JSON format that allows you to specify a schedule in the job descriptor. To schedule a job using the Jobs API, you must use two separate calls:
- Use one call to add an unscheduled job.
- Use a second call to associate a specific schedule file (
schedule-file.json) with the job.
Add a job using an API call
The following command adds a job called myjob.json.
curl -X POST -H "Content-Type: application/json" -H "Authorization: token=$(dcos config show core.dcos_acs_token)" $(dcos config show core.dcos_url)/service/metronome/v1/jobs -d@/Users/<your-username>/<myjob>.json
Remove a job using an API call
The following command removes a job regardless of whether the job is running:
curl -X DELETE -H "Authorization: token=$(dcos config show core.dcos_acs_token)" $(dcos config show core.dcos_url)/service/metronome/v1/jobs/<myjob>?stopCurrentJobRuns=true
To remove a job if it is not running, set stopCurrentJobRuns to False.
Modify or view a job using an API call
The following command shows all jobs:
curl -H "Authorization: token=$(dcos config show core.dcos_acs_token)" $(dcos config show core.dcos_url)/service/metronome/v1/jobs
The following command lists job runs:
curl -H "Authorization: token=$(dcos config show core.dcos_acs_token)" "$(dcos config show core.dcos_url)/service/metronome/v1/jobs/<myjob>/runs/"
Stop a run with the following command:
curl -X POST -H "Authorization: token=$(dcos config show core.dcos_acs_token)" "$(dcos config show core.dcos_url)/service/metronome/v1/jobs/<myjob>/runs/20160725212507ghwfZ/actions/stop"
Add a schedule to a job
The following command adds a schedule to a job:
curl -X POST -H "Content-Type: application/json" -H "Authorization: token=$(dcos config show core.dcos_acs_token)" $(dcos config show core.dcos_url)/service/metronome/v1/jobs/<job-id>/schedules -d@<schedule-file>.json
Start a job using an API call
You can use the DC/OS API to start jobs programmatically. Similar to starting a job using the UI or CLI, you must specify the job identifer in the call.
To trigger a job run to start you can use a REST API call similar to the following:
curl -X POST -H "Authorization: token=$(dcos config show core.dcos_acs_token)" $(dcos config show core.dcos_url)/service/metronome/v1/jobs/{jobId}/runs