This tutorial guides you through the steps for configuring Marathon-LB to run a containerized DC/OS service with external load balancing for a website. After completing this tutorial, you will have hands-on practice configuring load balancing for a sample application.
In this tutorial, you will:
- Download a Docker image that contains NGINX as a sample app.
- Prepare load balancing for the NGINX application on the
dcos.iowebsite. - Install Marathon-LB as the edge load balancer for the service.
- Run Marathon-LB on a public-facing node to route inbound network traffic.
Before you begin
- You must have a DC/OS cluster with a bootstrap node, at least one master node, at least one private agent node, and at least one public agent node.
- You must have an account with access to the DC/OS web-based administrative console or DC/OS command-line interface.
- You must have Marathon-LB installed.
Download the app definition and container
This tutorial uses a sample app definition file that you can download from the dcos-website GitHub repository.
-
Copy
dcos-website/dcos-website.jsonfrom thedcos-websiteGitHub repository. -
Go to the
mesosphere/dcos-websiteDocker repository and copy the latestimagetag.

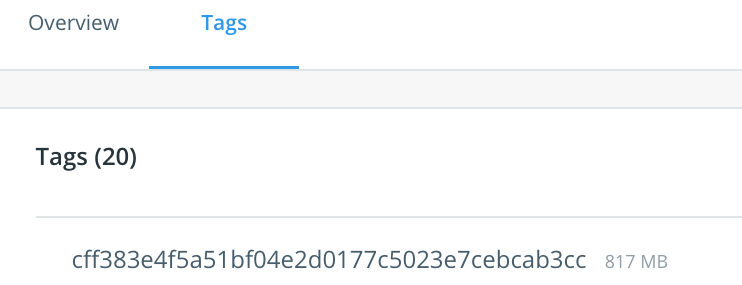
For example, after clicking Tags, you might see an identifier similar to this:
cff383e4f5a51bf04e2d0177c5023e7cebcab3cc

Modify the app image tag and public IP address
-
Open the
dcos-website.jsonapp definition file you downloaded from the repository. -
Add the
image-tagin thedocker:imagefield with the Docker image tag.For example:
{ "id": "dcos-website", "container": { "type": "DOCKER", "docker": { "image": "mesosphere/dcos-website:cff383e4f5a51bf04e2d0177c5023e7cebcab3cc", "network": "BRIDGE", "portMappings": [ { "hostPort": 0, "containerPort": 80, "servicePort": 10004 } ] } }, -
Identify the public-facing IP address for your public agent node.
For information about how to find your public agent IP address, see Finding a public agent IP.
-
In the
labelsfield, add an entry forHAPROXY_0_VHOSTand assign it the value of your public agent IP.For example, if the public agent node IP address is 64.172.103.2, you might add lines similar to the following:
"labels":{
        "HAPROXY_DEPLOYMENT_GROUP":"dcos-website",
        "HAPROXY_DEPLOYMENT_ALT_PORT":"10005",
        "HAPROXY_GROUP":"external",
        "HAPROXY_0_REDIRECT_TO_HTTPS":"true",
        "HAPROXY_0_VHOST": "64.172.103.2"
      }
Be sure to remove the leading
http://and the trailing slash () from the IP address, and to add a comma after the preceding field.The complete JSON app definition file should resemble the following:
  {
    "id": "dcos-website",
    "container": {
      "type": "DOCKER",
      "portMappings": [
        { "hostPort": 0, "containerPort": 80, "servicePort": 10004 }
      ],
      "docker": {
        "image": "mesosphere/dcos-website:cff383e4f5a51bf04e2d0177c5023e7cebcab3cc"
      }
    },
    "instances": 3,
    "cpus": 0.25,
    "mem": 100,
    "network": "BRIDGE",
    "healthChecks": [{
        "protocol": "HTTP",
        "path": "/",
        "portIndex": 0,
        "timeoutSeconds": 2,
        "gracePeriodSeconds": 15,
        "intervalSeconds": 3,
        "maxConsecutiveFailures": 2
    }],
    "labels":{
      "HAPROXY_DEPLOYMENT_GROUP":"dcos-website",
      "HAPROXY_DEPLOYMENT_ALT_PORT":"10005",
      "HAPROXY_GROUP":"external",
      "HAPROXY_0_REDIRECT_TO_HTTPS":"true",
      "HAPROXY_0_VHOST": "64.172.103.2"
    }
  }
Only apps with the label HAPROXY_GROUP=external will be exposed using this Marathon-LB configuration.
Add the load-balanced application and check its status
-
Run the service from the DC/OS CLI using the following command:
dcos marathon app add dcos-website.json -
Open the DC/OS web-based console URL in a browser, then click Services to verify that your application is deployed and running.

-
In the web browser, navigate to the IP address for your public agent node to verify the site you have deployed is running.
 Marathon Lb Documentation