
 Couchbase Documentation
The default DC/OS Couchbase installation provides reasonable defaults for trying out the service, but may not be sufficient for production use. You may require a different configuration depending on the context of the deployment.
Installing with Custom Configuration
The following are some examples of how to customize the installation of your Couchbase instance.
In each case, you would create a new Couchbase instance using the custom configuration as follows:
dcos package install couchbase --options=sample-couchbase.json
We recommend that you store your custom configuration in source control.
Installing multiple instances
By default, the Couchbase service is installed with a service name of couchbase. You may specify a different name using a custom service configuration as follows:
{
  "service": {
    "name": "couchbase-other"
  }
}
When the above JSON configuration is passed to the package install couchbase command via the --options argument, the new service will use the name specified in that JSON configuration:
dcos package install couchbase --options=couchbase-other.json
Multiple instances of Couchbase may be installed into your DC/OS cluster by customizing the name of each instance. For example, you might have one instance of Couchbase named couchbase-staging and another named couchbase-prod, each with its own custom configuration.
After specifying a custom name for your instance, it can be reached using dcos couchbase CLI commands or directly over HTTP as described below.
Installing into folders
In DC/OS 1.10 and later, services may be installed into folders by specifying a slash-delimited service name. For example:
{
  "service": {
    "name": "/foldered/path/to/couchbase"
  }
}
The above example will install the service under a path of foldered => path => to => couchbase. It can then be reached using dcos couchbase CLI commands or directly over HTTP as described below.
Addressing named instances
After you’ve installed the service under a custom name or under a folder, it may be accessed from all dcos couchbase CLI commands using the --name argument. By default, the --name value defaults to the name of the package, or couchbase.
For example, if you had an instance named couchbase-dev, the following command would invoke a pod list command against it:
dcos couchbase --name=couchbase-dev pod list
The same query would be over HTTP as follows:
curl -H "Authorization:token=$auth_token" <dcos_url>/service/couchbase-dev/v1/pod
Likewise, if you had an instance in a folder like /foldered/path/to/couchbase, the following command would invoke a pod list command against it:
dcos couchbase --name=/foldered/path/to/couchbase pod list
Similarly, it could be queried directly over HTTP as follows:
curl -H "Authorization:token=$auth_token" <dcos_url>/service/foldered/path/to/couchbase-dev/v1/pod
You may add a -v (verbose) argument to any dcos couchbase command to see the underlying HTTP queries that are being made. This can be a useful tool to see where the CLI is getting its information. In practice, dcos couchbase commands are a thin wrapper around an HTTP interface provided by the DC/OS Couchbase Service itself.
Integration with DC/OS access controls
In Enterprise DC/OS, DC/OS access controls can be used to restrict access to your service. To give a non-superuser complete access to a service, grant them the following list of permissions:
dcos:adminrouter:service:marathon full
dcos:service:marathon:marathon:<service-name> full
dcos:service:adminrouter:<service-name> full
dcos:adminrouter:ops:mesos full
dcos:adminrouter:ops:slave full
Where <service-name> is your full service name, including the folder if it is installed in one.
Service Settings
Placement Constraints
Placement constraints allow you to customize where a service is deployed in the DC/OS cluster. Placement constraints use the Marathon operators syntax. For example, [["hostname", "UNIQUE"]] ensures that at most one pod instance is deployed per agent.
A common task is to specify a list of whitelisted systems to deploy to. To achieve this, use the following syntax for the placement constraint:
[["hostname", "LIKE", "10.0.0.159|10.0.1.202|10.0.3.3"]]
Updating Placement Constraints
Clusters change, and as such so will your placement constraints. However, already running service pods will not be affected by changes in placement constraints. This is because altering a placement constraint might invalidate the current placement of a running pod, and the pod will not be relocated automatically as doing so is a destructive action. We recommend using the following procedure to update the placement constraints of a pod:
- Update the placement constraint definition in the service.
- For each affected pod, one at a time, perform a
pod replace. This will (destructively) move the pod to be in accordance with the new placement constraints.
Zones Enterprise
Requires: DC/OS 1.11 Enterprise or later.
Placement constraints can be applied to DC/OS zones by referring to the @zone key. For example, one could spread pods across a minimum of three different zones by including this constraint:
[["@zone", "GROUP_BY", "3"]]
For the @zone constraint to be applied correctly, DC/OS must have Fault Domain Awareness enabled and configured.
Virtual networks
DC/OS Couchbase supports deployment on virtual networks on DC/OS (including the dcos overlay network), allowing each container (task) to have its own IP address and not use port resources on the agent machines. This can be specified by passing the following configuration during installation:
{
  "service": {
    "virtual_network_enabled": true
  }
}
User
By default, all pods’ containers will be started as system user “nobody”. If your system configured for using over system user (for instance, you may have externally mounted persistent volumes with root’s permissions), you can define the user by defining a custom value for the service’s property “user”, for example:
{
  "service": {
    "properties": {
      "user": "root"
    }
  }
}
Configuring for Production
In a production deployment, each Couchbase Server service type (data, index, query, full text search, eventing, and analytics) runs in its own container. In the respective service type configuration sections, you select the count you want. The following sample shows 2 data, 1 index, 1 query, 1 fts, 1 eventing, and 1 analytics service in the DC/OS dashboard and the Couchbase dashboard.
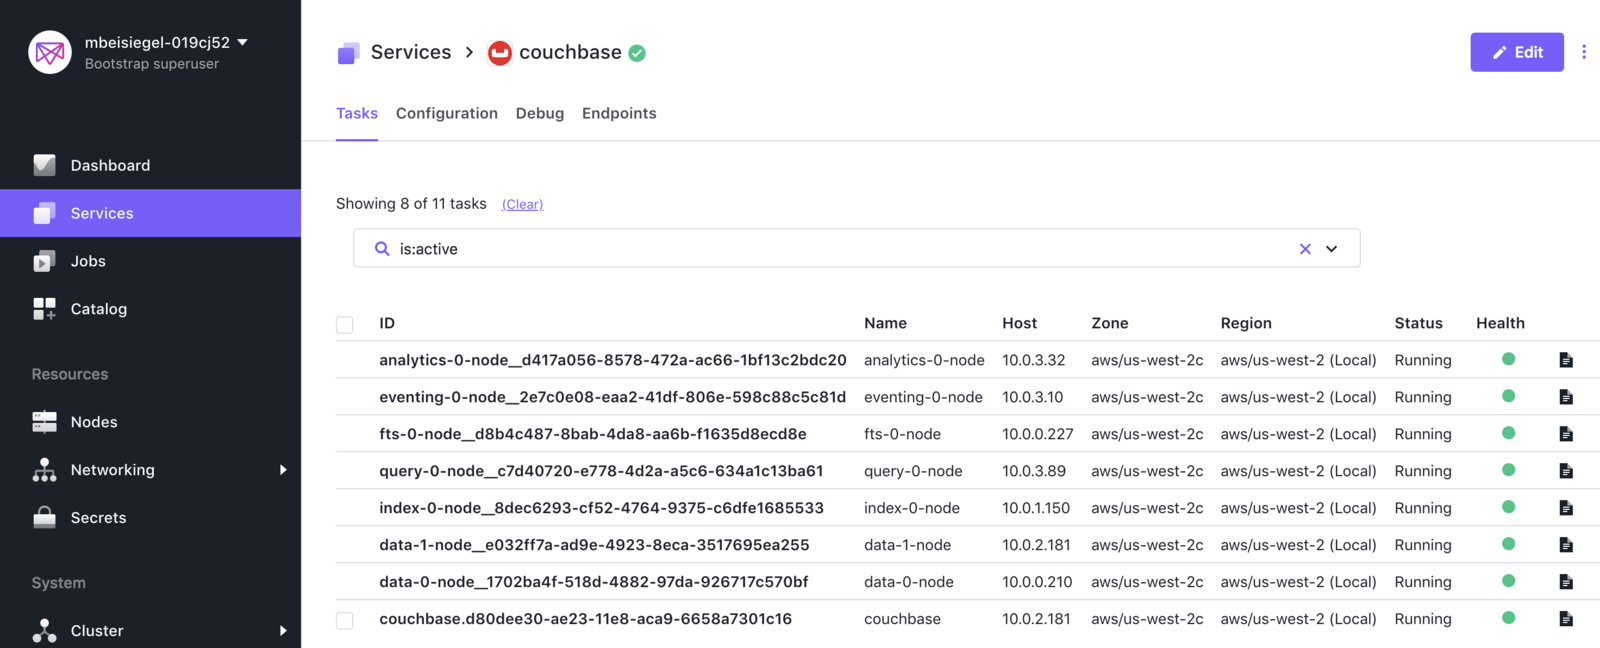
Figure 1. Sample configuration in DC/OS dashboard
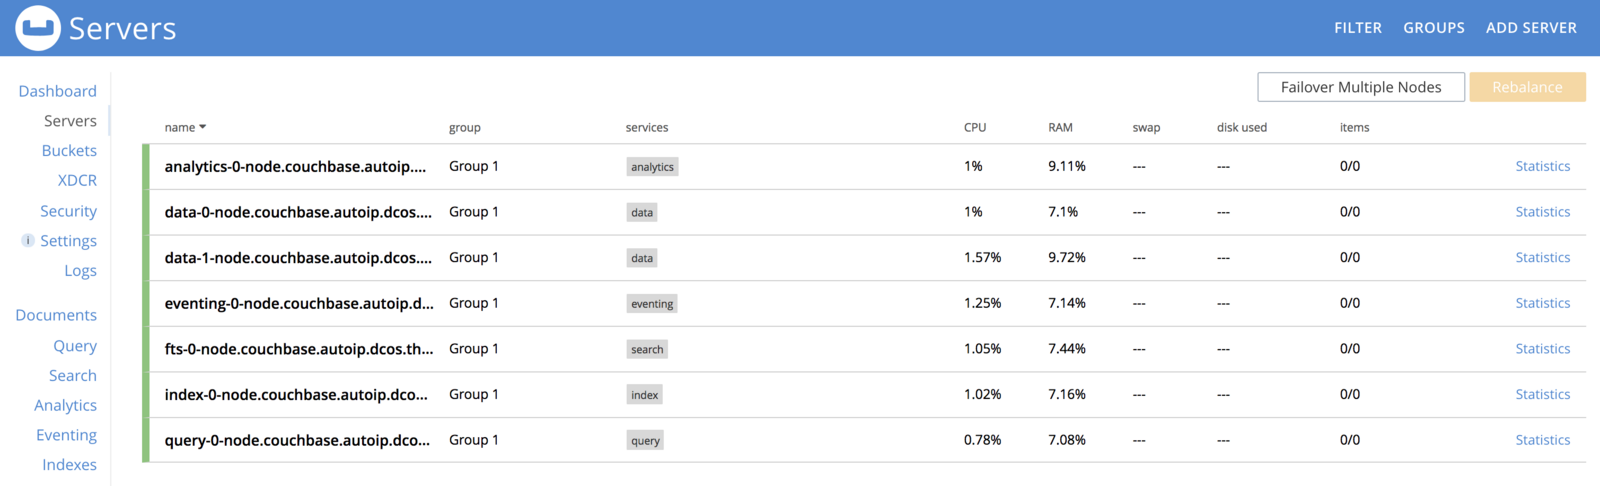
Figure 2. Sample configuration in Couchbase dashboard
Since all Couchbase service nodes require the same ports, in the Figure 2, you must have a DC/OS cluster with 7 private agents. Higher density can be achieved by using virtual networking where each container get its own IP. In combination with placement constraints, you can then also co-locate services on the same DC/OS agent, as fits your specific needs.
Configuring for Development
In a development deployment, data nodes have all Couchbase Server service types (data, index, query, full text search, eventing, and analytics).
In the Data Service configuration section, check the all services enabled box:
[<img src="/mesosphere/dcos/services/couchbase/0.2.0-5.5.0/img/couch_dev_conf_1.png" alt="Couchbase Install"/>](/mesosphere/dcos/services/couchbase/0.2.0-5.5.0/img/couch_dev_conf_1.png)

Figure 3. Enabling all services
The following images show the deployment of two data nodes that have all the Couchbase service types.
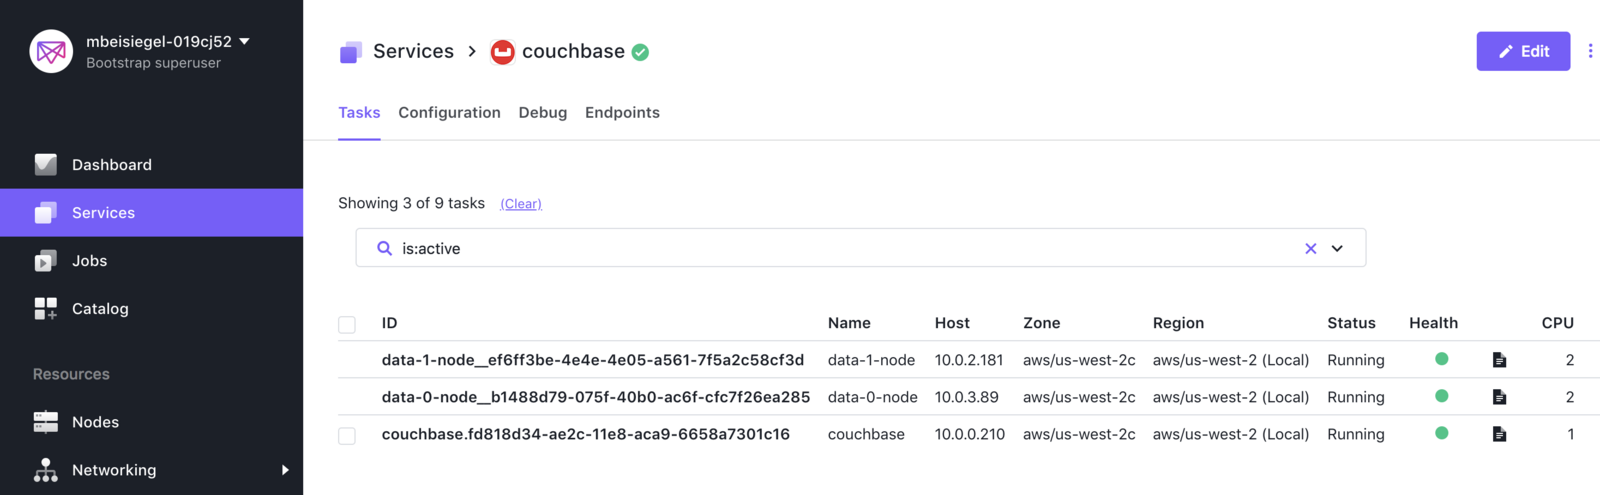
Figure 4. Data node configuration shown on DC/OS dashboard

Figure 5. Data node configuration shown on Couchbase dashboard