
 DC/OS文档
本页概括如何安装 DC/OS 用于生产。使用这种方法,您可以打包 DC/OS 分发并手动连接到每个节点,以运行 DC/OS 安装命令。若要与现有系统集成,或者您没有群集的 SSH 访问权限,则推荐使用这种安装方法。
DC/OS 安装进程需要 bootstrap 节点、管理节点、公共代理节点和专用代理节点。可以查看 节点 文档以了解更多信息。
生产安装流程
安装 DC/OS 群集需要以下步骤:
- 配置 bootstrap 节点
- 在管理节点上安装 DC/OS
- 在代理节点上安装 DC/OS
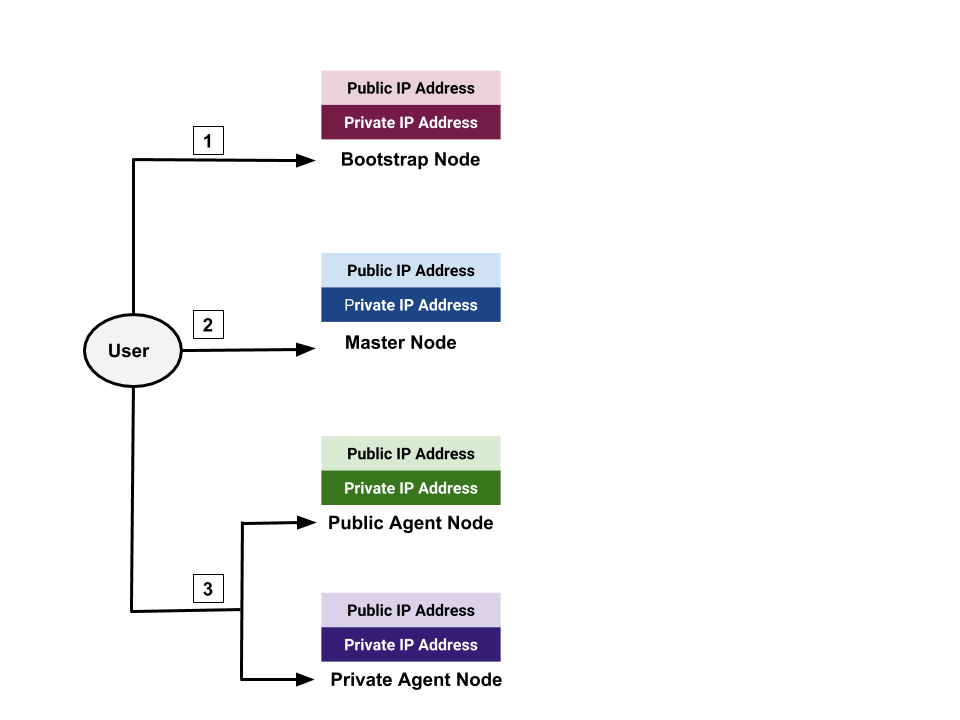 图 1. 生产安装流程
此安装方法需要下列设置:
- bootstrap 节点必须是可从群集节点访问的网络。
- bootstrap 节点必须从群集节点打开 HTTP(S) 端口。
DC/OS 安装会创建以下文件夹:
| 文件夹 | 描述 |
|---|---|
/opt/mesosphere |
包含 DC/OS 二进制文件、库和群集配置。请勿修改。 |
/etc/systemd/system/dcos.target.wants |
包含启动 systemd 组件的 systemd 服务。它们因受 systemd 限制而必须位于 /opt/mesosphere 之外。 |
/etc/systemd/system/dcos.<units> |
/etc/systemd/system/dcos.target.wants 中包含单位的副本。它们必须位于顶部文件夹以及 内部。 |
/var/lib/dcos/exhibitor/zookeeper |
包含 ZooKeeper 数据。 |
/var/lib/docker |
包含 Docker 数据。 |
/var/lib/dcos |
包含 DC/OS 数据。 |
/var/lib/mesos |
包含 Mesos 数据。 |
前提条件
您的群集必须符合软件和硬件 [要求],才能安装 DC/OS。(/mesosphere/dcos/cn/1.13/installing/production/system-requirements/).
配置您的群集
-
在 bootstrap 节点上创建名为
genconf的目录,并导航到该目录。mkdir -p genconf
存储许可证文件 Enterprise
- 创建 许可证文件(包含您的授权支持联系人发送的电子邮件中提供的许可文本)并另存为
genconf/license.txt.
创建 IP 检测脚本
在这一步创建 IP 检测脚本。这一脚本报告群集中每个节点的 IP 地址。DC/OS 群集中的每个节点都有一个唯一的 IP 地址,用于在群集中的节点之间进行通信。每次在节点上启动 DC/OS 时,IP 检测脚本都会将节点的唯一 IPv4 地址打印到 STDOUT。
-
为您的环境创建 IP 检测脚本,并另存为
genconf/ip-detect. 此脚本需要UTF-8编码并具备有效的 [shebang](https://en.wikipedia.org/wiki/Shebang_(Unix) 行。可以使用以下示例。-
使用 AWS 元数据服务器
此方法使用 AWS 元数据服务获取 IP 地址:
#!/bin/sh # Example ip-detect script using an external authority # Uses the AWS Metadata Service to get the node's internal # ipv4 address curl -fsSL http://169.254.169.254/latest/meta-data/local-ipv4 -
使用 GCE 元数据服务器
此方法使用 GCE 元数据服务器获取 IP 地址:
#!/bin/sh # Example ip-detect script using an external authority # Uses the GCE metadata server to get the node's internal # ipv4 address curl -fsSl -H "Metadata-Flavor: Google" http://169.254.169.254/computeMetadata/v1/instance/network-interfaces/0/ip -
使用现有接口的 IP 地址
此方法发现节点特定接口的 IP 地址。
如果有带有不同内部 IP 地址的多代硬件,可以在主机之间更改接口名称。IP 检测脚本必须考虑接口名称更改。如果将多个 IP 地址连接到同一个接口,或建立复杂的 Linux 网络等,则也会混淆示例脚本。
#!/usr/bin/env bash set -o nounset -o errexit export PATH=/usr/sbin:/usr/bin:$PATH echo $(ip addr show eth0 | grep -Eo '[0-9]{1,3}\.[0-9]{1,3}\.[0-9]{1,3}\.[0-9]{1,3}' | head -1) -
使用 Mesos 管理节点的网络路由
此方法使用 Mesos 管理节点的路由查找源 IP 地址,然后与该节点通信。
在本示例中,我们假设 Mesos 管理节点具有 IP 地址
172.28.128.3. 可以在此脚本使用任何语言。Shebang 行必须指向所用语言的相应环境,且输出必须是正确的 IP 地址。Enterprise
-
#!/usr/bin/env bash
set -o nounset -o errexit
MASTER_IP="172.28.128.3"
echo $(ip route show to match $MASTER_IP | grep -Eo '[0-9]{1,3}\.[0-9]{1,3}\.[0-9]{1,3}\.[0-9]{1,3}' | tail -1)
Open Source
#!/usr/bin/env bash
set -o nounset -o errexit -o pipefail
export PATH=/sbin:/usr/sbin:/bin:/usr/bin:$PATH
MASTER_IP=$(dig +short master.mesos || true)
MASTER_IP=${MASTER_IP:-172.28.128.3}
INTERFACE_IP=$(ip r g ${MASTER_IP} | \
awk -v master_ip=${MASTER_IP} '
BEGIN { ec = 1 }
 {
  if($1 == master_ip) {
        print $7
        ec = 0
 } else if($1 == "local") {
        print $6
        ec = 0
 }
      if (ec == 0) exit;
    }
      END { exit ec }
    ')
    echo $INTERFACE_IP
创建故障域检测脚本 Enterprise
DC/OS 群集默认启用 故障域意识,所以必须更改 config.yaml 才能使用此功能。但必须包含名为 fault-domain-detect 故障域检测脚本到您的 ./genconf 目录。要选择禁用故障域感知,请将 fault_domain_enabled 文件中的 config.yaml 参数设置为 false.
-
创建名为
fault-domain-detect的故障域检测脚本,在每个节点上运行,以检测节点的故障域。安装过程中此脚本的输出被传递到 Mesos。脚本输出的推荐格式为:
{
    "fault_domain": {
        "region": {
            "name": "<region-name>"
        },
        "zone": {
            "name": "<zone-name>"
        }
    }
}
我们提供 AWS 和 Azure 节点的故障域检测脚本. 对于具有 aws 节点和 azure 节点的群集,可将两者组合为一个脚本。可以使用这些模型为本地群集创建故障域检测脚本。
- 添加新创建的
fault-domain-detect脚本到 bootstrap 节点的/genconf目录。
创建配置文件
在这一步,可以创建针对您的环境自定义的 YAML 配置文件。DC/OS 在安装期间使用此配置文件生成群集安装文件。
设置超级用户密码 Enterprise
在以下说明中,我们假定您正在使用 ZooKeeper 进行共享存储。
-
在 bootstrap 节点运行此命令,创建用于超级用户身份认证的散列密码,其中
<superuser_password>是超级用户密码。 -
保存散列密码密钥,用于
superuser_password_hash文件中的config.yaml参数 。sudo bash dcos_generate_config.ee.sh --hash-password <superuser_password>以下是散列密码输出的示例。
Extracting an image from this script and loading it into a docker daemon, can take a few minutes.
dcos-genconf.9eda4ae45de5488c0c-c40556fa73a00235f1.tar
Running mesosphere/dcos-genconf docker with BUILD_DIR set to /home/centos/genconf
00:42:10 dcos_installer.action_lib.prettyprint:: ====> HASHING PASSWORD TO SHA512
00:42:11 root:: Hashed password for 'password' key:
$6$rounds=656000$v55tdnlMGNoSEgYH$1JAznj58MR.Bft2wd05KviSUUfZe45nsYsjlEl84w34pp48A9U2GoKzlycm3g6MBmg4cQW9k7iY4tpZdkWy9t1
创建配置
- 创建配置文件并另存为
genconf/config.yaml. 可以使用此模板开始创建。
Enterprise 指定三个Mesos 管理节点、静态管理节点发现列表、Exhibitor 的内部存储后端、一个自定义代理、指定的安全模式,以及云专用的 DNS 解析器。Enterprise
该开源模板指定三个 Mesos 管理节点、三个用于 Exhibitor 存储的 ZooKeeper 实例、静态管理节点发现列表、Exhibitor 的内部存储后端、一个自定义代理,以及云专用的 DNS 解析器。Open Source
如果服务器在您的 /etc/resolv.conf 中安装时带有域名,请添加 dns_search 参数。有关参数描述和配置示例,请参阅 文档.
Enterprise 模板 Enterprise
bootstrap_url: http://<bootstrap_ip>:80
cluster_name: <cluster-name>
superuser_username:
superuser_password_hash:
exhibitor_storage_backend: static
master_discovery: static
ip_detect_public_filename: <relative-path-to-ip-script>
master_list:
- <master-private-ip-1>
- <master-private-ip-2>
- <master-private-ip-3>
resolvers:
- 169.254.169.253
# Choose your security mode: permissive or strict
security: <security-mode>
superuser_password_hash: <hashed-password> # Generated above
superuser_username: <username> # This can be whatever you like
# A custom proxy is optional. For details, see the configuration documentation.
use_proxy: 'true'
http_proxy: http://<user>:<pass>@<proxy_host>:<http_proxy_port>
https_proxy: https://<user>:<pass>@<proxy_host>:<https_proxy_port>
no_proxy:
- 'foo.bar.com'
- '.baz.com'
fault_domain_enabled: false
#If IPv6 is disabled in your kernel, you must disable it in the config.yaml
enable_ipv6: 'false'
开源模板 Open Source
bootstrap_url: http://<bootstrap_ip>:80
cluster_name: <cluster-name>
exhibitor_storage_backend: static
master_discovery: static
ip_detect_public_filename:<relative-path-to-ip-script>
master_list:
- <master-private-ip-1>
- <master-private-ip-2>
- <master-private-ip-3>
resolvers:
- 169.254.169.253
use_proxy: 'true'
http_proxy: http://<user>:<pass>@<proxy_host>:<http_proxy_port>
https_proxy: https://<user>:<pass>@<proxy_host>:<https_proxy_port>
no_proxy:
- 'foo.bar.com'
- '.baz.com'
安装 DC/OS
在这一步,您将在 bootstrap 节点上创建一个自定义 DC/OS 构建文件,然后在群集上安装 DC/OS。使用这种方法,您可以
- 自行打包 DC/OS 分发版本
- 手动连接到每个服务器
- 运行命令
您可以在我们最新重要的 [产品咨询] 中找到更多信息和更详细的补救流程(https://support.mesosphere.com/s/login/?startURL=%2Fs%2Farticle%2FCritical-Issue-with-Overlay-Networking&ec=302).Enterprise
前提条件
- 经过优化,可在节点上手动分发 DC/OS 的
genconf/config.yaml文件。 - 包含 DC/OS Enterprise 许可证的
genconf/license.txt文件。Enterprise genconf/ip-detect脚本。
dcos_generate_config file 一词指的是 dcos_generate_config.ee.sh 文件或 dcos_generate_config.sh 文件,具体取决于您使用的是企业版还是开源版本的 DC/OS。
-
下载 dcos_generate_config 文件 并将其保存到 bootstrap 节点。此文件用于创建自定义的 DC/OS 构建文件。请联系销售代表或 sales@mesosphere.com 以访问此文件。Enterprise
或
-
下载 dcos_generate_config 文件 并将其保存到 bootstrap 节点。此文件用于创建自定义的 DC/OS 构建文件。Open Source
curl -O https://downloads.dcos.io/dcos/stable/dcos_generate_config.sh
-
在 bootstrap 节点运行 DC/OS 安装工具 shell 脚本,生成自定义 DC/OS 构建文件。安装脚本提取 Docker 容器,该容器使用通用 DC/OS 安装工具文件为群集创建自定义 DC/OS 构建文件。构建文件会输出到
./genconf/serve/.可以通过以下方式查看所有自动命令行安装工具选项:
dcos_generate_config.ee.sh --help标记 Enterprise 或dcos_generate_config.sh --help标记。Open Source
Enterprise
sudo bash dcos_generate_config.ee.sh
此时,目录结构应类似于:
├── dcos-genconf.c9722490f11019b692-cb6b6ea66f696912b0.tar
├── dcos_generate_config.ee.sh
├── genconf
│   ├── config.yaml
│   ├── ip-detect
│   ├── license.txt
Open Source
sudo bash dcos_generate_config.sh
此时,目录结构应类似于:
    ├── dcos-genconf.<HASH>.tar
    ├── dcos_generate_config.sh
    ├── genconf
    │   ├── config.yaml
    │   ├── ip-detect
- 要使安装脚本生效,必须首先创建
genconf/config.yaml和genconf/ip-detect.
-
在主目录中运行以下命令,以通过 NGINX Docker 容器托管 DC/OS 安装包。对于
<your-port>,请指定bootstrap_url. 中使用的端口值。sudo docker run -d -p <your-port>:80 -v $PWD/genconf/serve:/usr/share/nginx/html:ro nginx -
1在使用自定义生成文件安装 DC/OS 之后,继续在每个主节点上运行以下命令:
-
SSH 连接到管理节点。
ssh <master-ip> -
创建并导航至新目录。
mkdir /tmp/dcos && cd /tmp/dcos -
在 NGINX Docker 容器中下载 DC/OS 安装工具,其中
<bootstrap-ip>和<your_port>在bootstrap_url.中指定。curl -O http://<bootstrap-ip>:<your_port>/dcos_install.sh -
运行以下命令,在管理节点上安装 DC/OS。
sudo bash dcos_install.sh master
-
-
在每个代理节点上运行以下命令,使用自定义构建文件安装 DC / OS:
-
SSH 连接到代理节点。
ssh <agent-ip> -
创建并导航至新目录。
mkdir /tmp/dcos && cd /tmp/dcos -
在 NGINX Docker 容器中下载 DC/OS 安装工具,其中
<bootstrap-ip>和<your_port>在bootstrap_url.中指定。curl -O http://<bootstrap-ip>:<your_port>/dcos_install.sh -
运行此命令,在代理节点上安装 DC/OS。您必须将代理节点指定为 公共代理节点 或 专用代理节点。
-
专用代理节点:
sudo bash dcos_install.sh slave -
公共代理节点:
sudo bash dcos_install.sh slave_public
-
注意: 如果遇到错误(例如在 journald 中的
Time is marked as bad、adjtimex或Time not in sync),请验证是否在所有节点都启用了网络时间协议 (NTP)。如需更多信息,请参阅 系统要求 文档。 -
-
监视 Exhibitor 并等待其在 中聚合。
http://<master-ip>:8181/exhibitor/v1/ui/index.html.
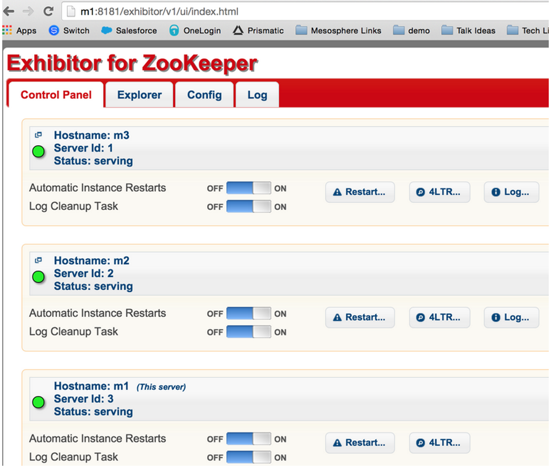
图 2. Exhibitor for ZooKeeper
当状态图标为绿色时,可以访问 DC/OS Web 界面。
-
在以下链接启动 DC/OS Web 界面:
http://<master-node-public-ip>/如果无法启动,请查看 故障排除 文档。 -
输入您的管理员用户名和密码。
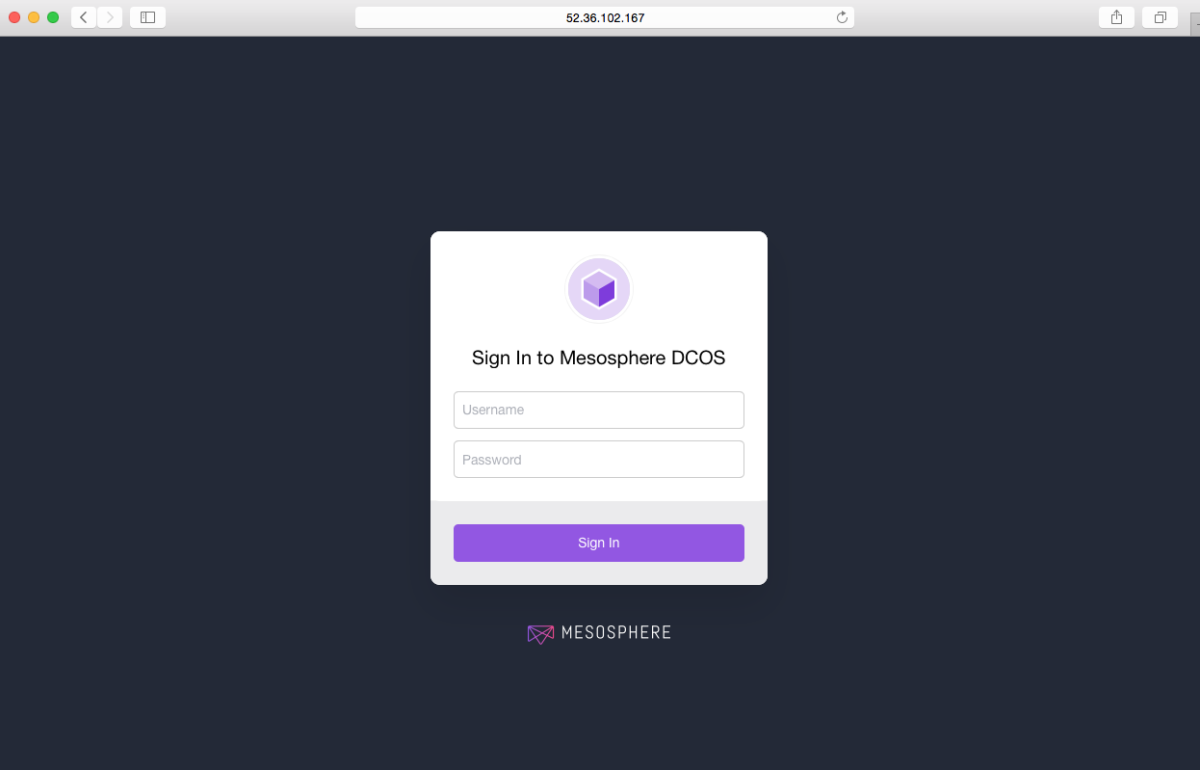
图 3. 登录对话
成功了!现在将显示 UI 仪表板。
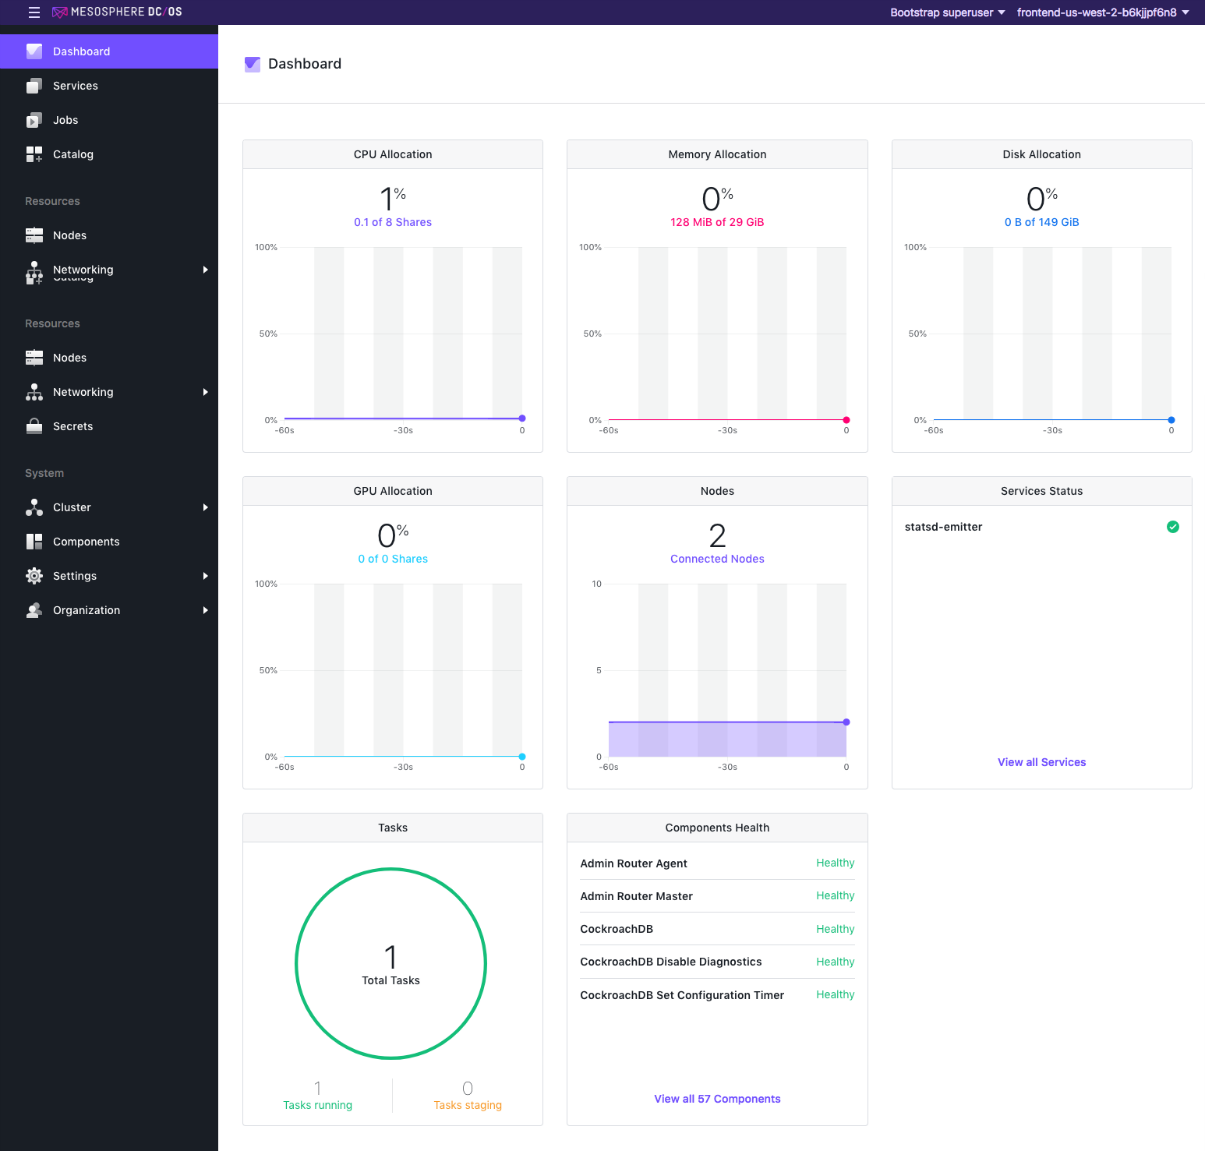
图 4. DC/OS UI 仪表板
后续步骤:Enterprise 和开源用户
下列链接提供了后续步骤的信息: