
 DC/OS Documentation
In this section you will see how to use the DC/OS UI to achieve multi-tenancy in permissive mode.
This tutorial demonstrates how to implement user permissions for DC/OS services in the permissive security mode. When you are done you will have multi-tenancy by using DC/OS permissions.
Prerequisites:
Create users and groups
-
Create service groups from the Services > Services > Create Group.
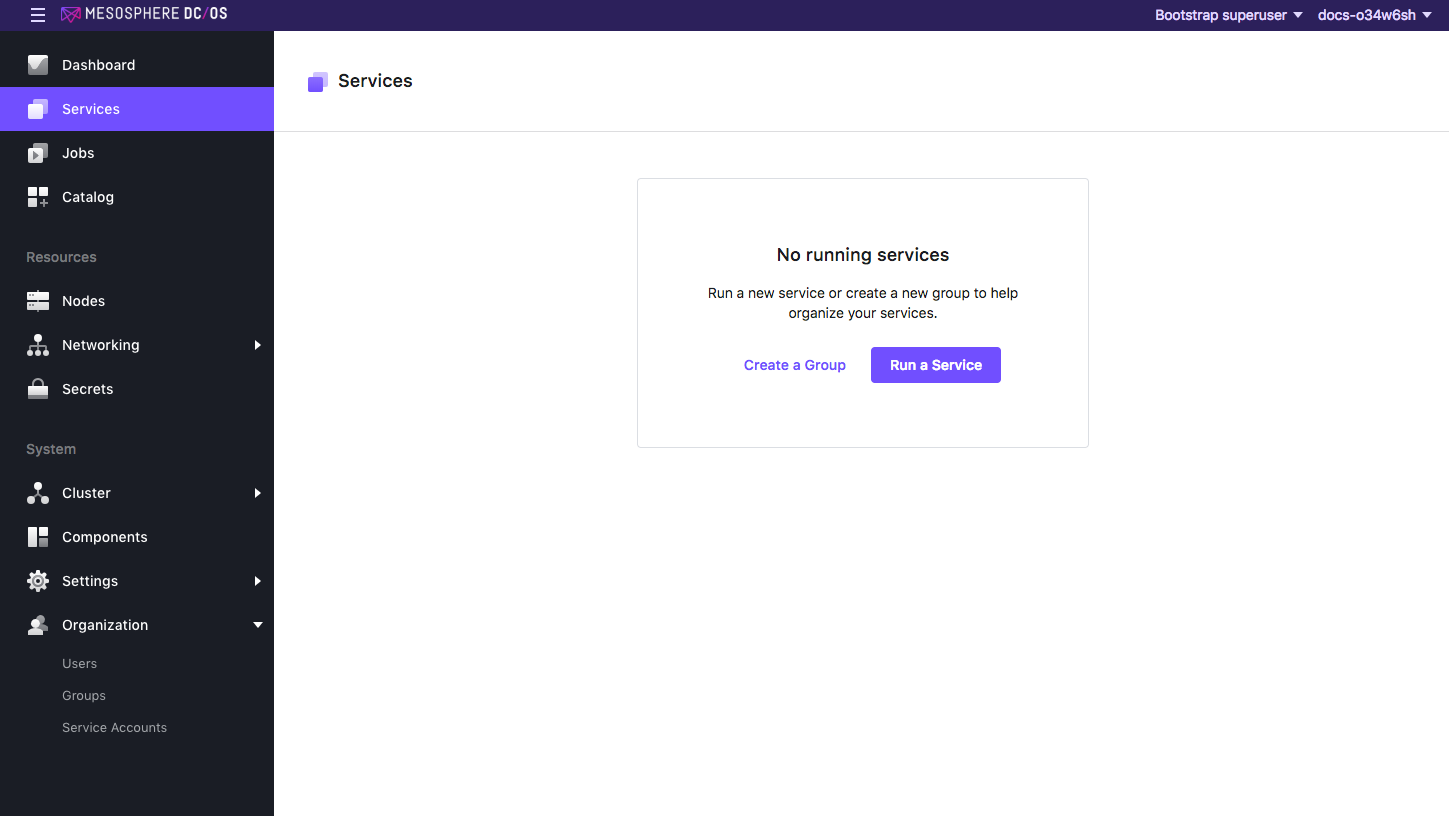
Figure 1. Create Group page
In this example a group called
prod-aand a group calledprod-bare created. After the groups are created you should see two folders. This is where you will deploy services for the user groups and set the permissions for each unit.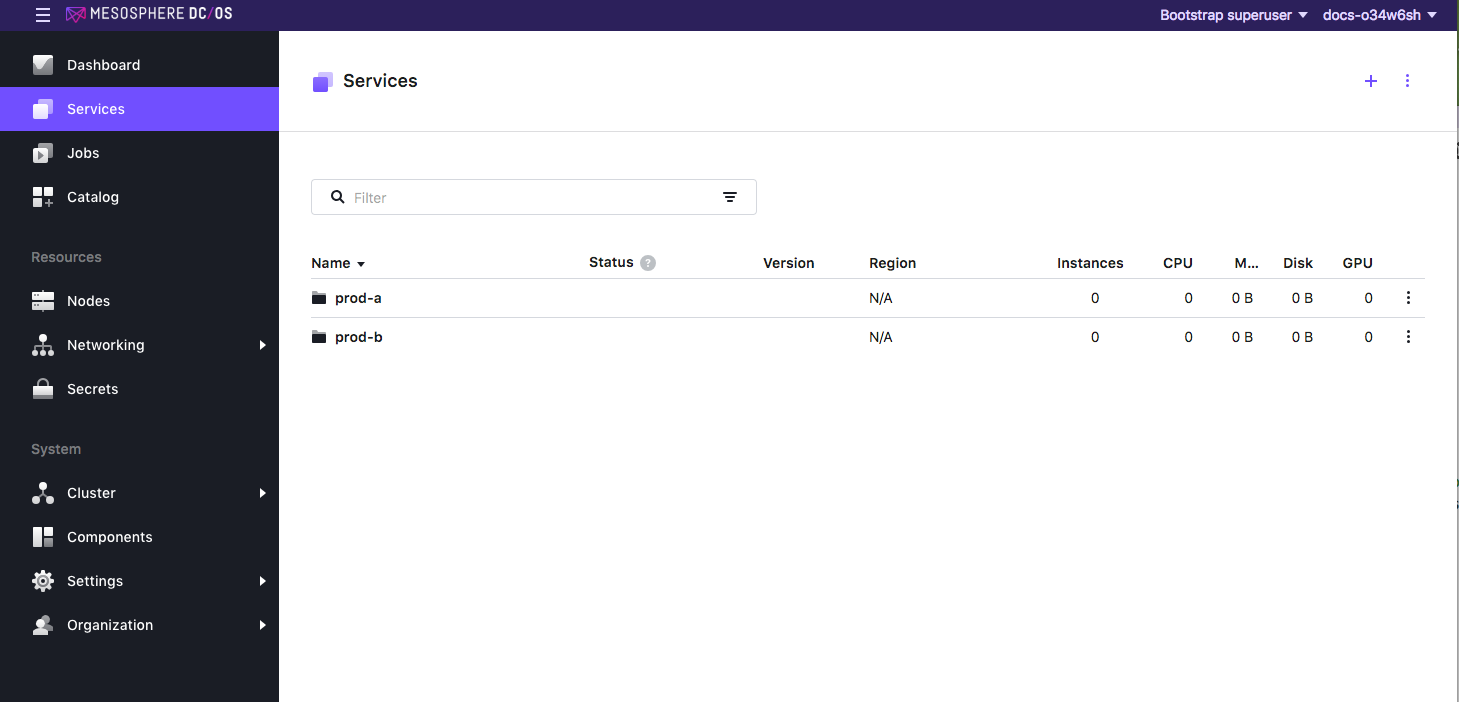
Figure 2. New groups folders
-
Create your users and groups and define the required permissions for each group.
-
Select Organization > Users and create a new user. In this example, two users are created (
CoryandNick).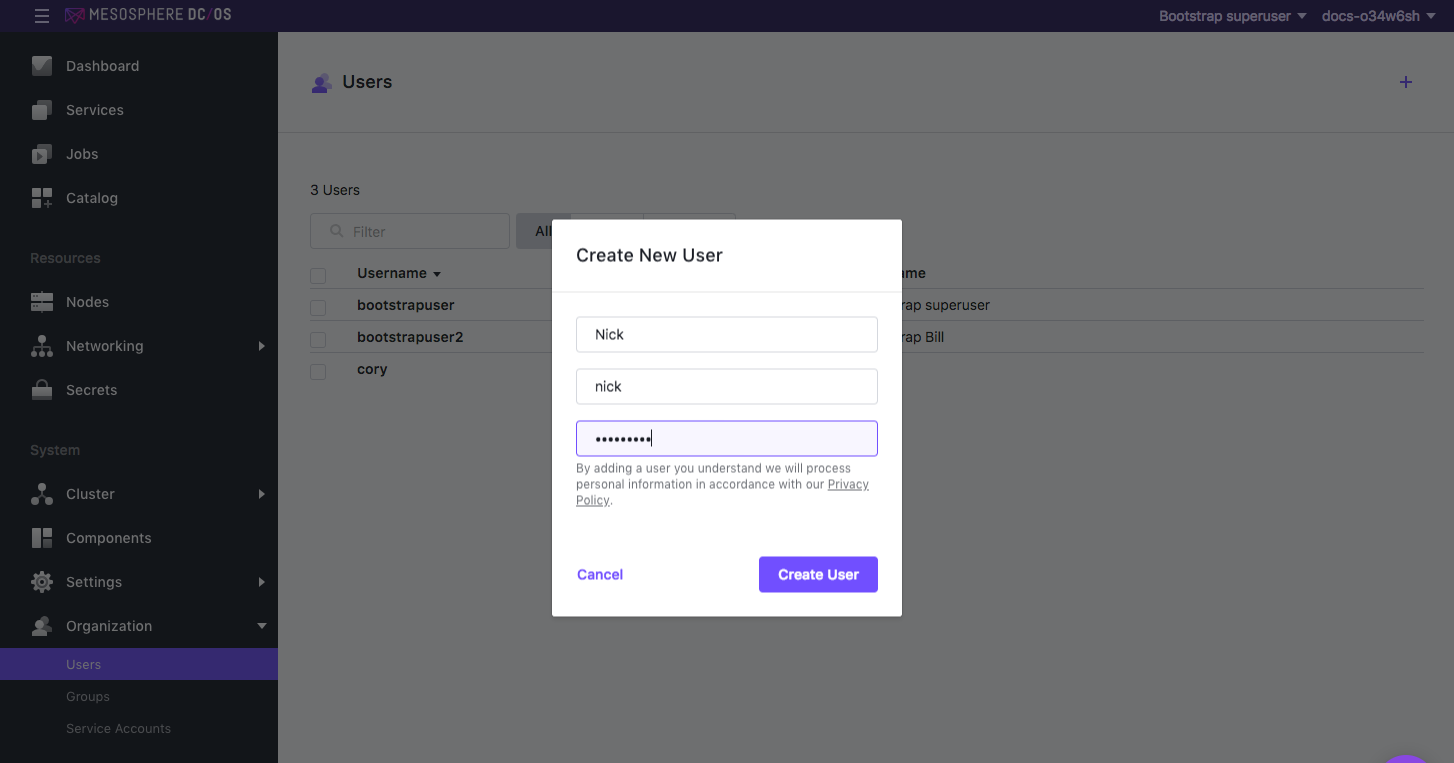
Figure 3. Creating a new user
When you are finished, you should see the two users.
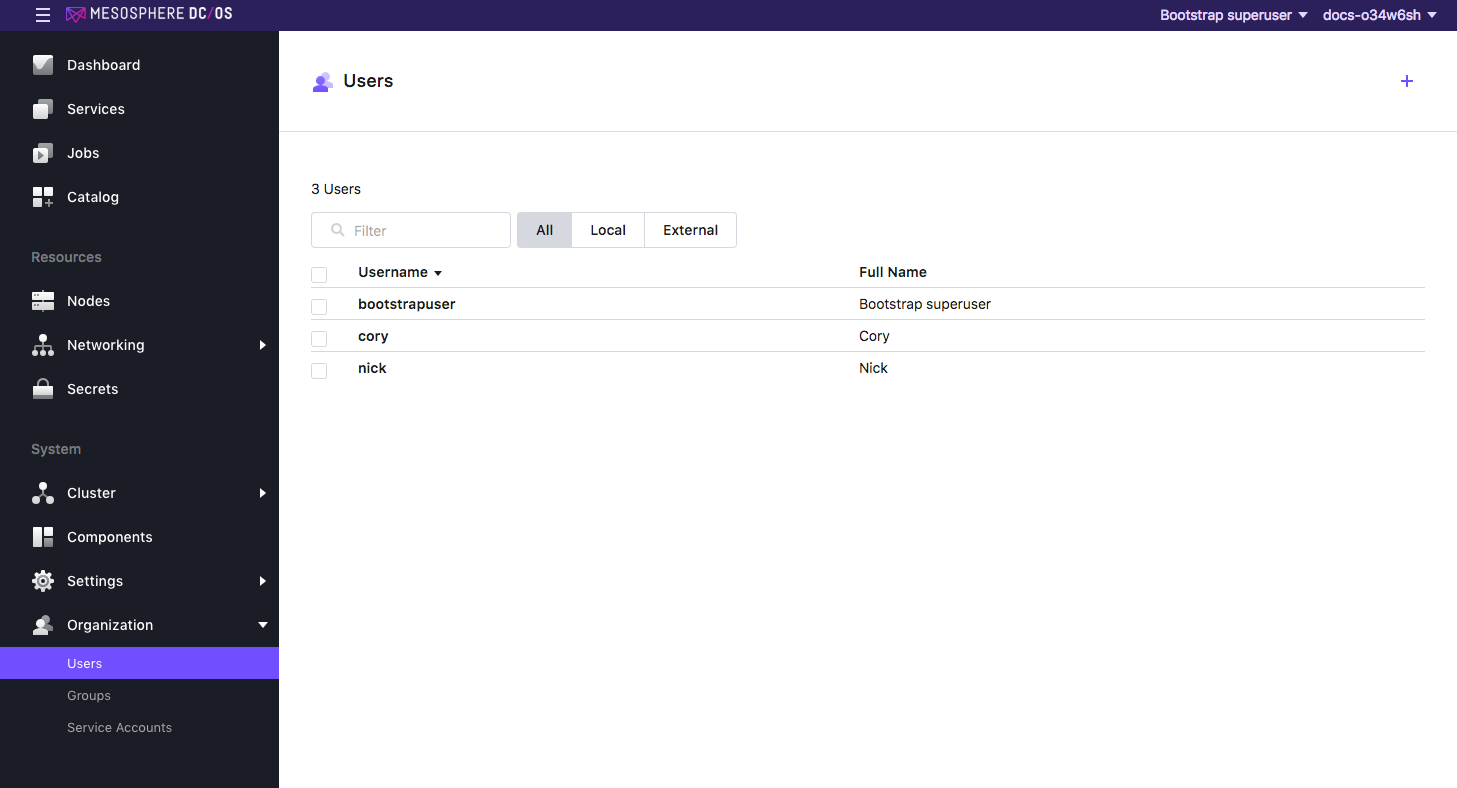
Figure 4. New users in Users page
Next we will create the groups and assign permissions to the DC/OS services.
-
Create user groups from the Organization > Groups.
-
Select New Group. In this example, two groups are created:
prod-a-groupfor managing the DC/OS services for user Cory.prod-b-groupfor managing the DC/OS services for user Nick.

Figure 5. Creating a new group
-
Define the permissions
-
Select Organization > Groups.
-
Select the prod-a-group and select ADD PERMISSION. In this example, permissions are assigned to prod-a to allow users to create their own services!
-
Select the INSERT PERMISSION STRING toggle to enter using the string format. Strings are case sensitive.
All of the required permissions for each group are added here. These permissions will allow users to have access to the DC/OS cluster and deploy their own services. These permissions will also restrict each group so that they can only see their own DC/OS services.
-
Add each of these permissions for the prod-a-group and click Close.
dcos:adminrouter:service:marathon full
dcos:adminrouter:service:nginx full
dcos:service:marathon:marathon:services:/prod-a full
dcos:adminrouter:ops:slave full
dcos:adminrouter:ops:mesos full
dcos:adminrouter:package full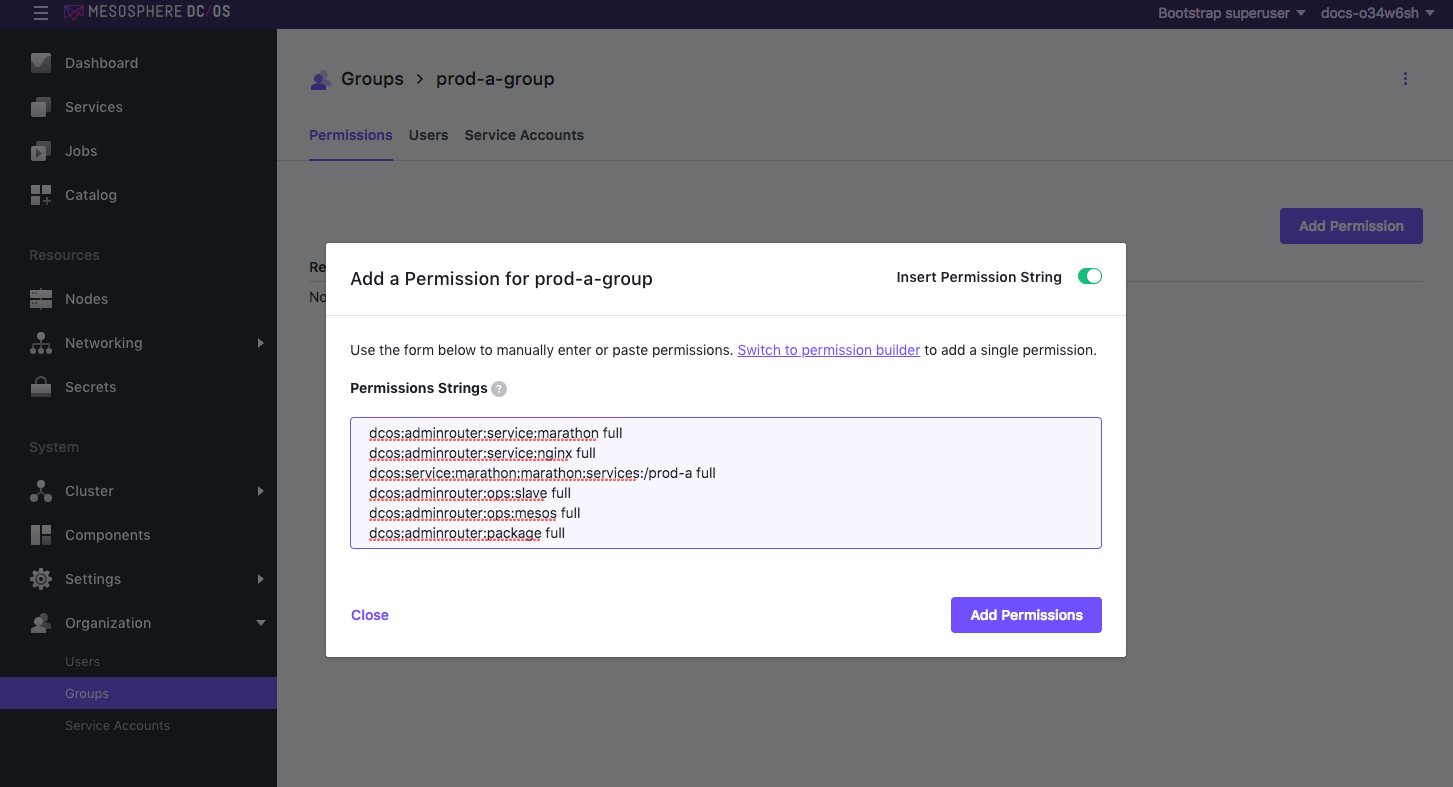
Figure 6. Adding permissions for
prod-a-groupHere is what the permissions view should look like after adding:
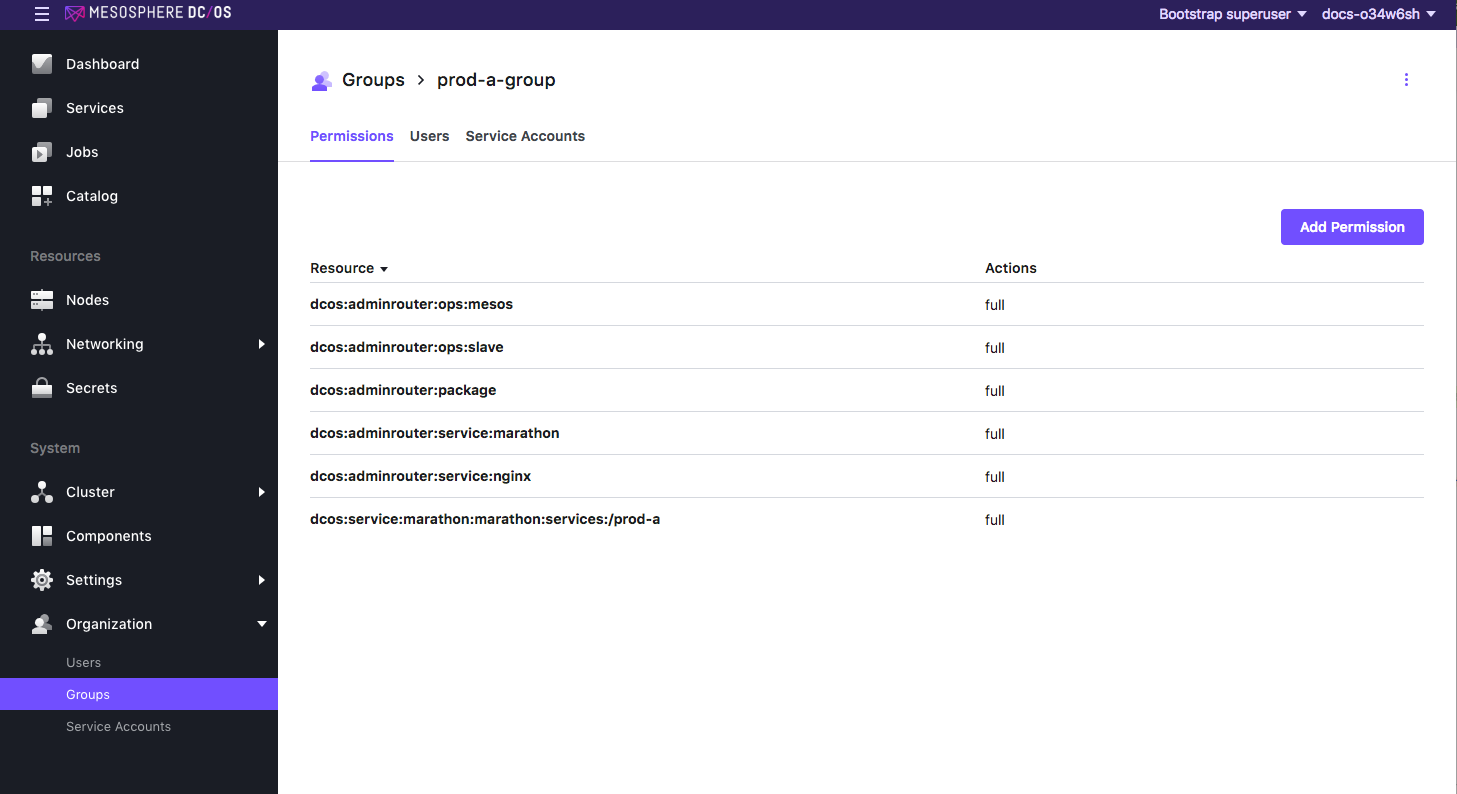
Figure 7. Group permissions added
-
Add each of these permissions for the
prod-b-groupand click Close.dcos:adminrouter:service:marathon full dcos:adminrouter:service:nginx full dcos:service:marathon:marathon:services:/prod-b full dcos:adminrouter:ops:slave full dcos:adminrouter:ops:mesos full dcos:adminrouter:package fullNow that the permissions are assigned to groups, you can add users to the groups to inherit the permissions.
-
Select Organization > Users and select Cory.
-
Select Group Membership and then type
prod-a-groupin the search box, then click to select.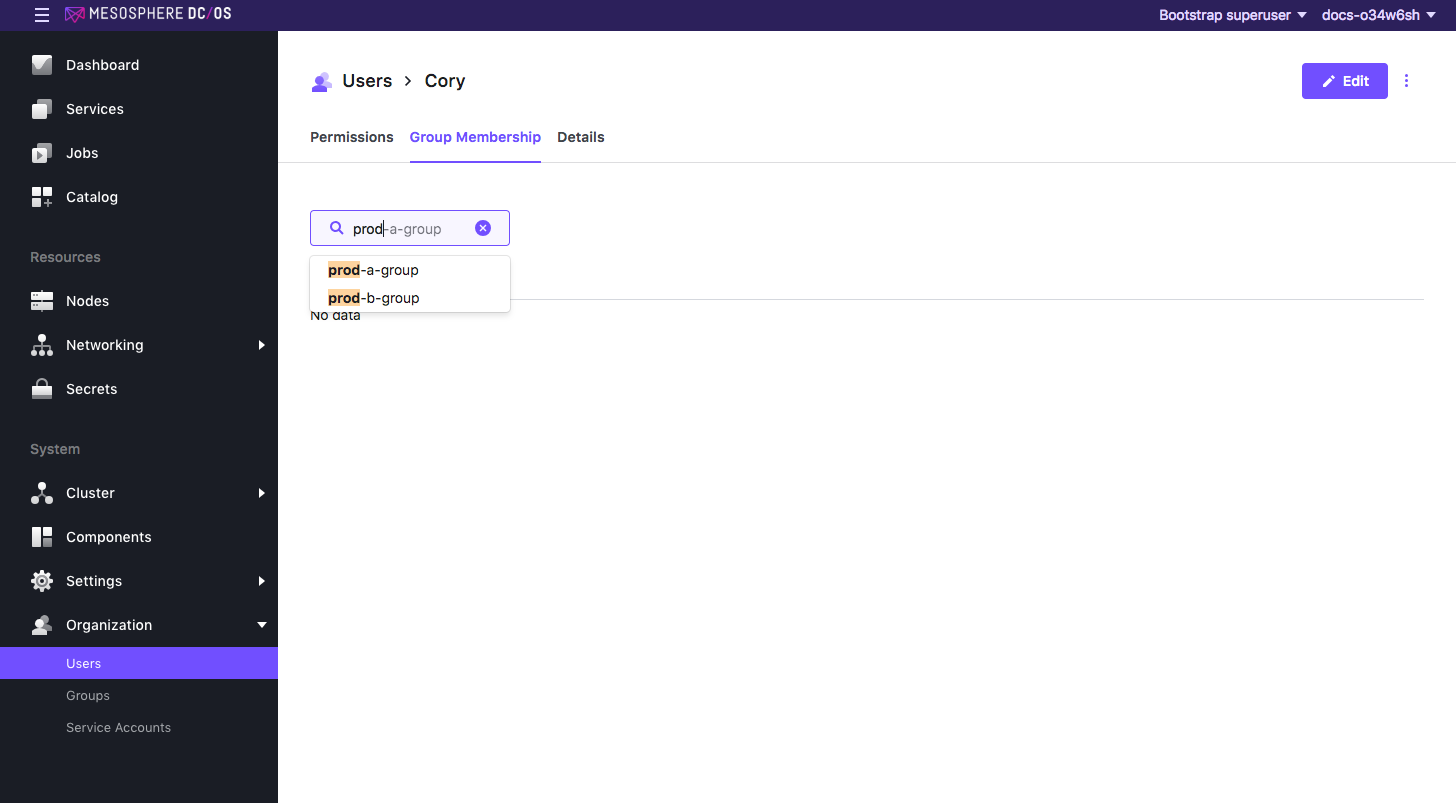
Figure 8. Add user to group
-
Select Organization > Users and select Nick.
-
Select Group Membership and then type
prod-b-groupin the search box, then click to select.
Log in to the DC/OS UI as user
- Log in as Cory to the DC/OS UI. You can see that user Cory only has access to the Services and Catalog tabs. Also, Cory can only see the prod-a services.
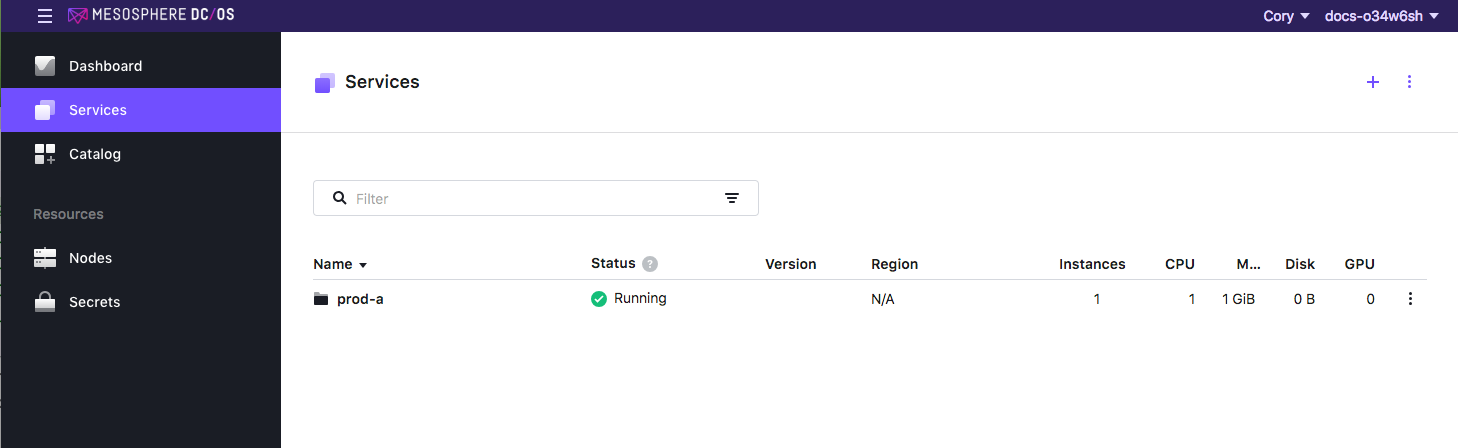
Figure 9. Restricted view
We will deploy an NGINX service to prod-a-group.
-
Select Services > Services and the click the plus sign (+) to deploy a service.
-
Select JSON Configuration and paste in the following app definition:
{
  "id": "/prod-a/nginx",
  "cmd": "rm -rf /usr/share/nginx/html && ln -s /mnt/mesos/sandbox/hello-nginx-master/ /usr/share/nginx/html && nginx -g 'daemon off;'",
  "instances": 1,
  "cpus": 1,
  "mem": 1024,
  "disk": 0,
  "gpus": 0,
  "fetch": [
    {
      "uri": "https://github.com/mesosphere/hello-nginx/archive/master.zip",
      "extract": true,
      "executable": false,
      "cache": false
    }
  ],
  "backoffSeconds": 1,
  "backoffFactor": 1.15,
  "maxLaunchDelaySeconds": 300,
  "container": {
    "type": "DOCKER",
    "docker": {
      "image": "nginx:1.8.1",
      "network": "BRIDGE",
      "portMappings": [
        {
          "hostPort": 0,
          "containerPort": 80,
          "protocol": "tcp",
          "servicePort": 10000
        },
        {
          "hostPort": 0,
          "containerPort": 443,
          "protocol": "tcp",
          "servicePort": 10001
        }
      ],
      "privileged": false,
      "forcePullImage": false
    }
  },
  "healthChecks": [
    {
      "gracePeriodSeconds": 300,
      "intervalSeconds": 60,
      "timeoutSeconds": 20,
      "maxConsecutiveFailures": 3,
      "protocol": "COMMAND",
      "command": {
        "value": "service nginx status | grep -q 'nginx is running.'"
      }
    }
  ],
  "upgradeStrategy": {
    "minimumHealthCapacity": 1,
    "maximumOverCapacity": 1
  },
  "unreachableStrategy": {
    "inactiveAfterSeconds": 900,
    "expungeAfterSeconds": 604800
  },
  "killSelection": "youngest_first",
  "acceptedResourceRoles": [
    "*"
  ],
  "requirePorts": false,
  "labels": {
    "DCOS_PACKAGE_RELEASE": "1",
    "DCOS_SERVICE_SCHEME": "http",
    "DCOS_PACKAGE_SOURCE": "https://universe.mesosphere.com/repo",
    "DCOS_PACKAGE_METADATA": "eyJwYWNrYWdpbmdWZXJzaW9uIjoiMi4wIiwibmFtZSI6Im5naW54IiwidmVyc2lvbiI6IjEuOC4xIiwibWFpbnRhaW5lciI6InN1cHBvcnRAbmdpbnguY29tIiwiZGVzY3JpcHRpb24iOiJOZ2lueCBwYWNrYWdlIiwidGFncyI6WyJwcm94eSIsIndlYi1zZXJ2ZXIiLCJjYWNoZSJdLCJzY20iOiJodHRwOi8vaGcubmdpbngub3JnL25naW54LyIsInByZUluc3RhbGxOb3RlcyI6IlByZXBhcmluZyB0byBpbnN0YWxsIG5naW54LiIsInBvc3RJbnN0YWxsTm90ZXMiOiJOZ2lueCBoYXMgYmVlbiBpbnN0YWxsZWQuIiwicG9zdFVuaW5zdGFsbE5vdGVzIjoiTmdpbnggd2FzIHVuaW5zdGFsbGVkIHN1Y2Nlc3NmdWxseS4iLCJsaWNlbnNlcyI6W3sibmFtZSI6IkJTRCBsaWtlIiwidXJsIjoiaHR0cDovL25naW54Lm9yZy9MSUNFTlNFIn1dLCJpbWFnZXMiOnsiaWNvbi1zbWFsbCI6Imh0dHBzOi8vcGJzLnR3aW1nLmNvbS9wcm9maWxlX2ltYWdlcy81Njc3NzQ4NDQzMjI3MTM2MDAvdFlvVmp1MzEucG5nIiwiaWNvbi1tZWRpdW0iOiJodHRwczovL3Bicy50d2ltZy5jb20vcHJvZmlsZV9pbWFnZXMvNTY3Nzc0ODQ0MzIyNzEzNjAwL3RZb1ZqdTMxLnBuZyIsImljb24tbGFyZ2UiOiJodHRwczovL3Bicy50d2ltZy5jb20vcHJvZmlsZV9pbWFnZXMvNTY3Nzc0ODQ0MzIyNzEzNjAwL3RZb1ZqdTMxLnBuZyJ9fQ==",
    "DCOS_PACKAGE_REGISTRY_VERSION": "2.0",
    "DCOS_SERVICE_NAME": "nginx",
    "DCOS_SERVICE_PORT_INDEX": "0",
    "DCOS_PACKAGE_VERSION": "1.8.1",
    "DCOS_PACKAGE_NAME": "nginx",
    "DCOS_PACKAGE_IS_FRAMEWORK": "false"
  }
}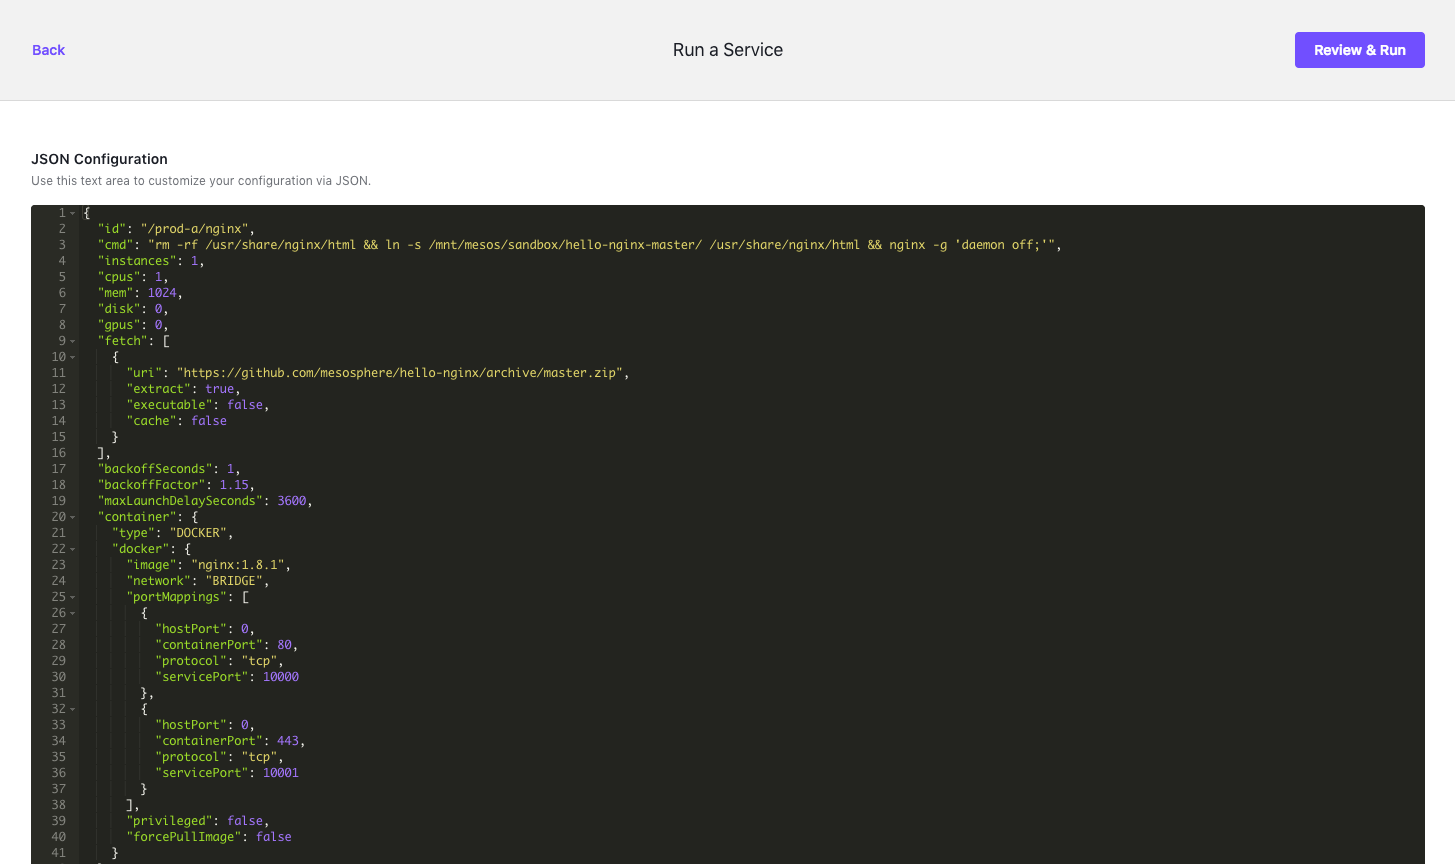
Figure 10. View of JSON file
-
Click REVIEW & RUN and then RUN SERVICE.
-
Repeat the previous steps for Nick. Be sure to specify
"id": "/prod-b/nginx",for example:{ "id": "/prod-b/nginx", "cmd": "rm -rf /usr/share/nginx/html && ln -s /mnt/mesos/sandbox/hello-nginx-master/ /usr/share/nginx/html && nginx -g 'daemon off;'", "instances": 1, "cpus": 1, "mem": 1024, "disk": 0, "gpus": 0, "fetch": [ ... } -
While logged in as Cory or Nick, click on the NGINX launch icon to view the confirmation message.
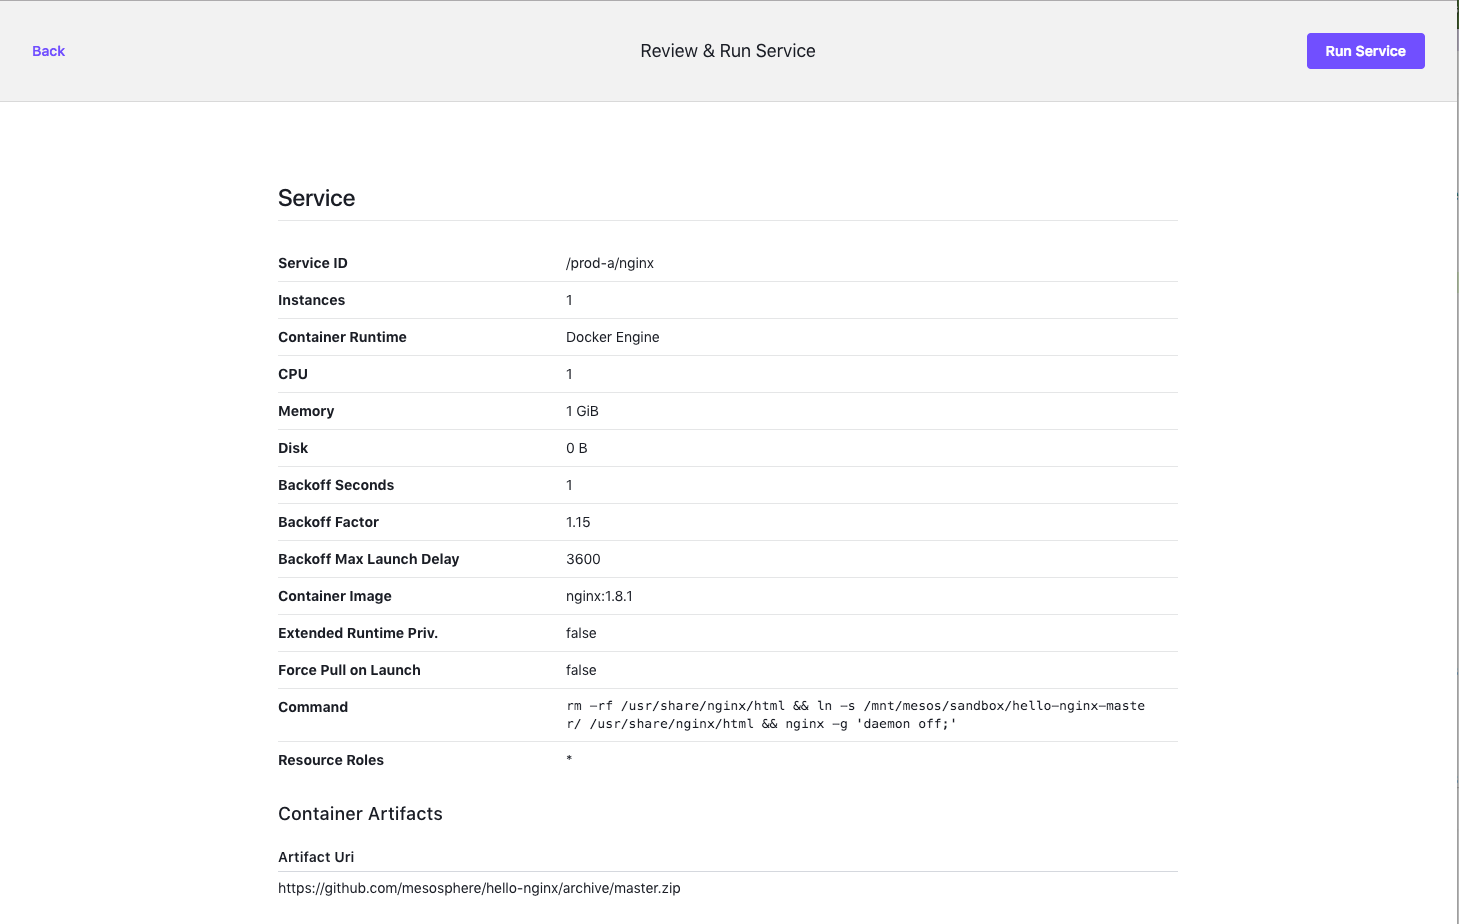
Figure 11. Confirmation screen
Next we will look at the Services tab from the superuser view.
DC/OS UI: Monitor user accounts
-
Log out of the current user and then back in as a user with superuser permission. You will see that both services are running in the
prod-aandprod-b-groups.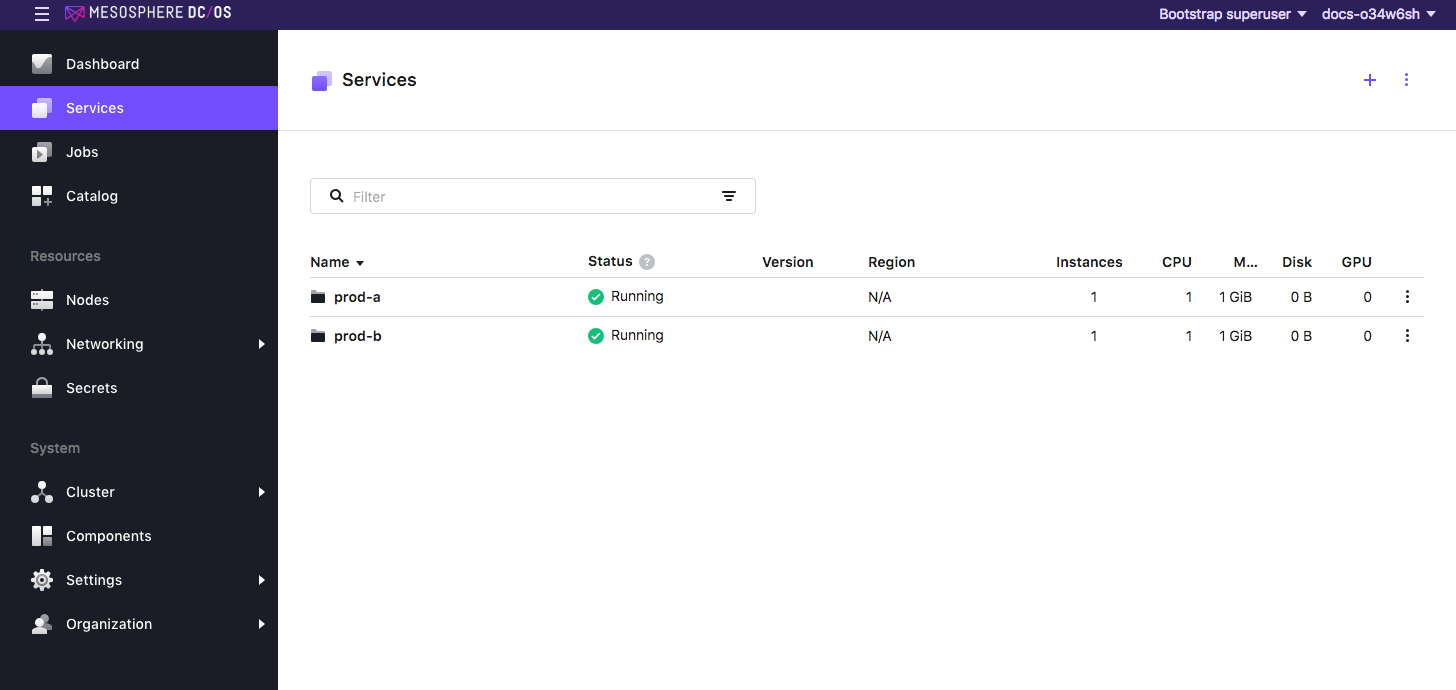
Figure 12. Superuser view