
 DC/OS Documentation
System requirements
Hardware
To use all of the services offered in DC/OS, you should choose at least five Mesos Agents using Standard_D2 Virtual Machines, which is the default size in the DC/OS Azure Marketplace offering. Selecting smaller-sized VMs is not recommended, and selecting fewer VMs will likely cause certain resource-intensive services such as distributed datastores to work improperly (from installation issues to operational limitations).
Production-Ready Cluster Configurations
These recommendations are based on operation of multiple DC/OS clusters over many years, scaling a mix of stateful and stateless services under a live production load. Your service mix may perform differently, but the principles and lessons discussed herein still apply.
General Machine Configurations
We recommend disabling swap on your VMs, which is typically enabled by default for Azure Linux images. We have found that using the ephemeral SSDs for swap (via WAAgent configuration)
can conflict with the disk caching configuration of the D series of VMs. For other VM series, such as the L series, it may be possible to use the SSDs for swap and other purposes. See the following section for particulars on disk configuration.
Monitoring (such as Node Exporter with Prometheus) should be used to identify and alert as to when workloads are nearing Azure defined limits.
Networking
On Azure, raw network performance is roughly determined by VM size.
VMs with 8 or more cores such as Standard_D8_v3, are eligible for
Azure Accelerated Networking (SR-IOV).
We have seen much lower latency and more available and stable bandwidth using SR-IOV
as opposed to relying on the Azure hypervisor vswitches.
For example, in our testing, a Standard_D16s_v3 without SR-IOV
can push approximately 450MB/s of data between two VMs, while the same size
machines can push closer to 1000MB/s of data using SR-IOV.
Thus, SR-IOV should be employed when possible and you should benchmark your
instance sizes ((for example, using iperf3) to make sure your network requirements
are met.
Additionally, while multiple NICs per virtual machine are supported, the amount of bandwidth is per-VM, not per NIC. Thus, while segmenting your network into control and data planes (or other networks) may be useful for organizational or security purposes, Linux level traffic shaping is required in order to achieve bandwidth control.
Disk Configurations
In order to achieve performant, reliable cluster operation on Azure, Premium SSDs are recommended in particular disk configurations. Managed Disks (MDs) are preferred over Unmanaged Disks (UMDs) to avoid Storage Account limitations. The Azure fabric will place the managed disks appropriately to meet the guaranteed SLAs. Storage account limitations for UMDs are documented here.
On Azure, Premium SSDs have a limited number of possible synchronous IOPs, limited by the latency of the underlying disk fabric. Services such as etcd, Zookeeper and databases which use a write-ahead-log (WAL) are particularly sensitive to this I/O configuration. Thus, much of the system engineering described herein is focused on minimizing and/or eliminating I/O contention on the Azure Disks.
Additionally, exceeding the I/O allocation on a machine will result in throttling. Users are advised to study this article in detail to understand the theoretical background of the recommendations herein.
Given the need to separate synchronous from asynchronous I/O loads in order to maintain performance, the following disk mounting configurations are recommended:
- Masters:
- / - P10
- /var/lib/etcd - (for those running etcd) - P10
- /var/log - P10
- /var/lib/dcos/exhibitor - P10
- Public Agents:
- / - P10
- /var/log - P10
- /var/lib/docker - P10
- /var/lib/mesos/slave - P10
- Private Agents:
- / - P10
- /var/log - P10
- /var/lib/docker - P10
- /var/lib/mesos/slave - P20
It is certainly possible to run clusters with smaller and/or fewer disks,
but for production use, the configurations above have proven to have substantial advantages
for any non-trivial cluster sizes. Additionally, we recommend attaching appropriate
Premium SSDs to /dcos/volume0 ... /dcos/volumeN
using Mesos MOUNT disk resources, which can then be dedicated to data
intensive services without I/O contention.
For data intensive services such as Postgres or mysql, you should consider attaching LVM RAID stripes to those MOUNT resources to increase the possible transactions per second of the databases.
With respect to configuring the disk caches, the following general rules apply:
- OS disks should be set to
ReadWrite. - Data disks with a mixed or read heavy load (database bulk storage, etc) should
be set to
ReadOnly. - Data disks with high sequential write loads (WAL disks) should be set to
None.
Software
You will need an active Azure subscription to install DC/OS via the Azure Marketplace.
Also, to access nodes in the DC/OS cluster you will need ssh installed and configured.
Install DC/OS
Deploying the template
To install DC/OS 1.12 on Azure, use the Azure Resource Manager templates provided.
Some notes on the template configuration:
- Choose
East USas the Location, because some resources of the template may not be available in other locations. - Set
Oauth Enabledto true if you want to sign in the DC/OS Dashboard through OAuth. - Fill up the
Agent Endpoint DNS Name PrefixandMaster Endpoint DNS Name Prefix. - Enter your
SSH RSA Public Key.
Accessing DC/OS
- Look up
MASTERFQDNin the outputs of the deployment. To find that, click on the link underLast deployment(which is4/15/2016 (Succeeded)here) and you should see this:
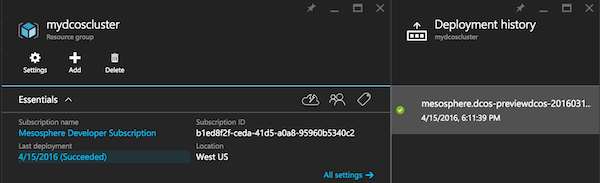
Figure 1. Deployment history
- Click on the latest deployment and copy the value of
MASTERFQDNin theOutputssection.
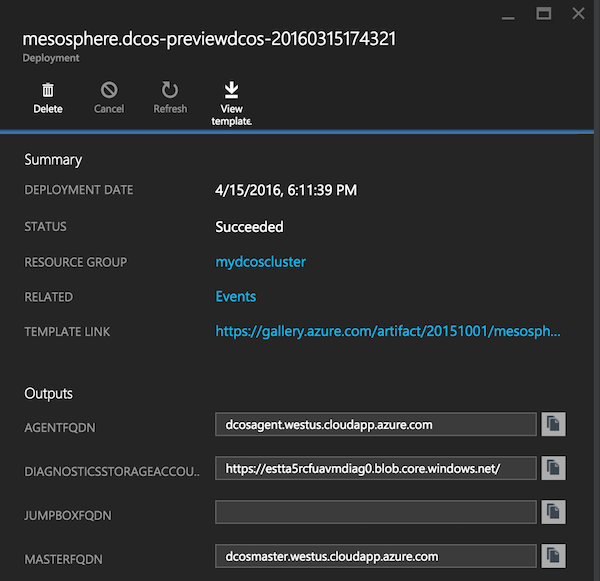
Figure 2. Outputs section
-
Note the value of
MASTERFQDNyou found in theOutputssection in Figure 2, and use it in the following step. Because of security considerations, you cannot visit the DC/OS Dashboard in Azure directly by default. -
Choose one of the following workaround solutions to visit the DC/OS Dashboard in Azure:
Case 1:
In order to visit the DC/OS Dashboard, you will need to access TCP port 80 or 443 of the master node. You can add an inbound security rule and an inbound NAT rule.
- Find the network security group resource of the master node,

Figure 3. Master node network security group
- Click on the Inbound security rules tab on the left side.
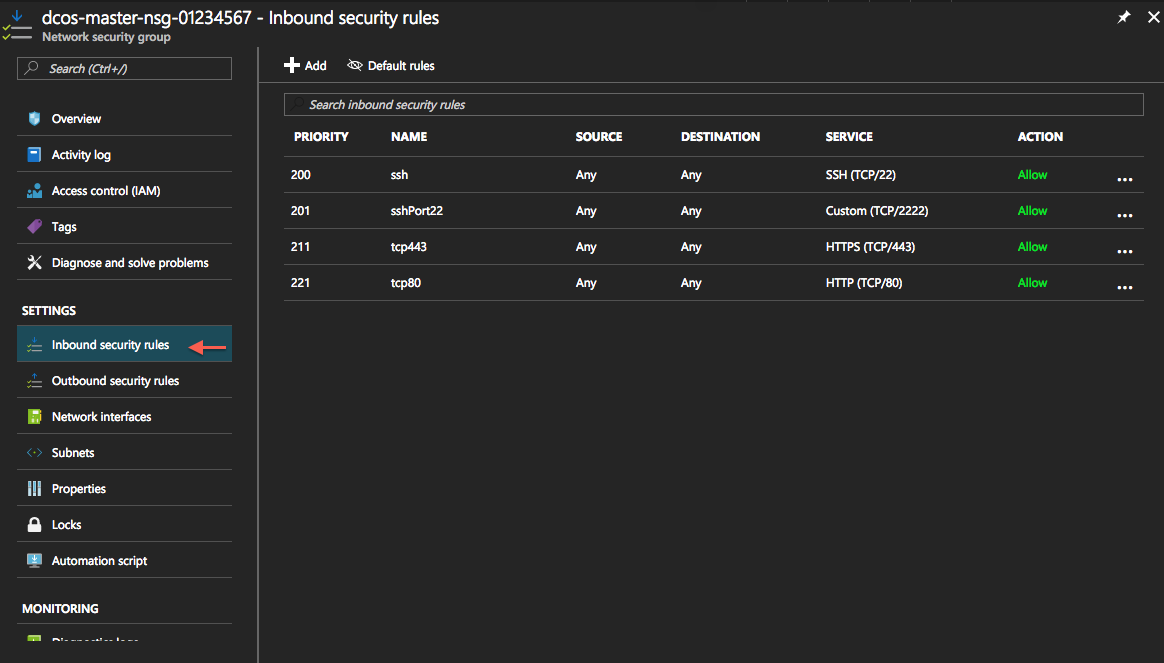
Figure 4. Inbound security rules
- Add an inbound security rule.
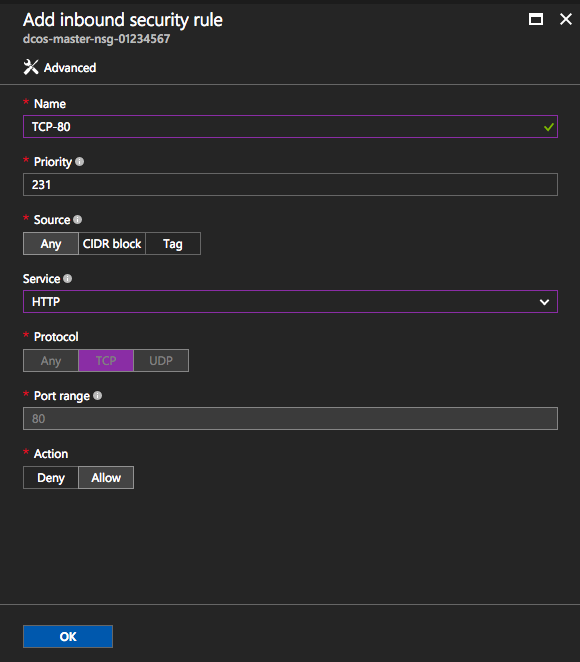
Figure 5. Adding an inbound security rule
- Find the load balancer resource of the master node.
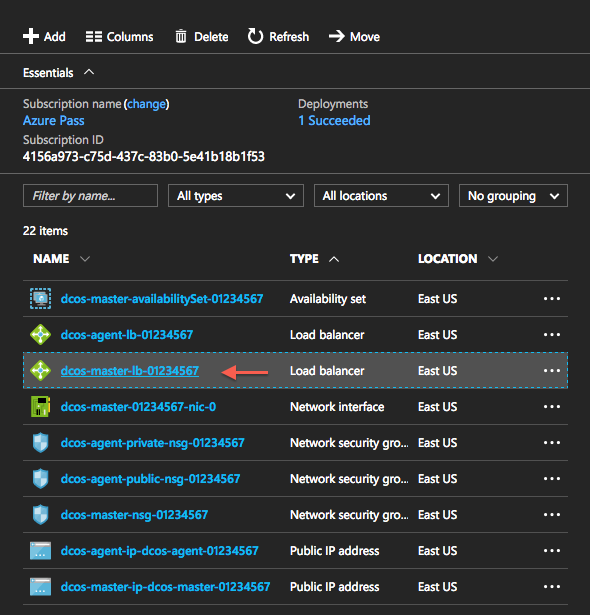
Figure 6. Master node load balancer
- Click on the Inbound NAT rules tab on the left side,
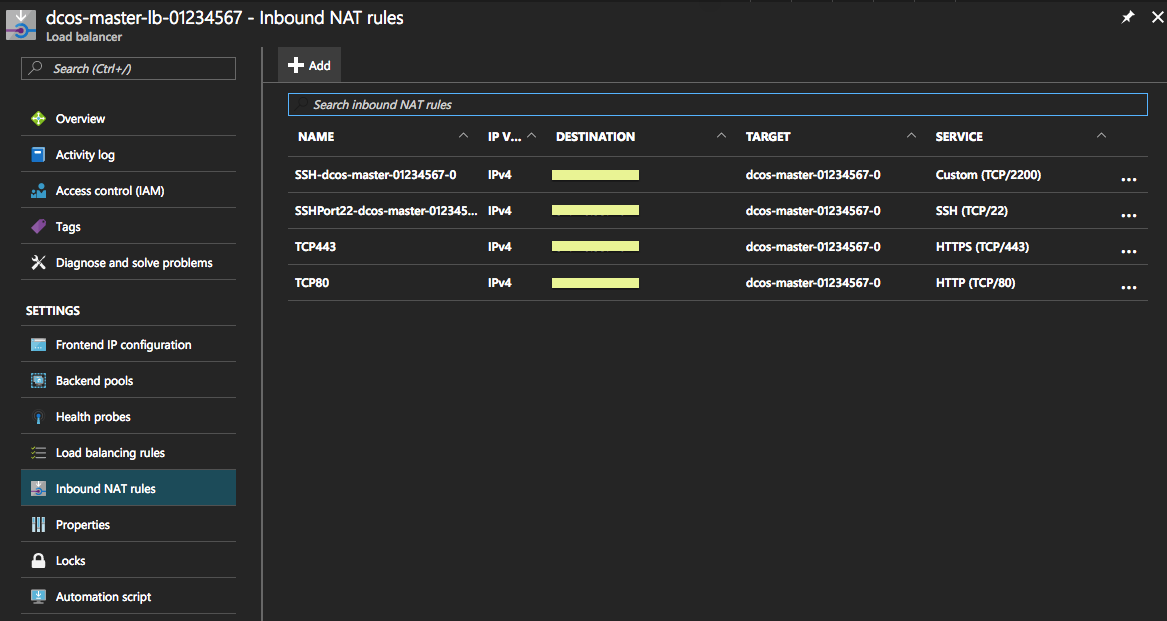
Figure 7. Inbound NAT rules
- Add an inbound NAT rule.
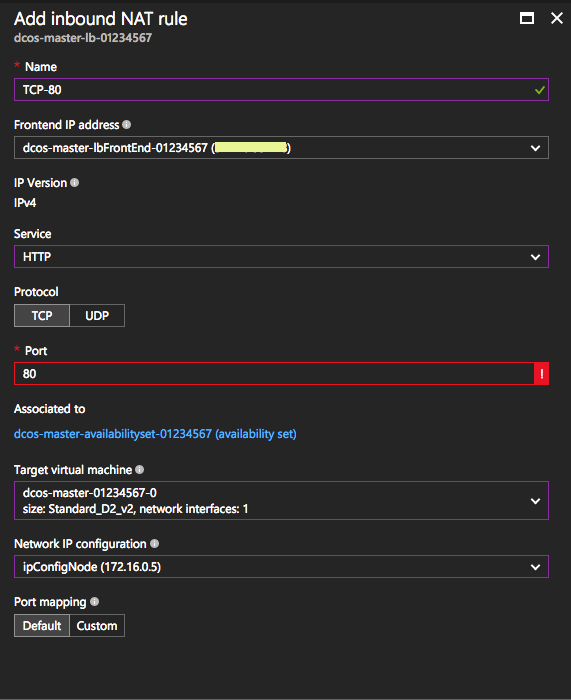
Figure 8. Adding an inbound NAT rule
Now you can visit http://$MASTERFQDN and view the DC/OS Dashboard.
Case 2: Using ssh tunnel
In this case, we need to setup an SSH tunnel, to forward TCP port 80 of the master node on the Azure cluster to the 8000 port of your local machine.
Copy the value of MASTERFQDN you found in the previous step and paste it in the following command:
ssh azureuser@$MASTERFQDN -L 8000:localhost:80
For example:
ssh azureuser@dcosmaster.westus.cloudapp.azure.com -L 8000:localhost:80
Now you can visit http://localhost:8000 on your local machine and view the DC/OS Dashboard.

Figure 9. DC/OS dashboard
Caveats
Some caveats about SSH access:
- For connections to
http://localhost:8000to work, the SSH command must be run on your local machine, and not inside a Virtual Machine. - In the example above, port
8000is assumed to be available on your local machine. - The SSH commands shown only work on Mac or Linux. For Windows, use PuTTY with a similar port-forwarding configuration, see also How to Use SSH with Windows on Azure.
- If you want to learn more about SSH key generation, see this GitHub tutorial.
The DC/OS UI will not show the correct IP address or CLI install commands when connected by an SSH tunnel.
Run DC/OS CLI
The following commands can be used to run the DC/OS CLI directly on the master node.
# Connect to master node with ssh
ssh azureuser@$MASTERFQDN

# Install CLI on the master node and configure with http://localhost
curl https://downloads.dcos.io/binaries/cli/linux/x86-64/dcos-/dcos -o dcos &&
sudo mv dcos /usr/local/bin &&
sudo chmod +x /usr/local/bin/dcos &&
dcos cluster setup http://localhost &&
dcos

# Now you can use the DC/OS CLI:
dcos package search
Tear down the DC/OS cluster
If you have created a new resource group in the deployment step, it is easy to tear down the cluster and release all of the resources: just delete the resource group. If you have deployed the cluster into an existing resource group, you will need to identify all resources that belong to the DC/OS cluster and manually delete them.