
 DC/OS Documentation
You can create a DC/OS cluster for Amazon Web Services (AWS) by using the DC/OS templates on AWS CloudFormation.
The basic templates provide:
- Limited customization options
- Fastest deployment and minimal setup required
- Great for simple production deployments, demos, and testing
These instructions provide a basic AWS CloudFormation template that creates a DC/OS cluster that is suitable for demonstrations and POCs. This is the fastest way to get started with the DC/OS templates for AWS CloudFormation.
For a complete set of DC/OS configuration options, see the Advanced AWS Install Guide.
| Important: Upgrades are not supported with this installation method. |
System requirements
Hardware
An AWS EC2 m3.xlarge instance. Selecting smaller-sized VMs is not recommended, and selecting fewer VMs will likely cause certain resource-intensive services, such as distributed datastores, to not work properly.
- You have the option of one or three Mesos master nodes.
- The default is five private Mesos agent nodes.
- The default is one public Mesos agent node. By default, ports are closed and health checks are configured for Marathon-LB. Ports 80 and 443 are configured for the AWS Elastic Load Balancer.
Software
-
DC/OS AWS templates:
- Contact your sales representative or sales@mesosphere.com to obtain these files. Enterprise
- The most recent DC/OS open source AWS templates can be downloaded from downloads.dcos.io, and older versions can be downloaded from dcos.io/releases. Open Source
-
An AWS account.
-
An AWS EC2 key pair for the same region as your cluster. Key pairs cannot be shared across regions. The AWS key pair uses public-key cryptography to provide a secure login to your AWS cluster. For more information about creating an AWS EC2 key pair, see the documentation.
-
SSH installed and configured. This is required to access nodes in the DC/OS cluster.
Create DC/OS cluster stack
Enterprise users Enterprise
-
Launch AWS CloudFormation.
-
Click Create Stack.
-
On the Select Template page, in the Choose a template field, click the Specify an Amazon S3 template URL radio button and paste in the template URL you received from Sales.
| Warning: Do not click the View/Edit template in Designer link and edit the template. The DC/OS template is configured for running DC/OS. If you modify the template you might be unable to run certain packages on your DC/OS cluster. |
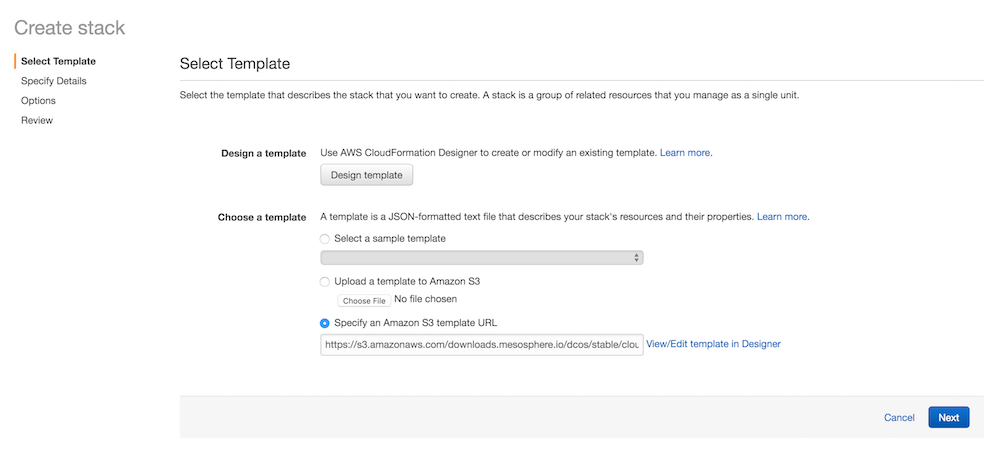
Figure 1. Launch stack
-
Click Next.
-
On the Specify Details page, specify a cluster name (
Stack name), key pair (KeyName), public agent (PublicSlaveInstanceCount), and private agent (SlaveInstanceCount). Click Next. Depending on the DC/OS services that you install, you might need to change the number of agent nodes after cluster creation. For more information, see Scaling the DC/OS cluster in AWS. -
Skip the Open Source users section and go to Step 6.
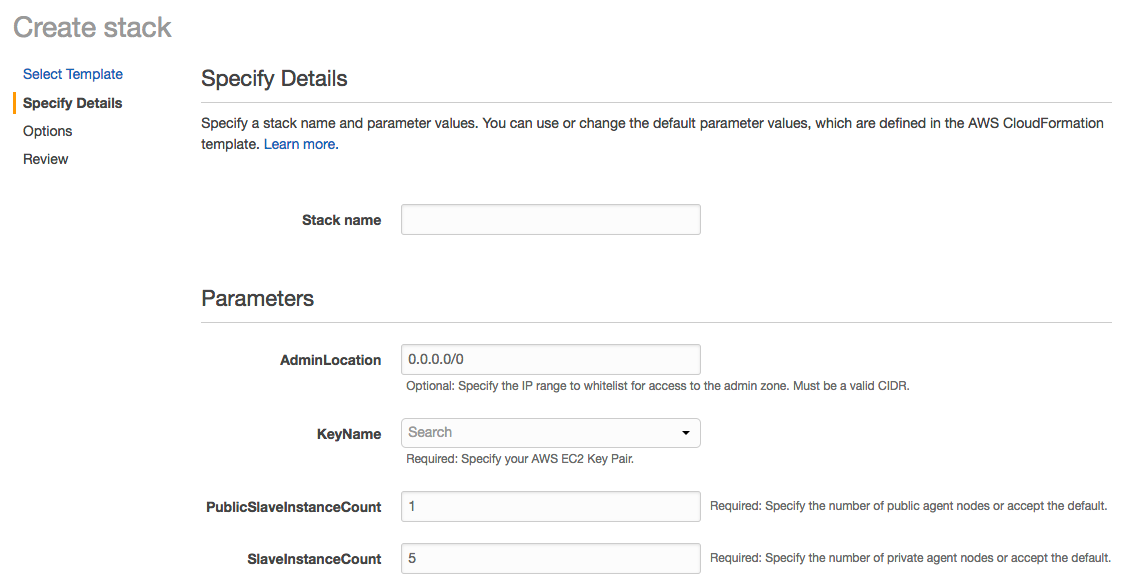
Figure 2. Create stack
Open Source users Open Source
-
Launch the DC/OS template on CloudFormation and select the region and number of masters (one or three). You must have a key pair for your selected region.
-
On the Select Template page, accept the defaults and click Next.
Figure 3. Launch stack
- On the Specify Details page, specify a cluster name (
Stack name), key pair (KeyName), whether to enable OAuth authentication (OAuthEnabled), number of public agent nodes (PublicSlaveInstanceCount), number of private agent nodes (SlaveInstanceCount), and click Next.
| Warning: Do not click the View/Edit template in Designer link and edit the template. The DC/OS template is configured for running DC/OS. If you modify the template you might be unable to run certain packages on your DC/OS cluster. |
- Go to Step 6 in the “All users” section.
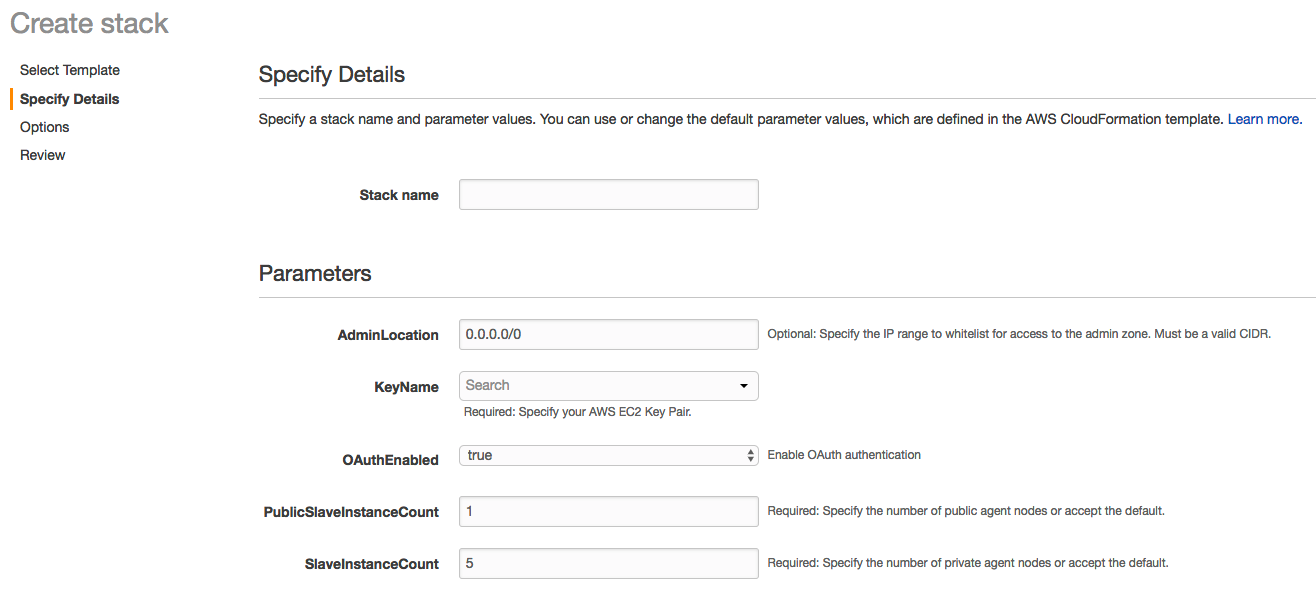
Figure 4. Create stack
All users
-
On the Options page, accept the defaults and click Next. In the Advanced section you can choose whether to rollback on failure. By default this option is set to Yes.
-
On the Review page, check the acknowledgement box and then click Create. If the Create New Stack page is shown, either AWS is still processing your request or you’re looking at a different region. Navigate to the correct region and refresh the page to see your stack.
Monitor cluster stack launch
In AWS CloudFormation you should see the following:
- The cluster stack spins up over a period of 10 to 15 minutes.
- The status changes from CREATE_IN_PROGRESS to CREATE_COMPLETE.
Troubleshooting: A ROLLBACK_COMPLETE status means the deployment has failed. See the Events tab for useful information about failures.
| Important: A ROLLBACK_COMPLETE status means the deployment has failed. See the Events tab for useful information about failures. |
Open and log into the DC/OS GUI
-
In AWS CloudFormation, check the box next to your stack.
-
Click the Outputs tab and copy the Mesos Master hostname.
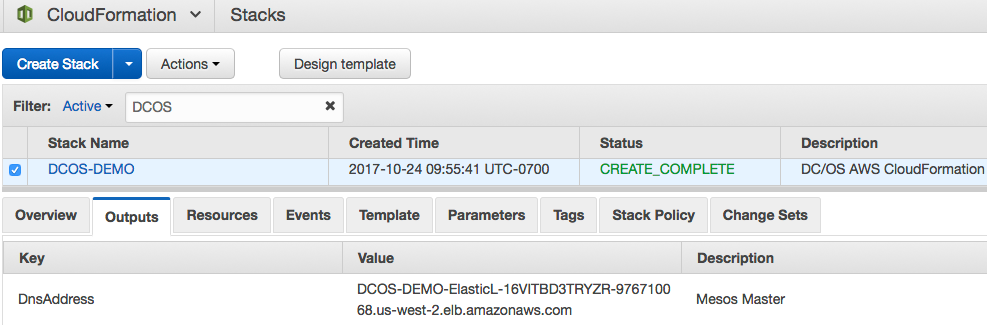
Figure 5. Monitor stack creation
- Paste the hostname into your browser to open the DC/OS web interface. The interface runs on the standard HTTP port 80, so you do not need to specify a port number after the hostname. Your browser may show a warning that your connection is not secure. This is because DC/OS uses self-signed certificates. You can ignore this error and click to proceed to the login screen.
Figure 6. DC/OS web interface login screen
Note: You might need to resize your window to see this tab. You can find your DC/OS hostname any time from the AWS CloudFormation Management page.
- Enter the username and password of the superuser account. The default username is
bootstrapuserand default password isdeleteme. Click LOG IN. Enterprise
Install the DC/OS CLI
You must install the DC/OS Command-Line Interface (CLI) to administer your DCOS cluster.
-
Click the drop-down menu on the upper-left corner of the DC/OS GUI and select Install CLI.
-
Copy the code snippet and run in a terminal. Provide the sudo password, accept the fingerprint of the cluster certificate, and provide the superuser name and password to authenticate the CLI.