
 DC/OS Documentation
The Jobs tab provides native support for creating, scheduling and managing your jobs. From the side menu, click on Jobs. The display will show all of your current jobs either singly or, if grouped, in the group folder.
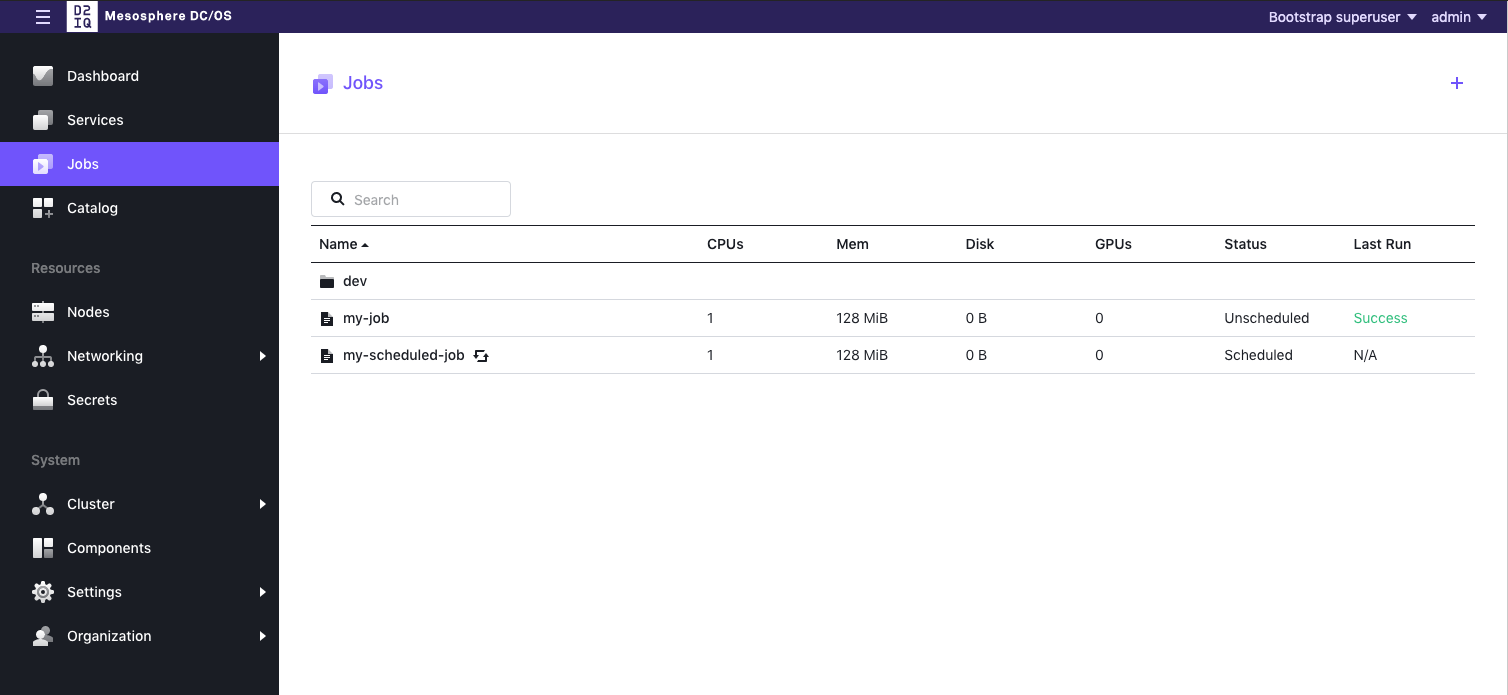
Figure 1 - Jobs main screen
Click on the down arrow next to each column name to sort the list.
| Column | Description | Values |
|---|---|---|
| Name | Unique identifier for your job. Corresponds to Job ID in the configuration section. | |
| CPUs* | The number of CPU shares your job needs per instance. | |
| Mem* | The amount of memory your job needs per instance in MiB. | |
| Disk* | The amount of disk your job needs per instance in MiB. | |
| GPUs* | The amount of GPU shares your job needs per instance. | |
| Status | Current status of your job. | Scheduled or Unscheduled |
| Last Run | Shows the final status of the last time your job was run. | Success or Fail |
Creating a new job
There are two ways to create a job in the DC/OS™ UI.
- If you have no jobs configured, the Jobs screen will contain a notice that you have no active jobs, and a Create a Job button.
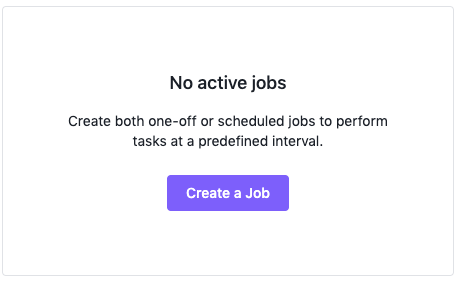
Figure 2 - Create a Job button
- Regardless of whether you have active jobs or not, you can always click on the + sign in the upper right corner to create a new job.

Figure 3 - Click on plus sign
A configuration screen for a new job will appear. Note that this screen is the same as that used for editing jobs.
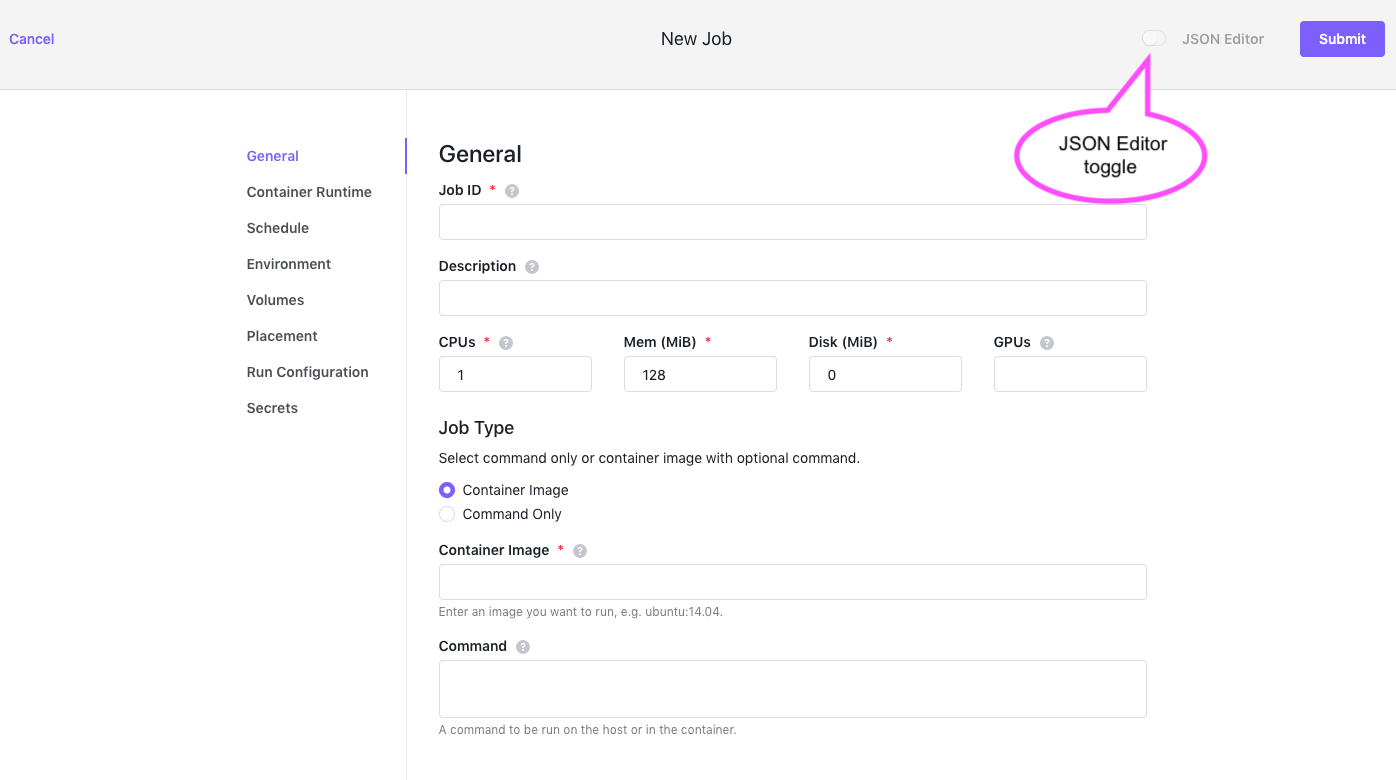
Figure 4 - Job configuration screen
Split screen
Note that in all the Jobs configuration screens, you can choose to view the UI alone, or split the screen between the UI and a JSON Editor window. In the following discussion of the Jobs configuration options, we will show you the split screen so that you can see how they work together, but you may always choose to use the UI by itself.
Edits made to either interface will be immediately reflected in the other. For example, if you enter a value in any field in the left hand UI, it will be added to the JSON file on the right hand.
To dismiss the JSON Editor screen, click the toggle again.

Figure 5 - Split screen
To invoke the JSON Editor, click on the JSON Editor toggle switch next to the Submit button.
Configuring a job
You will see eight tabs on the left hand side of the screen. These help you name, configure and manage your job:
| Name | Description |
|---|---|
| General | Sets the most basic job settings, such as the job identifier, CPU, memory and disk requirements. |
| Container Runtime | Specifies whether the job runs using the Universal Container Runtime or the Docker® Engine. |
| Schedule | Sets up a schedule for your job. You can use the cron format. |
| Environment | Specifies environment variables to be attached to each instance of your job. |
| Volumes | Configures a stateful job by setting up a persistent volume. |
| Placement | Specifies the placement of agent nodes in regions and zones for high availability, or to expand capacity to new regions. |
| Run Configuration | Advanced settings for the job. |
| Secrets | Sets up a Secret Store to secure important values like private keys, API tokens, and so forth. |
General
The General tab allows you to set up the most basic configuration for a job.
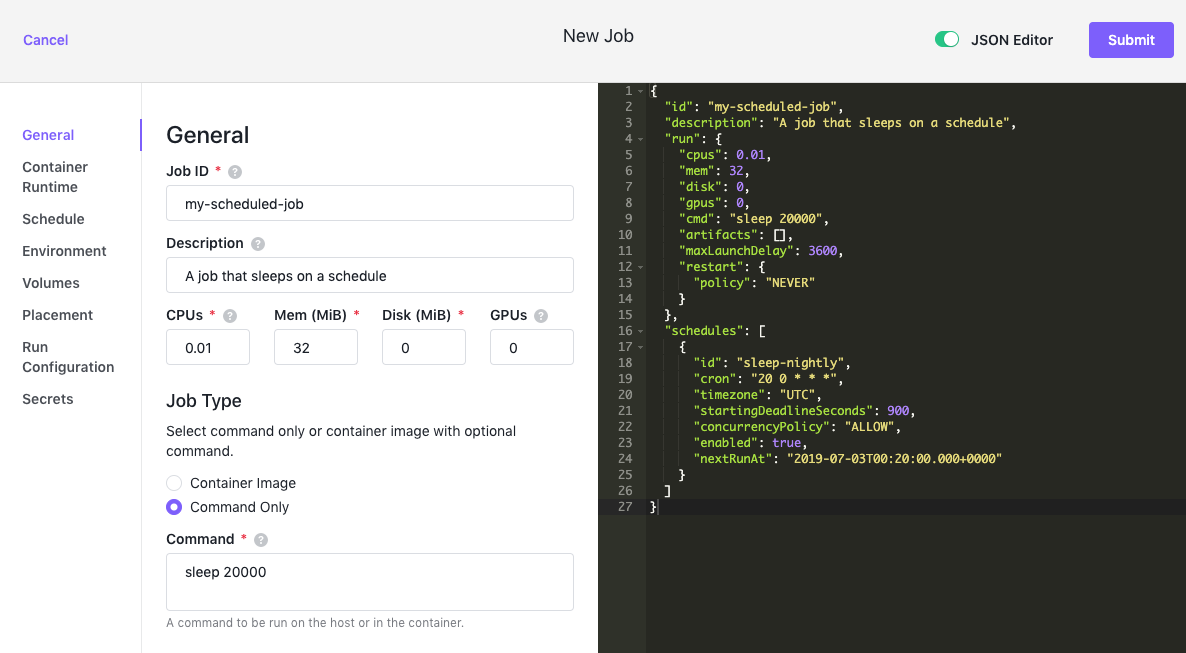
Figure 6 - General configuration tab
| Name | Description |
|---|---|
| Job ID | Required field. Defines a unique identifier for the new job. You also use this setting to manage job operations. Each name must be at least 1 character long and may only contain digits (0-9), dashes (-), and lowercase letters (a - z). The name may not begin or end with a dash. |
| Description | Provides an optional description of the new job. |
| CPUs | Required field. Specifies the number of CPU cores your job requires. This number can be an integer or a fraction. |
| Mem (MiB) | Required field. Specifies the amount of memory, in MiB, your job requires. |
| Disk (MiB) | Required field. Specifies the amount of disk space, in MiB, your job requires. |
| GPUs | Specifies the number of GPU (Graphics Processing Unit) shares this job needs per instance. This field is only applicable for jobs that run on nodes configured to use GPU (Graphics Processing Unit) cores and tasks that are launched using DC/OS Universal Container Runtime containers. Support for GPU resources is not available for Docker containers or images. |
| Job Type | Select Container Image with an optional Command or Command Only. |
| Container Image | Repository name. This field allows you to specify an image you want to run, such as Ubuntu:14.04. |
| Command* | Specifies a command to be run on the host or in the container. This value is wrapped by Mesos via /bin/sh - job.cmd. Either cmd or args must be supplied . It is invalid to supply both cmd and args in the same job. |
| Command Only | Specifies a command to be run on the host or in the container. This value is wrapped by Mesos via /bin/sh - job.cmd. Either cmd or args must be supplied . It is invalid to supply both cmd and args in the same job. |
Container Runtime
The Container Runtime is responsible for running your job. We support the Universal Container Runtime (UCR) and the Docker Engine.
UCR
Universal Container Runtime uses the native Mesos engine and supports GPU resources. This is the recommended selection.
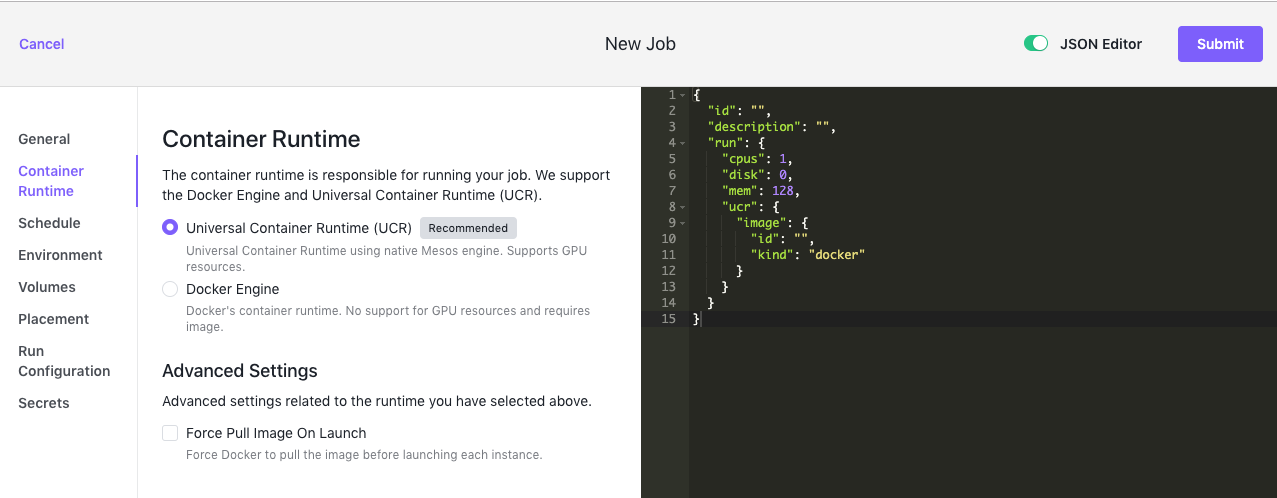
Figure 7 - Jobs > Container Runtime tab
| Name | Description |
|---|---|
| Force Pull Image On Launch | Forces Docker to pull the latest image before launching each instance. |
Docker Engine
The Docker Engine is Docker’s container runtime. It requires an image and does not support GPU resources.
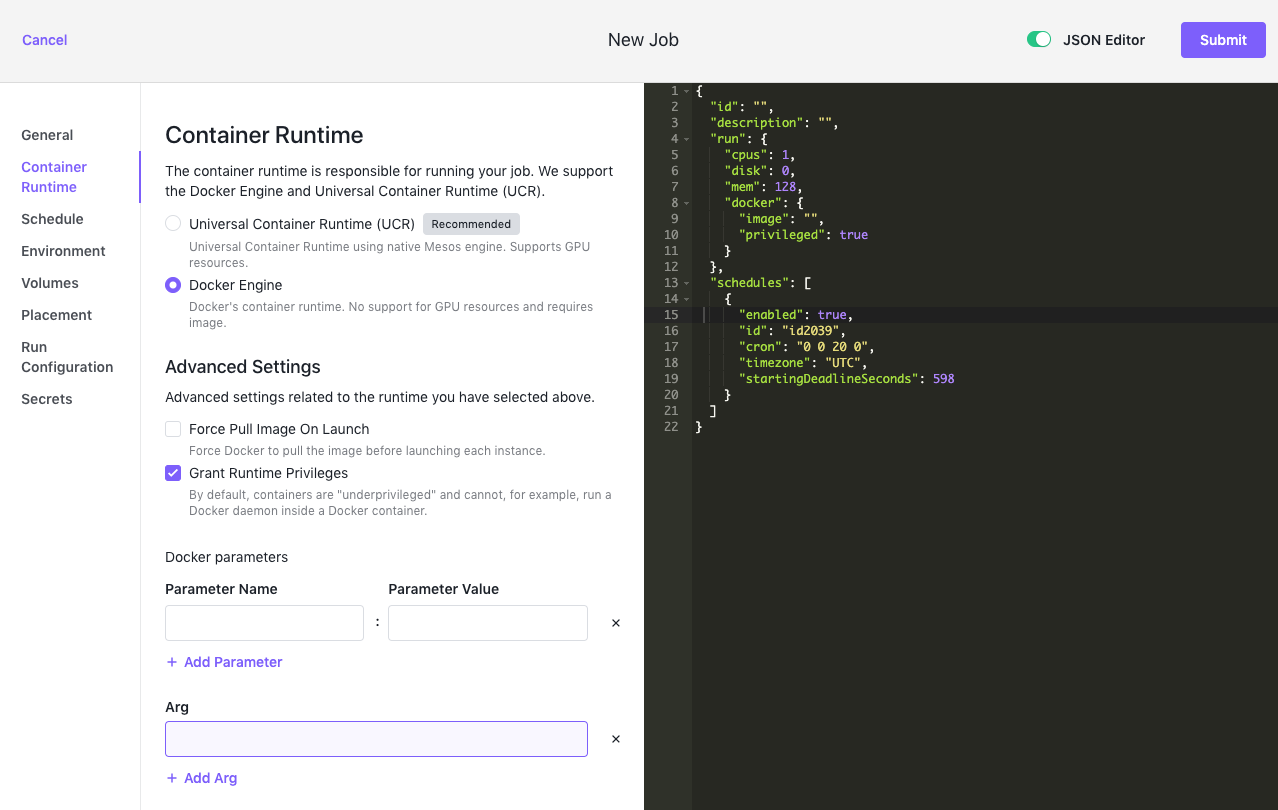
Figure 8 - Jobs > Container Runtime > Docker Engine tab
Additional options
| Name | Description |
|---|---|
| Force Pull Image On Launch | Forces Docker to pull the latest image before launching each instance. |
| Grant Runtime Privileges | Runs the specified Docker image in privileged mode. By default, containers are “underprivileged” and cannot, for example, run a Docker daemon inside a Docker container. |
Docker Parameters
| Name | Description |
|---|---|
| Add Parameter | Specifies additional Docker runtime Parameter Names and Parameter Values for the new job, if applicable. You can add multiple Parameter Names and corresponding values by clicking Add Parameter for each Parameter Name and Parameter Value you want to include. |
| Add Arg | Specifies additional command-line arguments for the new job, if applicable. You can add multiple arguments by clicking Add Arg for each argument you want to include. |
Schedule
You can set up jobs with a scheduler using the cron format. Select Schedule to specify a schedule for when the job runs.
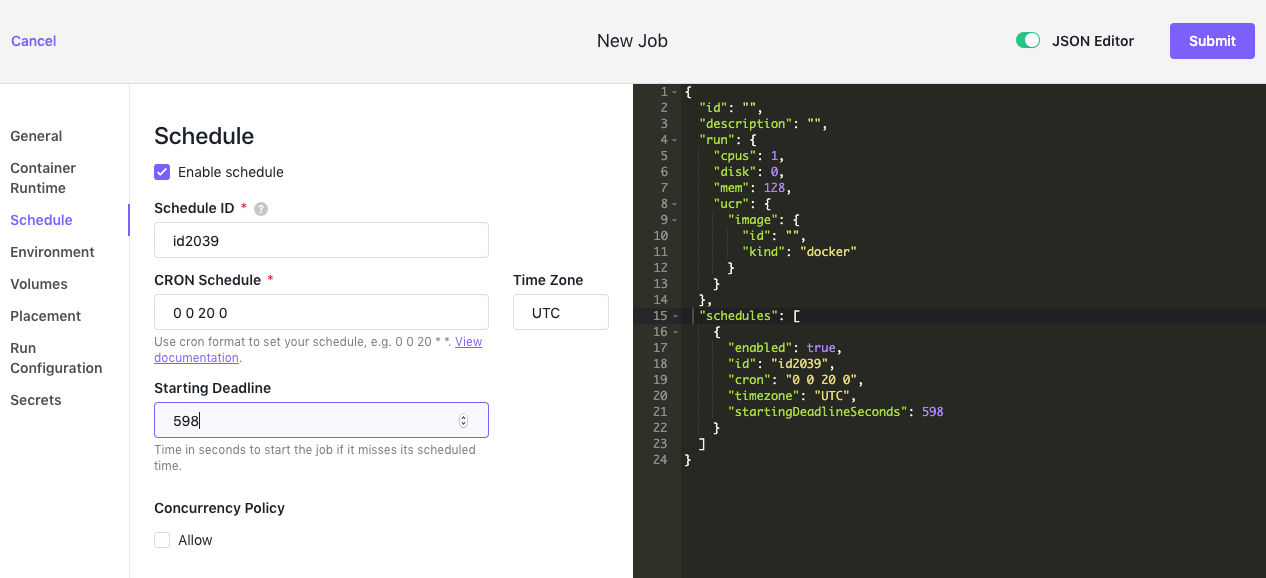
Figure 9 - Jobs > Schedule tab
| Name | Description |
|---|---|
| Enable Schedule | Activates or deactivates the scheduler. |
| Schedule ID | Defines a unique identifier for the job schedule. This is a required field. The schedule identifier must be a string with at least 2 characters and it can only contain digits (0-9), dashes (-), and lowercase letters (a-z). The schedule identifier must not begin or end with a dash. |
| CRON Schedule | Specifies the schedule in cron format. This is a required field. Use this crontab generator for help. You can also set a Time Zone to apply to the cron schedule. For example, you might have nodes in different time zones and want to run the job using a standardized UTC time or a specific local time zone such as America/New_York. |
| Starting Deadline | Sets the time, in seconds, to start the job if it misses its scheduled time for any reason. Missed job executions are counted as failed jobs. |
| Concurrency Policy | A concurrency policy determines whether a new job run instance is triggered if there’s already a job instance running. Set if you want to allow new job instances to run if there’s already a job instance running. |
Environment
Select Environment to configure any environment values to be attached to each instance of your job that is launched.
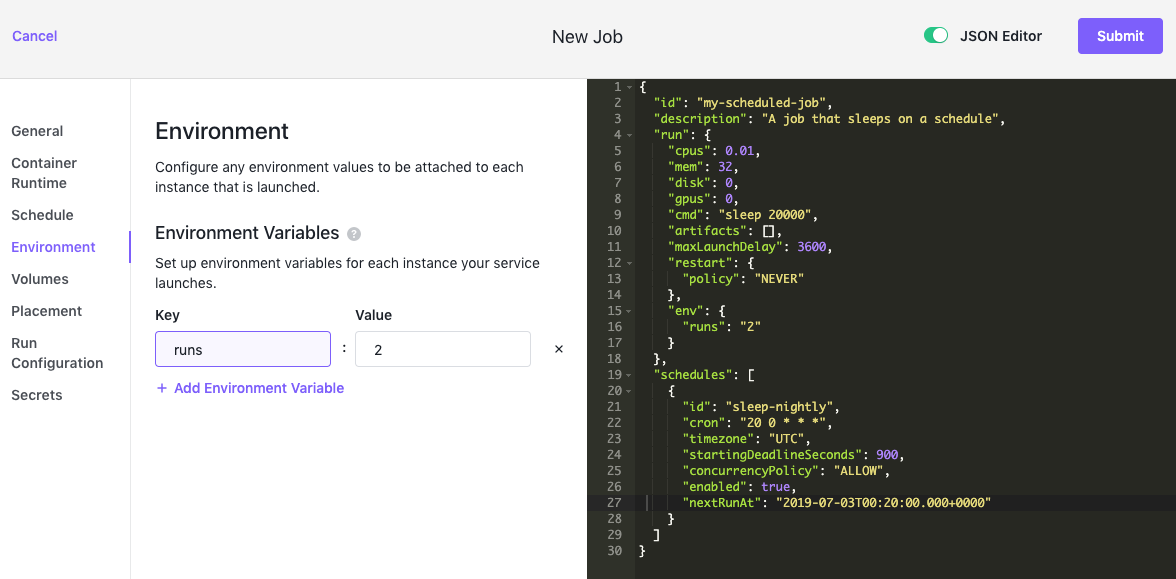
Figure 10 - Jobs > Environment tab
| Name | Description |
|---|---|
| Environment Variables | Sets up environment variables for each instance your service launches. DC/OS exposes environment variables for host ports and metadata. |
| Key | Unique name for an environment value. |
| Value | Value assigned to a key. |
Volumes
Select the Volumes tab to create a stateful job by configuring a persistent volume. Persistent volumes enable instances to be restarted without data loss.
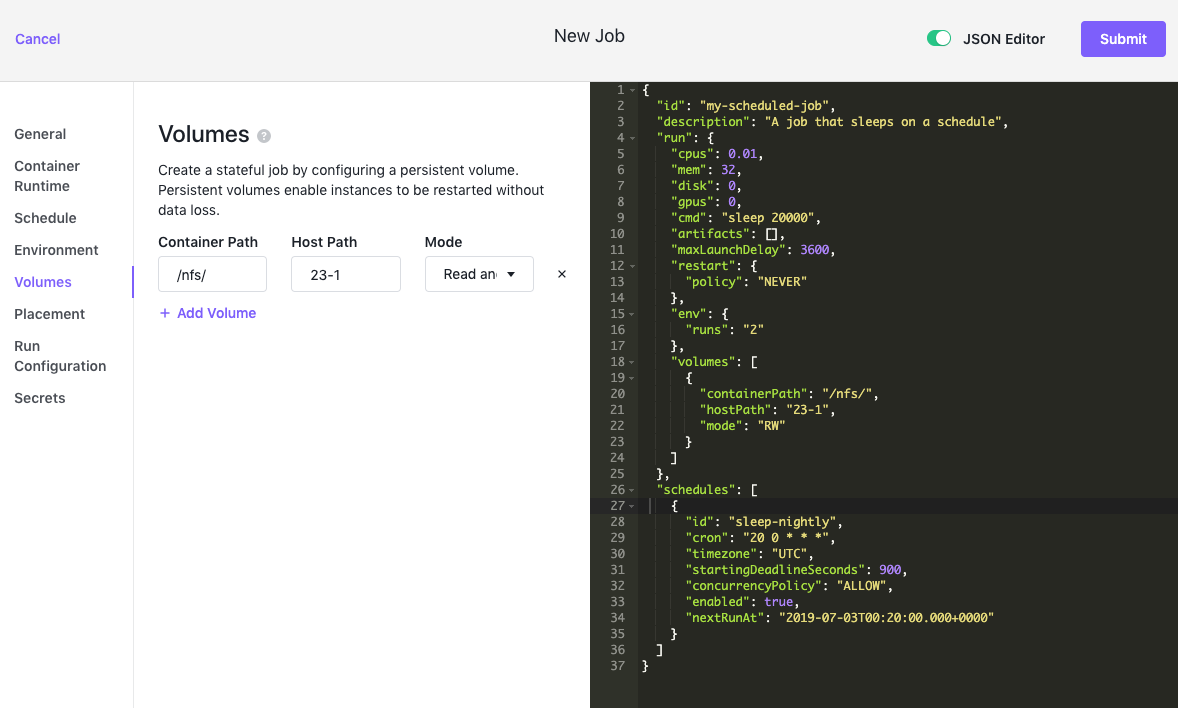
Figure 11 - Jobs > Volumes tab
| Name | Description |
|---|---|
| Add Volume | Sets up the persistent volume. |
| Container Path | The path where your application will read and write data. This must be a single-level path relative to the container; it cannot contain a forward slash (/). |
| Host Path | |
| Mode | Access mode of the volume. You may select Read and Write or Read Only from the drop-down menu. |
For more information, see the Storage documents.
Placement
You can configure the placement of agent nodes in regions and zones for high availability, or to expand capacity to new regions when necessary.
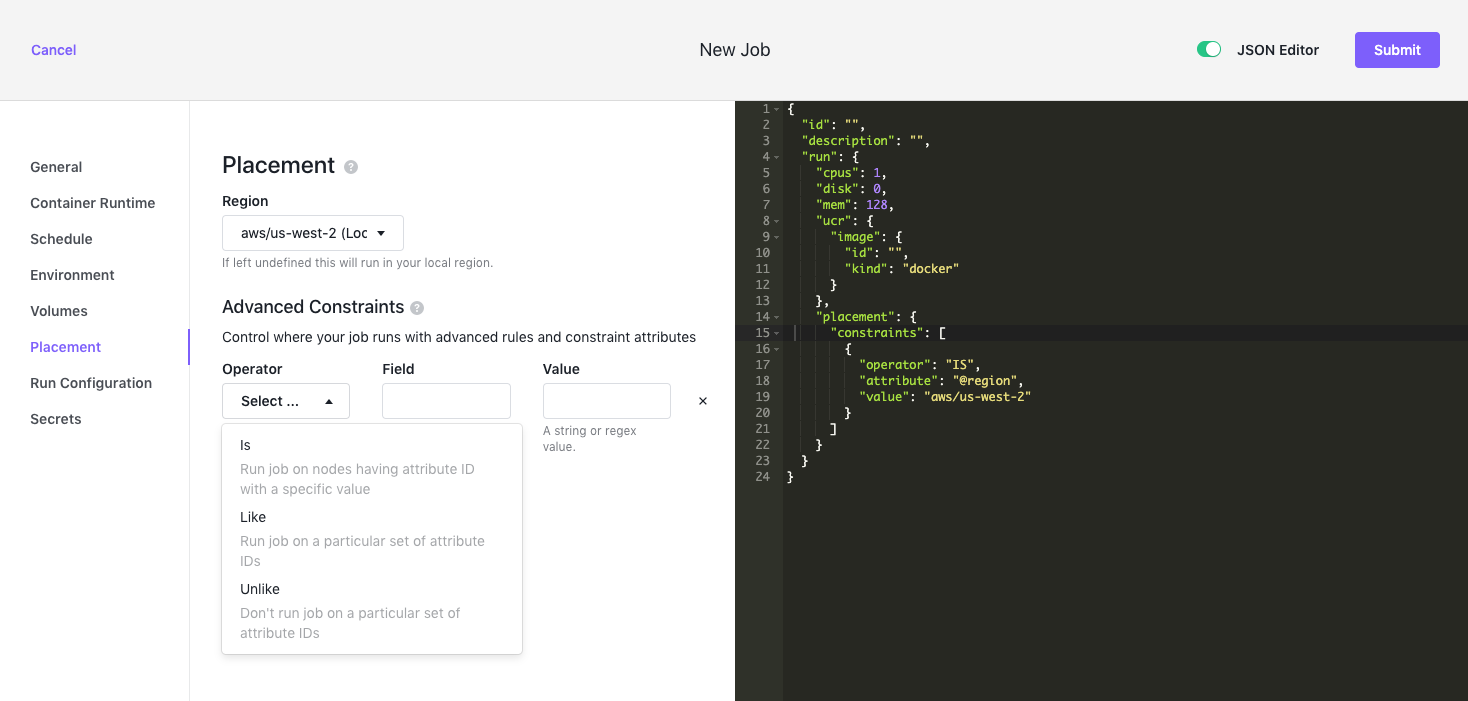
Figure 12 - Jobs > Placement tab
| Name | Description |
|---|---|
| Region | Where you want your agent nodes to run. If you leave this field blank, your job will run in your local region. These values usually correspond to a cloud provider’s zones, such as aws/us-west-2. |
| Advanced Constraints | Control more precisely where your job runs. |
Constraints have three parts:
- An Operator. You have three choices for operators:
- Is - Run job on nodes having attribute IDs with a specific value.
- Like - Run job on a particular set of attribute IDs.
- Unlike - Don’t run job on a particular set of attribute IDs.
- A Field. This can be the hostname of the agent node or any attribute of the agent node.
- A Value. This can be a string or regex value of your choice.|
Run Configuration
Select Run Configuration to specify advanced settings for the new job.
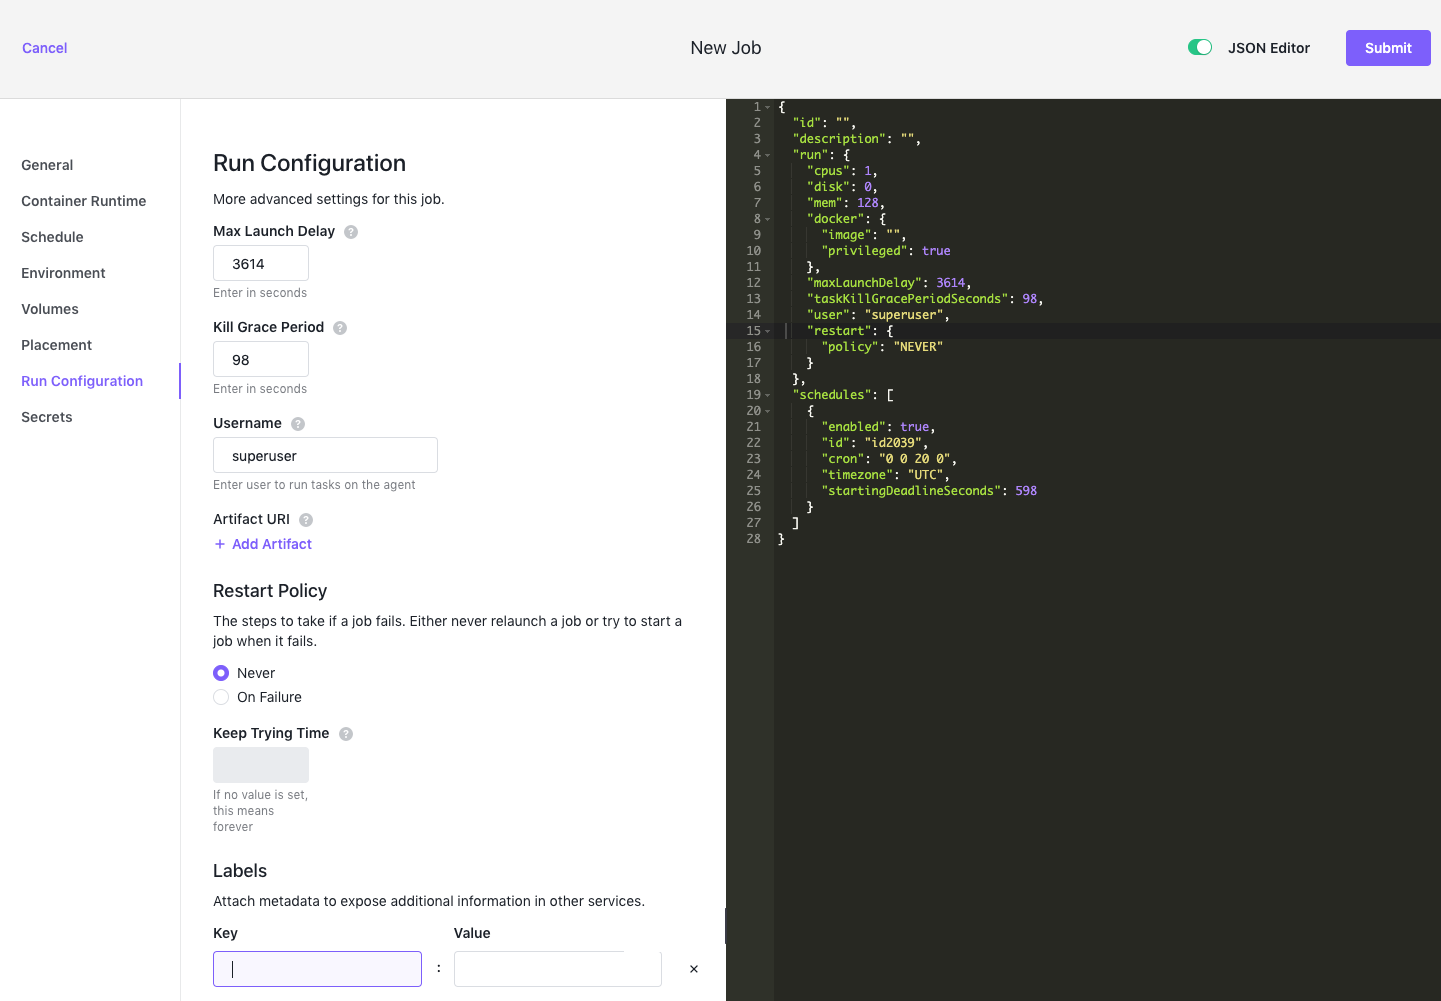
Figure 13 - Jobs > Run Configuration tab
| Name | Description |
|---|---|
| Max Launch Delay | Specifies the maximum number of seconds to wait for a job to start running after it is launched by a scheduled job run or manually by a user. If the job does not start running within the maximum number of seconds allowed, the job is aborted. |
| Kill Grace Period | Specifies the number of seconds between escalating from SIGTERM to SIGKILL when signalling tasks to terminate. During this grace period, tasks should perform an orderly shut down immediately upon receiving SIGTERM. |
| Username | Identifies the user account that runs the tasks on the agent. |
| Artifact URI | Provides one or more artifact URIs you want passed to fetcher module and resolved at runtime and the action–Execute, Extract, or Cache–you want to perform for each URI. |
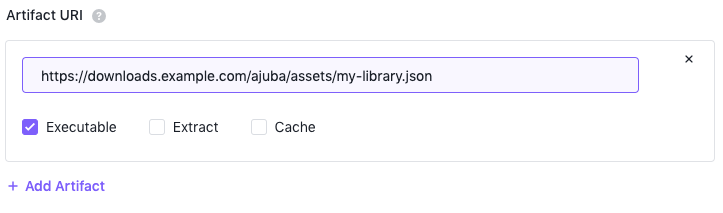
Figure 14 - Add an artifact URI and action
| Name | Description |
|---|---|
| Restart Policy | Specifies the steps to take if a job fails. |
| Never | Choose this if you never want to attempt to restart a failed job. |
| On Failure | Set a time limit for attempting to restart the job using the Keep Trying Time field. For example, set the Keep Trying Time to 30 if you want to try restarting the job after waiting for 30 seconds. If no value is set for Keep Trying Time, DC/OS will continue attempting to restart the failed job indefinitely. |
| Labels | Specifies a Key and Value that you want to attach as metadata to the new job. You can then use the job label to filter or expose information for labeled jobs. You can add multiple label key name/value pairs by clicking Add Label for each name/value pair you want to include. For more information about using labels, see Labeling tasks and jobs. |
Secrets
Select the DC/OS Secret Store to secure important values like private keys, API tokens, and database passwords.
To use a Secret in an application, you must make sure the user has the appropriate permissions. See the Secrets documentation for more information.
Click on Add Secret to add a secret.
Figure 15 - Secrets tab
| Name | Description |
|---|---|
| Secret | Unique values are also allowed for one-time use. |
| Expose As | From the dropdown menu, select Environmental Value or File. |
| Environmental Value | An environmental variable-based secret. |
| Environment Variable Name | Enter the name of an environmental variable. |
Managing jobs with the UI
Detailed instructions for adding, viewing, modifying or removing jobs can be found in the section on Deploying Jobs.