
 DC/OS Documentation
This tutorial shows how to deploy applications on Marathon using Jenkins for DC/OS. This tutorial will walk you through creating a new Jenkins job, publishing a Docker container on source code changes, and deploying those changes to Marathon based on the application definition contained in the project’s marathon.json file.
Prerequisite: This tutorial assumes that you have a working Jenkins installation and permission to launch applications on Marathon. Jenkins for DC/OS must be installed as described on the Jenkins Quickstart page.
The Example Project
The project used in this tutorial is taken from the cd-demo repository and runs a Jekyll website inside a Docker container. The required files for this tutorial are Dockerfile, conf/cd-demo-appn.json, and the site directory. Copy those items to a new project and push to a new Git repository on the host of your choice. This tutorial uses Docker Hub to store the created image and requires account information to perform this task.
Accessing Jenkins for DC/OS
Jenkins for DC/OS can be accessed through the Dashboard or Services navigation menu’s within the DC/OS web interface.
Click the “Jenkins” service and then “Open Service” to access the Jenkins web interface.
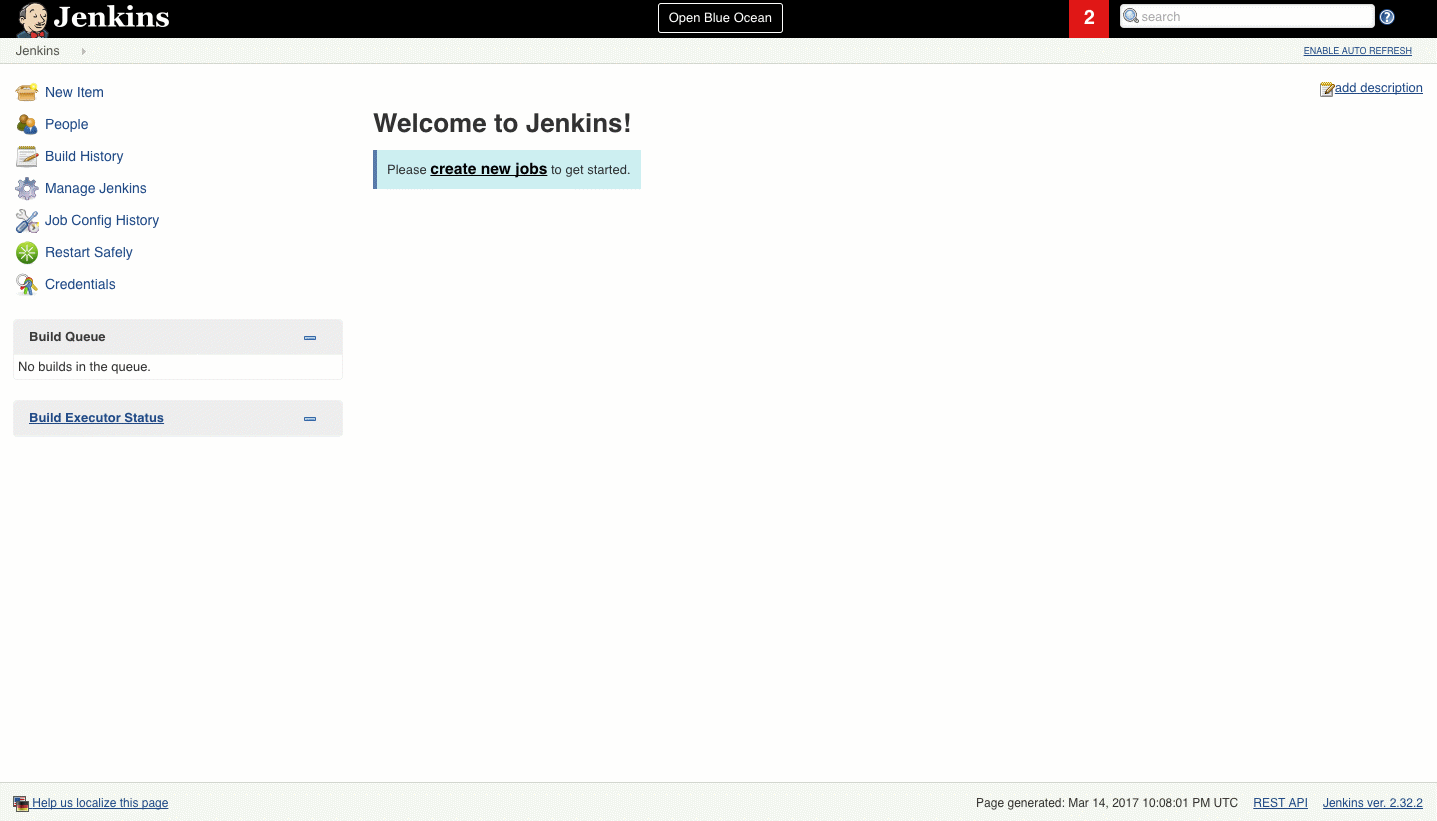
Figure 1. Jenkins web interface
Adding Docker Hub Credentials
Jenkins stores account credentials within its Credential Store, which allows jobs to use credentials in a secure manner. From the main Jenkins page, click Credentials from the left-hand menu. From there, select System (also from the left-hand menu) and finally the Global credentials (unrestricted) link presented in the main viewing area. The left-hand menu should now have an Add Credentials option.
Click Add Credentials to create a new credential for Docker Hub. The Kind drop-down menu should have the “Username with password” option selected. Fill out the rest of the information to match your Docker Hub account.
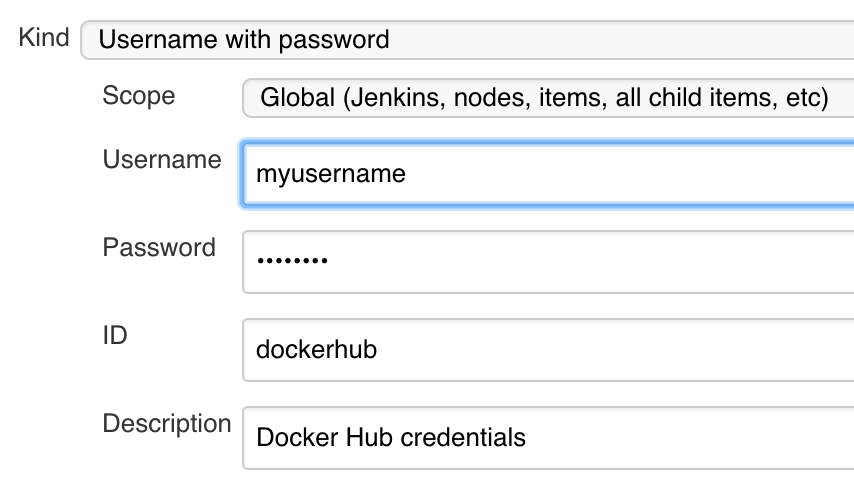
Figure 2. Add Jenkins credentials
The Job
We will create a new Jenkins job that performs several operations with Docker Hub and then either update or create a Marathon application.
Create a new Freestyle job with a name that includes only lowercase letters and hyphens. This name will be used later in the Docker image name and possibly as the Marathon application ID.
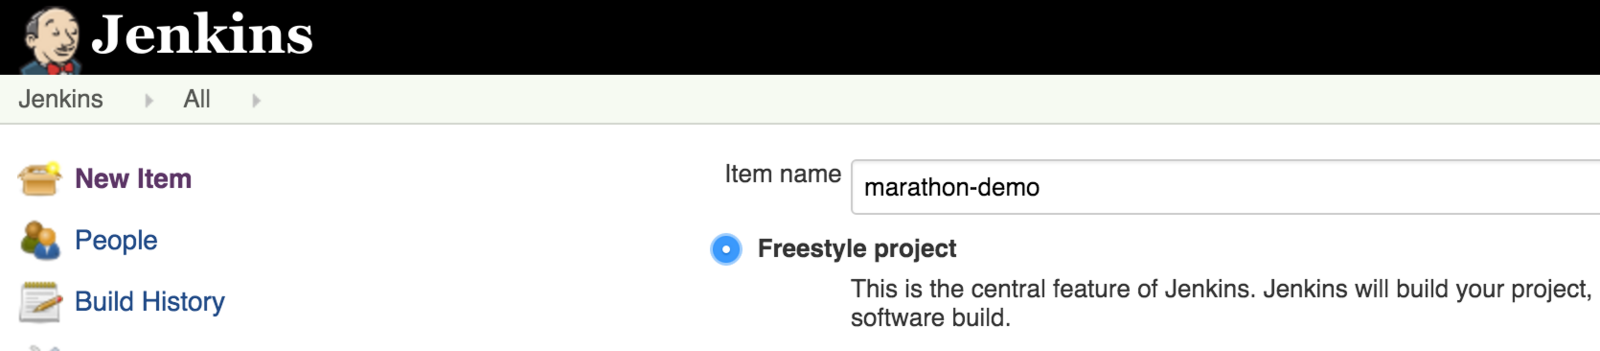
Figure 3. Freestyle project
SCM/Git
From the Example Project section above, fill in the Git repository URL with the newly created Git repository. This must be accessible to Jenkins and may require adding credentials to the Jenkins instance.
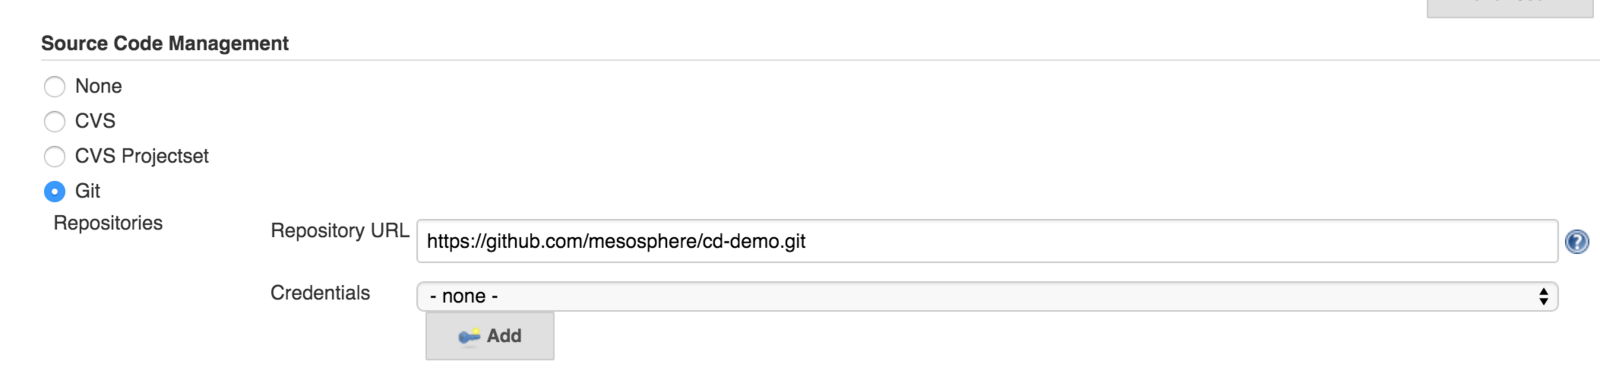
Figure 4. Source Code Management credentials
Build Triggers
Select the Poll SCM build trigger with a schedule of: */5 * * * *. This will check the Git repository every five minutes for changes.
Build Steps
The Jenkins job performs these actions:
- Build a new Docker image.
- Push the new image to Docker Hub.
These steps can be performed by a single build step using the Docker Build and Publish plugin, which is already included and ready for use. From the Add build step drop-down list, select the Docker Build and Publish option.
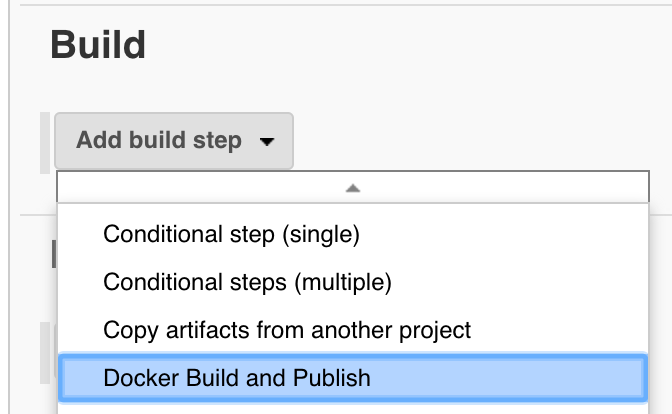
Figure 5. Docker “Add build step” options
Fill in the following fields:
- Repository Name with your Docker Hub username and
/${JOB_NAME}as the suffix (“myusername/${JOB_NAME}”) - Tag with
$ - Registry credentials to the credentials for Docker Hub created above
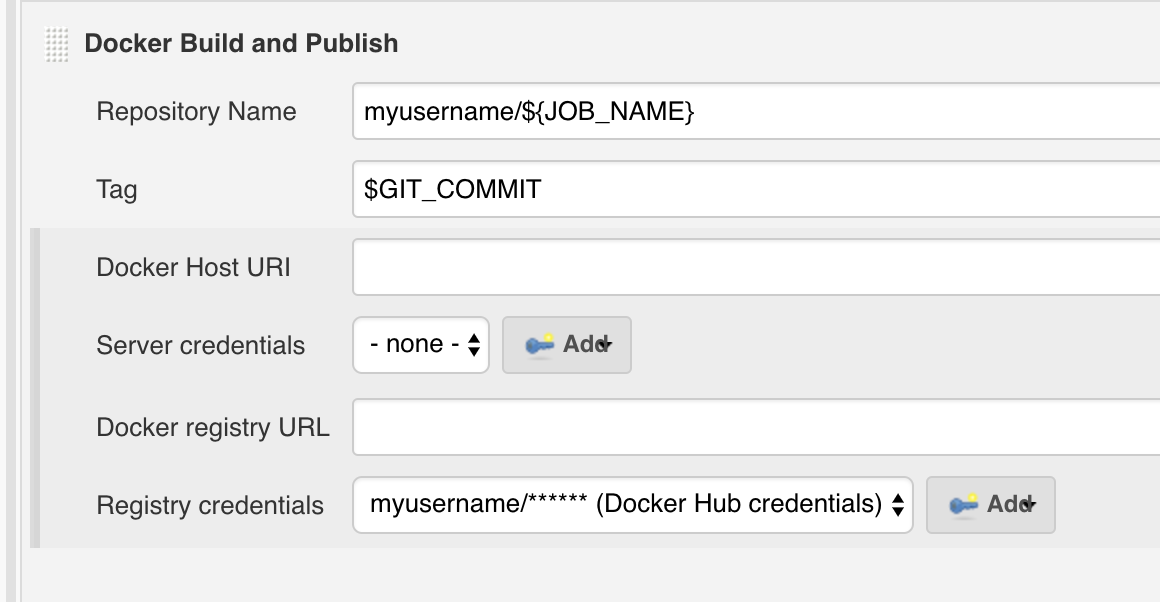
Figure 6. Docker Build and Publish screen
Marathon Deployment
Add a Marathon Deployment post-build action by selecting the Marathon Deployment option from the Add post-build action drop-down.
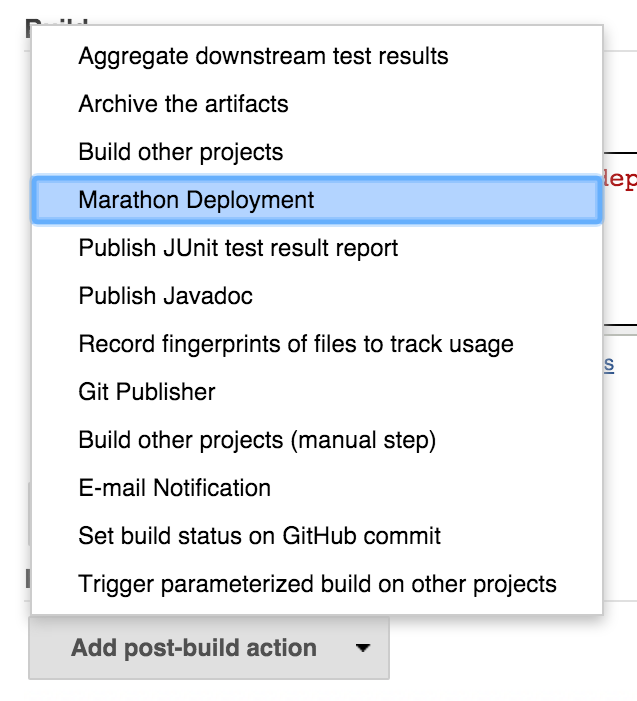
Figure 6. Marathon Deployment menu
Fill in the following fields:
- Marathon URL can be accessed within DC/OS using the URL
http://leader.mesos/service/marathon - Application Definition with the relative path to the marathon application file (
conf/cd-demo-app.json) - Docker Image with the image created above (
myusername/${JOB_NAME}:${GIT_COMMIT})
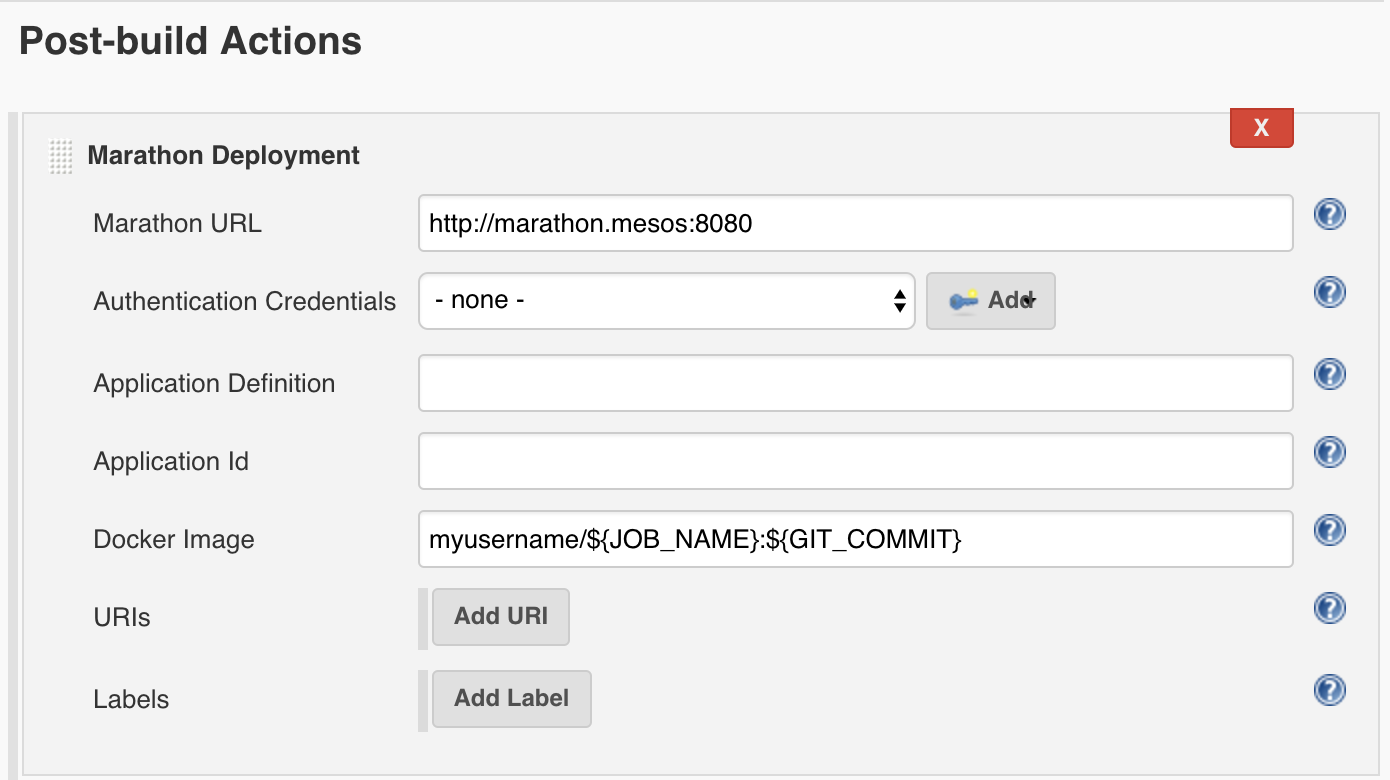
Figure 7. Post-Build Actions screen
How It Works
The Marathon Deployment post-build action reads the application definition file, by default marathon.json, contained within the project’s Git repository. This is a JSON file and must contain a valid Marathon application definition.
The configurable fields in the post-build action will overwrite the content of matching fields from the file. For example, setting the “Application Id” will replace the id field in the file. In the configuration above, “Docker Image” is configured and will overwrite the image field contained within the docker field.
The final JSON payload is sent to the configured Marathon instance and the application is updated or created.
Save
Save the job configuration.
Build It
Click Build Now and let the job build.
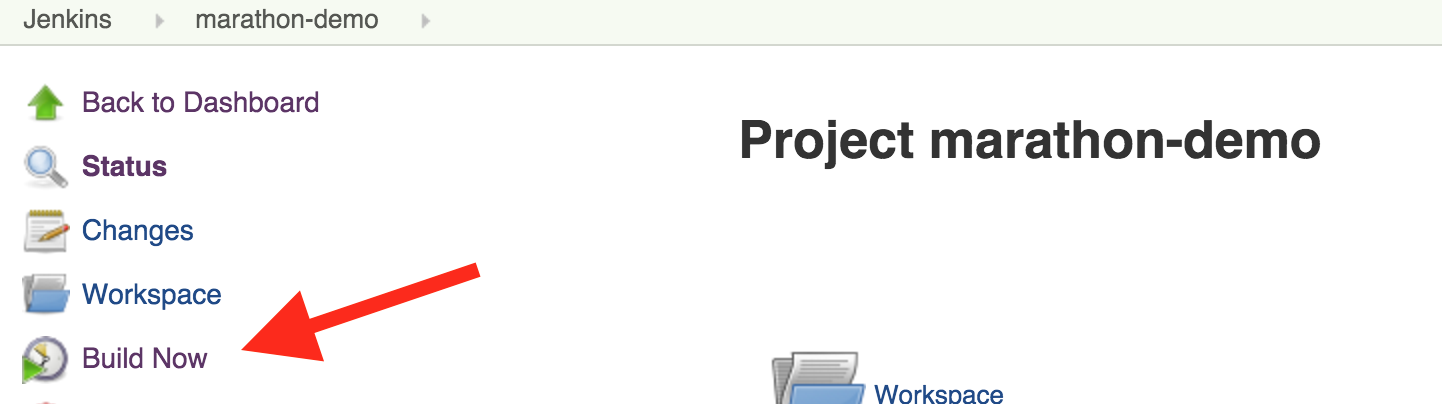
Figure 8. Build the job
Deployment
Upon a successful run in Jenkins, the application will begin deployment on DC/OS. You can visit the DC/OS web interface to monitor progress.
When the Status has changed to Running, the deployment is complete and you can visit the website.
Visit Your Site
Visit port 80 on the public DC/OS agent to display a Jekyll website.
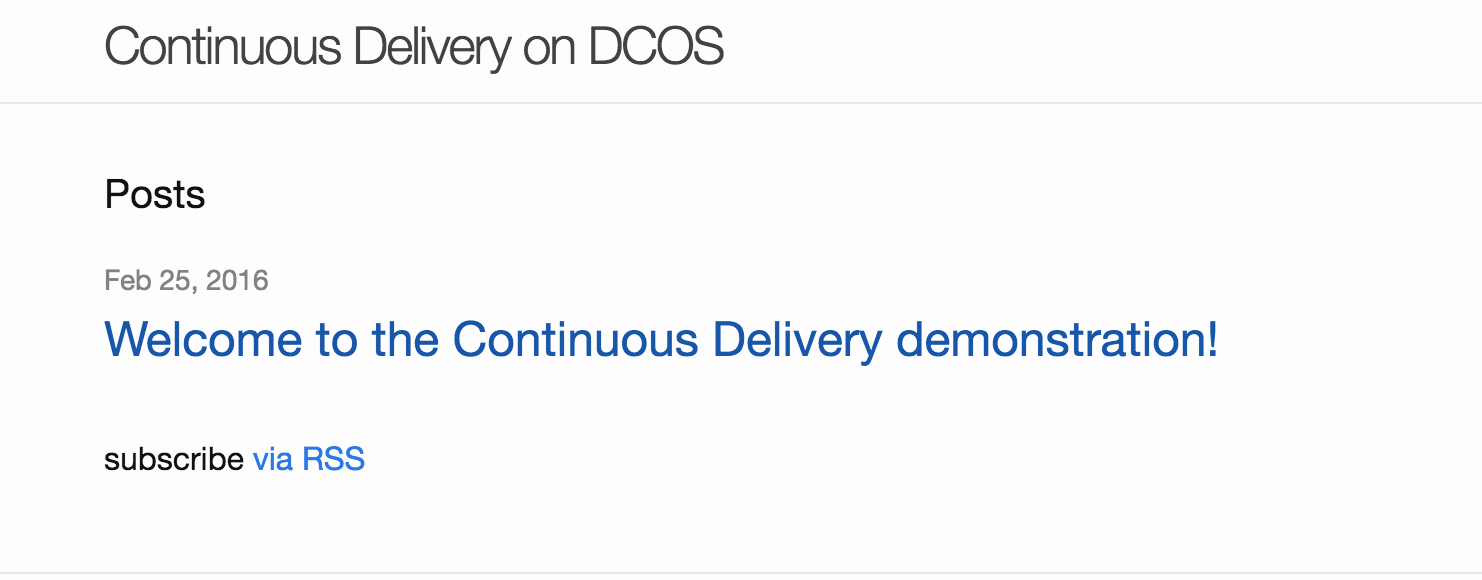
Figure 9. Jekyll demo
Adding a New Post
The content in the _posts directory generates a Jekyll website. For this example project, that directory is site/_posts. Copy an existing post and create a new one with a more recent date in the filename. I added a post entitled “An Update”.
Commit the new post to Git. Shortly after the new commit lands on the master branch, Jenkins will see the change and redeploy to Marathon.
