
 DC/OS Documentation
In the previous tutorial, you deployed a sample application with a predefined app definition and Docker container file. This tutorial shows how to create and deploy sample applications that have not been predefined.
In this tutorial, you get hands-on experience:
- creating a simple one-command service
- creating a containerized service
The tutorial demonstrates how you can complete these tasks by using the DC/OS web-based administrative console or by running command-line programs.
Before you begin
Before starting this tutorial, you should verify the following:
- You must be able to access a properly-configured and running DC/OS cluster.
- You must have the DC/OS command-line interface installed.
Learning objectives
By completing this tutorial, you will learn:
- How to use the DC/OS web-based console to create and deploy a single-command service.
- How to use the DC/OS command-line interface (CLI) to create and deploy a single-command service.
- How to use the DC/OS web-based console to create and deploy a containerized service.
- How to use the DC/OS command-line interface (CLI) to create and deploy a containerized service.
Create a single command service
You can create and deploy a simple single-command service using the DC/OS web-based administrative console or by running command-line programs.
Using the DC/OS web-based console
-
Open a web browser and navigate to the URL for the DC/OS web-based administrative console.
-
Click Services, then click Run a Service.
-
Click Single Container.
-
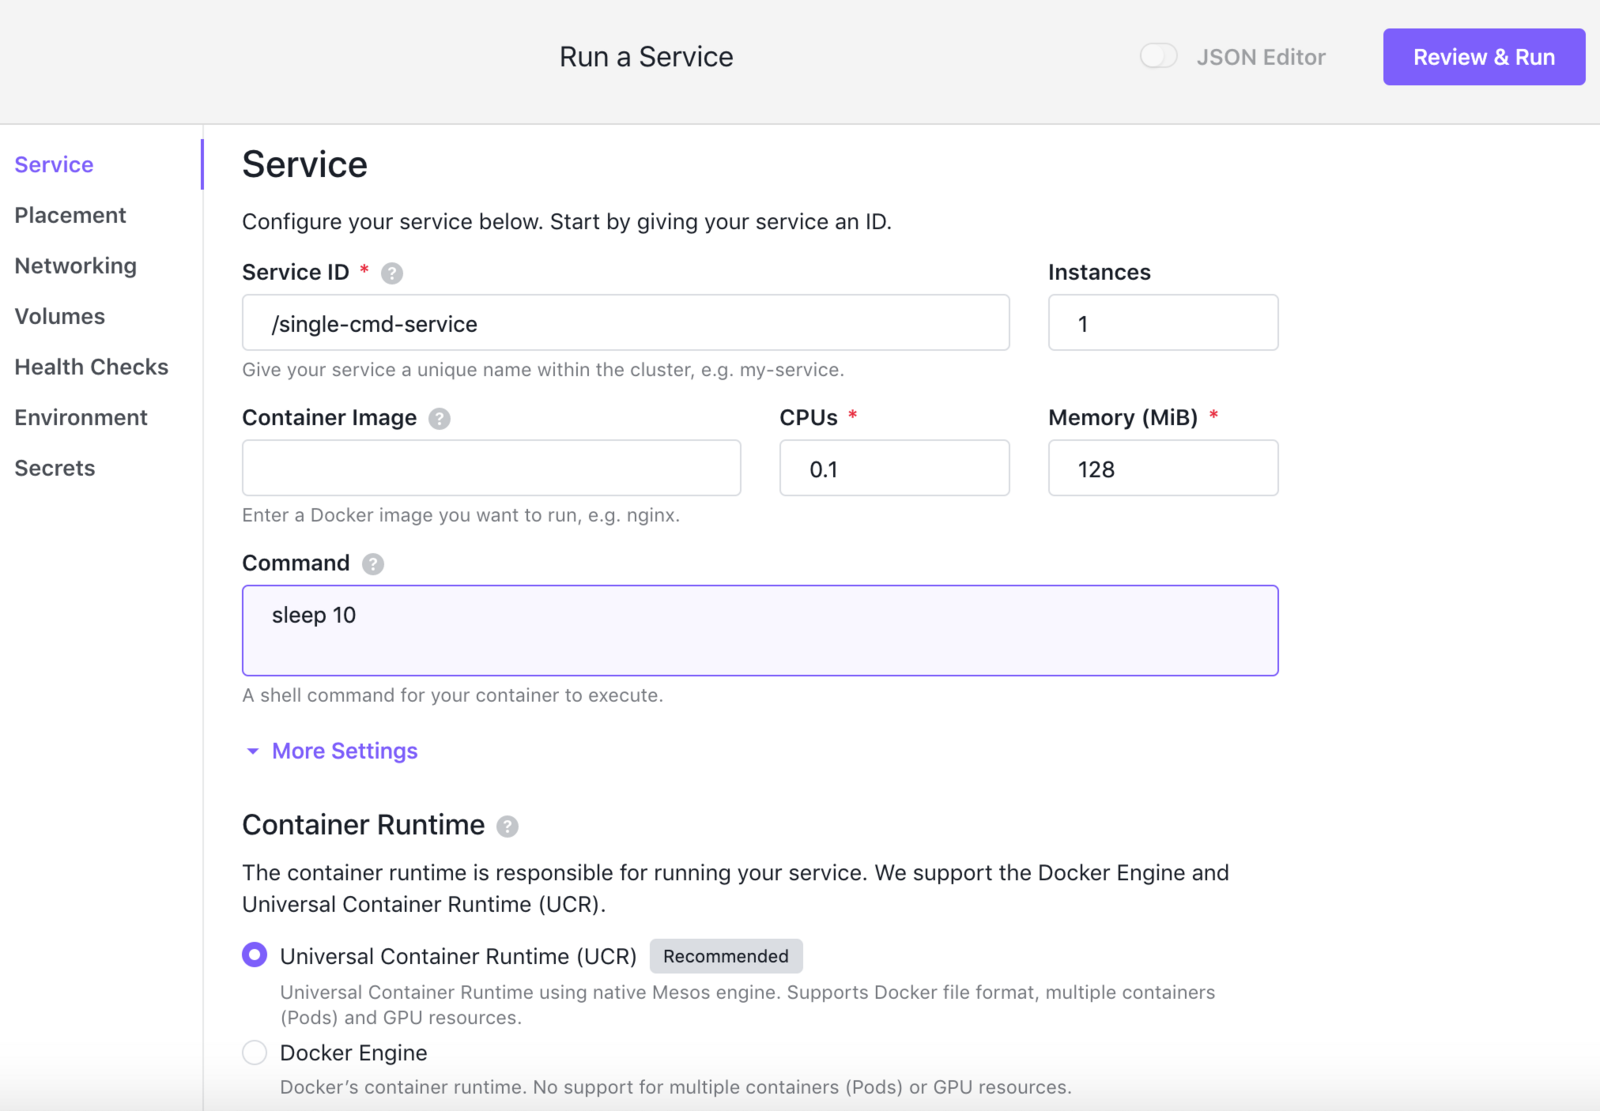
Type a name for your service in the Service ID field.
For example, type
single-cmd-servicefor the service identifier.You can use the default values for the number of instances, CPUs, and memory and leave the Container Image field blank.
-
For the Command field, enter
sleep 10 && echo DONE. -
Click More Settings, then select Universal Container Runtime (UCR) to use the native DC/OS container runtime.
The Universal Container Runtime (UCR) supports Docker files, multiple containers (pods), and using GPU resources. If you select this option, you can optionally specify a Docker container image.
You should only select the Docker Engine option if you need Docker-specific features. If you select this option, you must specify a Docker container image in the Container Image field.
For this tutorial, you can leave the Advanced settings undefined.
-
Click Review & Run, then click Run Service.
-
Click the name of your service in the Services view to see it running and monitor its health.

Using the DC/OS CLI
You can also create and run single-command services using the DC/OS CLI.
-
Open a terminal shell on the computer where you have access to the DC/OS command-line interface (CLI).
-
Open a new file in a text editor to create a JSON file called
single-cmd-app-cli.json. -
Copy and paste the following sample content into the
single-cmd-app-cli.jsonfile:{ "id": "/single-cmd-app-cli", "cmd": "sleep 10", "instances": 1, "cpus": 1, "mem": 128, "portDefinitions": [ { "protocol": "tcp", "port": 10000 } ], "requirePorts": false } -
Start the single-command service by running the following command:
dcos marathon app add single-cmd-app-cli.json -
Verify the single-command service has been successfully deployed by running the following command:
dcos marathon app listThe command returns information similar to the following about the services you have deployed.
ID                   MEM  CPUS  TASKS  HEALTH  DEPLOYMENT  WAITING  CONTAINER  CMD
/single-cmd-app-cli  128   1     0/1    N/A       ---      False       N/A     sleep 10
/single-cmd-service  128  0.1    0/1    N/A       ---      False      MESOS    sleep 10 && echo Done
As this sample output illustrates, you can verify that both the single-command service you created using the DC/OS web-based console and the one you deployed using a JSON file and CLI commands are running. You can also view both services by clicking Services in the DC/OS web-based console.

Create a simple containerized service
You can create and deploy containerized services using the DC/OS web-based administrative console or by running command-line programs.
This exercise uses a sample containerized, long-running task that is available from the Mesosphere Docker Hub repository.
Using the DC/OS web-based console
-
Open a web browser and navigate to
hello-dcoson the [Mesosphere Docker Hub repository and copy the latest image tag. -
Open a web browser and navigate to URL for the DC/OS web-based administrative console.
-
Click Services, then click Run a Service.
-
Click Single Container.
-
Type a name for your service in the Service ID field.
For example, type
container-hello-dcos-servicefor the service identifier. -
Type the container path and image tag in the Container Image field.
For example, type
mesosphere/hello-dcos:1.0where 1.0 is the<image-tag>you copied from to thehello-dcospage.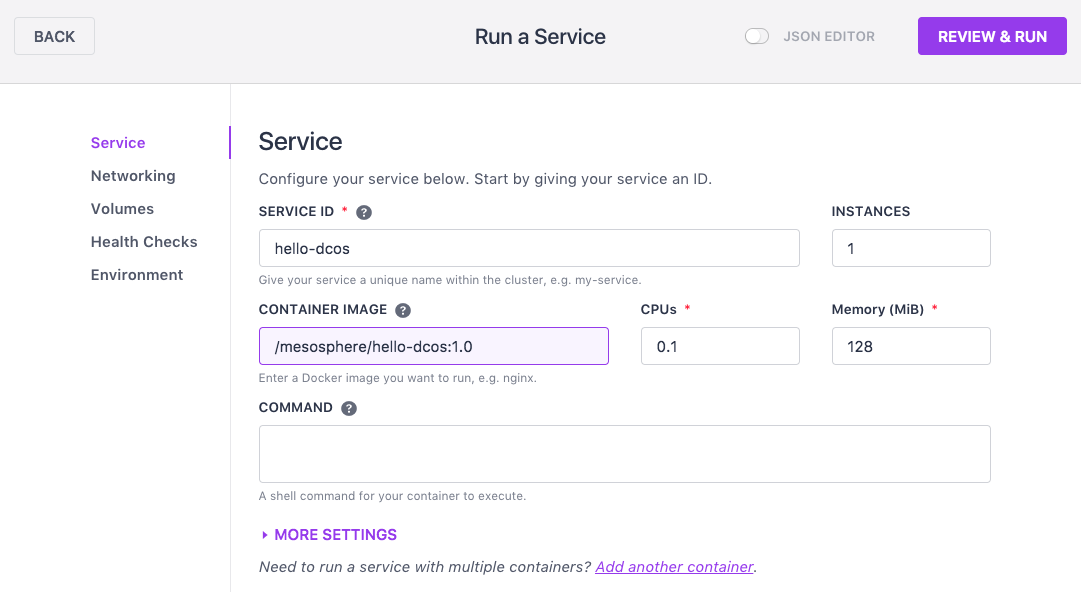
-
Click Review & Run, then click Run Service.
-
Click the name of your service in the Services view to see it running and monitor its health.

-
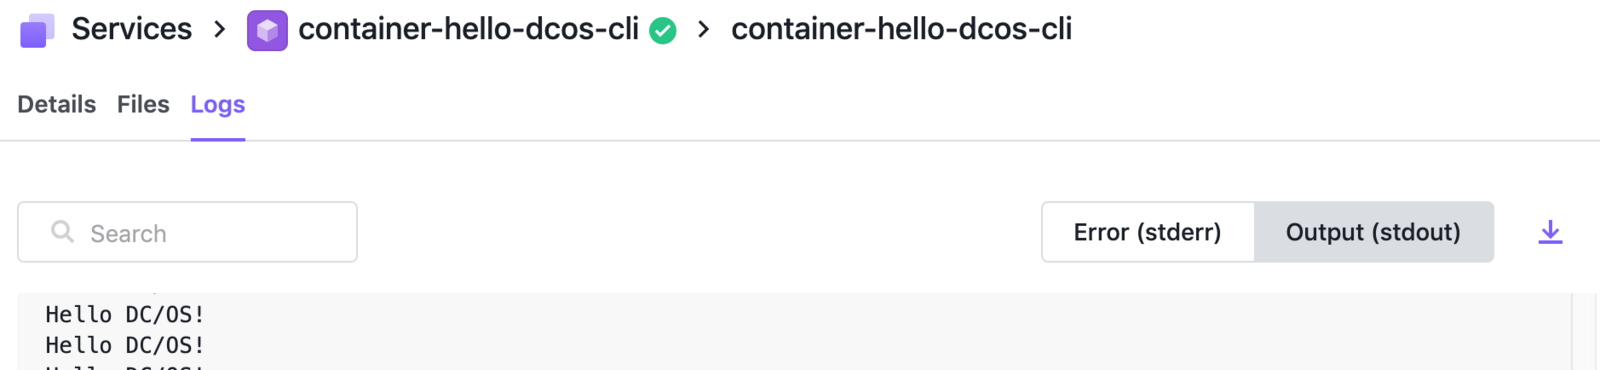
Click the name of the containerized service, then choose one task instance to view the task Details, Files, and Logs.
-
Click Logs, then click Error (stderr) and Output (stdout) to see the logged messages and output for the containerized service.

Using the DC/OS CLI
-
Open a web browser and navigate to
hello-dcoson the [Mesosphere Docker Hub repository and copy the latest image tag. -
Open a terminal shell on the computer where you have access to the DC/OS command-line interface (CLI).
-
Open a new file in a text editor to create a JSON file called
container-app-cli.json. -
Copy and paste the following sample content into the
container-app-cli.jsonfile, replacing<image-tag>with the tag you copied in step 1.{ "id": "/container-hello-dcos-cli", "instances": 1, "cpus": 1, "mem": 128, "container": { "type": "DOCKER", "docker": { "image": "mesosphere/hello-dcos:<image-tag>", "forcePullImage": false, "privileged": false } }, "acceptedResourceRoles": ["slave_public"], "portDefinitions": [ { "protocol": "tcp", "port": 10001 } ], "requirePorts": false } -
Start the service by running the following command:
dcos marathon app add container-app-cli.json -
Verify the containerized service has been successfully deployed by running the following command:
dcos marathon app listThe command returns information similar to the following about the services you have deployed.
ID MEM CPUS TASKS HEALTH DEPLOYMENT WAITING CONTAINER CMD /container-hello-dcos-cli 128 1 1/1 N/A --- False DOCKER N/A /container-hello-dcos-service 128 0.1 1/1 N/A --- False DOCKER N/A /dcos-101/app1 128 1 1/1 N/A --- False DOCKER while true; do python... /redis-tutorial 1024 1 1/1 1/1 --- False DOCKER N/A /single-cmd-app-cli 128 1 0/1 N/A --- False N/A sleep 10 /single-cmd-service 128 0.1 0/1 N/A --- False MESOS sleep 10 && echo DONE -
Open the DC/OS web-based administrative console, click Services, then click the name of the service to display its details.
-
Click Logs, then click Output (stdout) view to see the output of the service.
Next steps
In this tutorial, you deployed some simple custom apps using both the DC/OS web-based administrative console and using DC/OS command-line programs. You have now seen how to add apps to the cluster without using a container image, using the native Universal Container runtime, and using a Docker container image and have verified that all of the custom apps are running on the cluster.
The next tutorials explore more advanced deployment scenarios and tasks and expose some additional core components of the DC/OS architecture:
Related topics
In this tutorial, you deployed custom apps using single containers and the Marathon orchestration framework.
For more information about Universal Containerizer Runtime (UCR) and working with Docker containers and images, see Using Containerizers.