
 DC/OS Documentation
You can create and extend DC/OS clusters with AWS CloudFormation templates. The advanced templates are:
- Highly customizable
- Composable; for example, you can deploy multiple agent pools to a single cluster
- Complicated; more setup work is required
The advanced AWS CloudFormation templates bring power and flexibility to creating and extending DC/OS clusters. With these templates you can choose from the complete set of DC/OS configuration options.
- Instantiate a complete DC/OS cluster on an existing VPC/Subnet combination.
- Extend and update existing DC/OS clusters by adding more agent nodes.
The templates are used together to create a DC/OS cluster. The templates are driven by parameters that AWS CloudFormation uses to create each stack.
| Important: Upgrades are not supported with this installation method. |
Prerequisites
Hardware
You must have an AWS EC2 m3.xlarge instance. Selecting smaller-sized VMs is not recommended, and selecting fewer VMs will likely cause certain resource-intensive services, such as distributed datastores, to work improperly.
Software
- The
dcos_generate_configfile:- Enterprise users should use the dcos_generate_config file. Contact your sales representative or sales@mesosphere.com to access the config file. Enterprise
- Open Source users should use the dcos_generate_config file. Open Source
- An Amazon Web Services account with root IAM privileges. Advanced privileges are required to install the advanced templates. Contact your AWS administrator for more information.
- An AWS EC2 Key Pair for the same region as your cluster. Key pairs cannot be shared across regions. The AWS key pair uses public-key cryptography to provide secure login to your AWS cluster. For more information about creating an AWS EC2 Key Pair, see the documentation.
- AWS Command Line Interface.
- The CLI JSON processor jq.
- A node that meets the bootstrap node system requirements.
- An AWS S3 bucket with read-write access.
-
The S3 bucket must have a bucket policy that allows the launched AWS instances to download the files from the s3 bucket. Here is a sample policy that allows anyone to download:
{
  "Version":"2012-10-17",
  "Statement":[
    {
      "Sid":"AddPerm",
      "Effect":"Allow",
      "Principal": "*",
      "Action":["s3:GetObject"],
      "Resource":["arn:aws:s3:::<bucket_name>/<bucket_path>/*"]
    }
  ]
}
-
For more information about s3 bucket policies, see the AWS Documentation.
Create your templates
-
Create a directory named
genconfin the home directory of your node and navigate to it.mkdir -p genconf -
Create a configuration file in the
genconfdirectory and save asconfig.yaml. This configuration file specifies your AWS credentials and the S3 location to store the generated artifacts.
The required parameters for Enterprise and Open Source users are:
Enterprise
aws_template_storage_bucket: <your-bucket>
aws_template_storage_bucket_path: <path-to-directory>
aws_template_upload: true
aws_template_storage_access_key_id: <your-access-key-id>
aws_template_storage_secret_access_key: <your-secret-access_key>
cluster_name: <cluster-name>
security: [permissive|strict]
superuser_password_hash: <hashed-password>
superuser_username: <username>
zk_super_credentials: <userid>:<password>
zk_master_credentials: <userid>:<password>
zk_agent_credentials: <userid>:<password>
Open Source
aws_template_storage_bucket: <your-bucket>
aws_template_storage_bucket_path: <path-to-directory>
aws_template_upload: true
aws_template_storage_access_key_id: <your-access-key-id>
aws_template_storage_secret_access_key: <your-secret-access_key>
For parameters descriptions and configuration examples, see the documentation.
- Run the DC/OS installer script with the AWS argument specified. This command creates and uploads a custom build of the DC/OS artifacts and templates to the specified S3 bucket.
Enterprise
sudo bash dcos_generate_config.ee.sh --aws-cloudformation
Open Source
sudo bash dcos_generate_config.sh --aws-cloudformation
The root URL for this bucket location is at the end of this step. You should see a message like this:
AWS CloudFormation templates now available at: https://<amazon-web-endpoint>/<path-to-directory>
-
Go to S3 and navigate to your S3 bucket shown above in
<path-to-directory>.- Select cloudformation and then select the zen template for the number of desired masters. For example, select el7-zen-1.json for a single master configuration.
- Right-click and select Properties, and then copy the AWS S3 template URL.
-
Go to CloudFormation and click Create Stack.
-
On the Select Template page, specify the AWS S3 template URL path to your Zen template. For example:
https://s3-us-west-2.amazonaws.com/user-aws/templates/config_id/14222z9104081387447be59e178438749d154w3g/cloudformation/ee.el7-zen-1.json
Create your template dependencies
Use the zen.sh script to create the template dependencies. These dependencies will be used as input to create your stack in CloudFormation.
-
Save this script as
zen.sh#!/bin/bash export AWS_DEFAULT_OUTPUT="json" set -o errexit -o nounset -o pipefail if [ -z "${1:-}" ] then echo Usage: $(basename "$0") STACK_NAME exit 1 fi STACK_NAME="$1" VPC_CIDR=10.0.0.0/16 PRIVATE_SUBNET_CIDR=10.0.0.0/17 PUBLIC_SUBNET_CIDR=10.0.128.0/20 echo "Creating Zen Template Dependencies" vpc=$(aws ec2 create-vpc --cidr-block "$VPC_CIDR" --instance-tenancy default | jq -r .Vpc.VpcId) aws ec2 wait vpc-available --vpc-ids "$vpc" aws ec2 create-tags --resources "$vpc" --tags Key=Name,Value="$STACK_NAME" echo "VpcId: $vpc" ig=$(aws ec2 create-internet-gateway | jq -r .InternetGateway.InternetGatewayId) aws ec2 attach-internet-gateway --internet-gateway-id "$ig" --vpc-id "$vpc" aws ec2 create-tags --resources "$ig" --tags Key=Name,Value="$STACK_NAME" echo "InternetGatewayId: $ig" private_subnet=$(aws ec2 create-subnet --vpc-id "$vpc" --cidr-block "$PRIVATE_SUBNET_CIDR" | jq -r .Subnet.SubnetId) aws ec2 wait subnet-available --subnet-ids "$private_subnet" aws ec2 create-tags --resources "$private_subnet" --tags Key=Name,Value="${STACK_NAME}-private" echo "Private SubnetId: $private_subnet" public_subnet=$(aws ec2 create-subnet --vpc-id "$vpc" --cidr-block "$PUBLIC_SUBNET_CIDR" | jq -r .Subnet.SubnetId) aws ec2 wait subnet-available --subnet-ids "$public_subnet" aws ec2 create-tags --resources "$public_subnet" --tags Key=Name,Value="${STACK_NAME}-public" echo "Public SubnetId: $public_subnet" -
Run the
zen.shscript with an optional tag value for your specified DC/OS stack (STACK_NAME), or use the defaultdcos. This value will be used to tag your DC/OS cluster in AWS.bash ./zen.sh <STACK_NAME>The output should look like this:
Creating Zen Template Dependencies
VpcId: vpc-e0bd2c84
InternetGatewayID: igw-38071a5d
Private SubnetId: subnet-b32c82c5
Public SubnetId: subnet-b02c55c4
Use these dependency values as input to create your stack in CloudFormation in the next steps.
Launch the templates on CloudFormation
- Go to CloudFormation and click Create Stack.
- On the Select Template page, upload the Zen template from your workstation and click Next.
Template examples:
-
https://s3-us-west-2.amazonaws.com/dcos/templates/dcos/config_id/6a7451f6dec/cloudformation/ee.el7-zen-1.jsonEnterprise -
https://s3-us-west-2.amazonaws.com/dcos/templates/dcos/config_id/6a7451f6dec/cloudformation/el7-zen-1.jsonOpen Source
-
On the Specify Details page, specify these values and and click Next.

Figure 1. AWS Advanced web interface
- Stack name Specify the cluster name.
- CustomAMI Optional: Specify the AMI ID. For more information, see Installing using a Custom AMI.
- InternetGateway Specify the
InternetGatewayIDoutput value from thezen.shscript. The Internet Gateway ID must be attached to the VPC. This Internet Gateway will be used by all nodes for outgoing internet access. - KeyName Specify your AWS EC2 Key Pair.
- MasterInstanceType Specify the AWS EC2 instance type. The m3.xlarge instance type is recommended.
- PrivateAgentInstanceCount Specify the number of private agents.
- PrivateAgentInstanceType Specify the AWS EC2 instance type for the private agent nodes. The m3.xlarge instance type is recommended.
- PrivateSubnet Specify the
Private SubnetIdoutput value from thezen.shscript. This subnet ID will be used by all private agents. - PublicAgentInstanceCount Specify the number of public agents.
- PublicAgentInstanceType Specify the AWS EC2 instance type for the public agent nodes. The m3.xlarge instance type is recommended.
- PublicSubnet Specify the
Public SubnetIdoutput value from thezen.shscript. This subnet ID will be used by all public agents. - Vpc Specify the
VpcIdoutput value from thezen.shscript. All nodes will be launched by using subnets and Internet Gateway under this VPC.
-
On the Options page, accept the defaults and click Next.
Note: You can choose whether to roll back on failure. By default this option is set to Yes.
-
On the Review page, check the acknowledgement box and then click Create.
Note: If the Create New Stack page is shown, either AWS is still processing your request or you are looking at a different region. Navigate to the correct region and refresh the page to see your stack.
Monitor the DC/OS cluster convergence process
In CloudFormation you should see that:
-
The cluster stack spins up over a period of 15 to 20 minutes. You will have a stack created for each of these, where
<stack-name>is the value you specified for Stack name and<stack-id>is an auto-generated ID.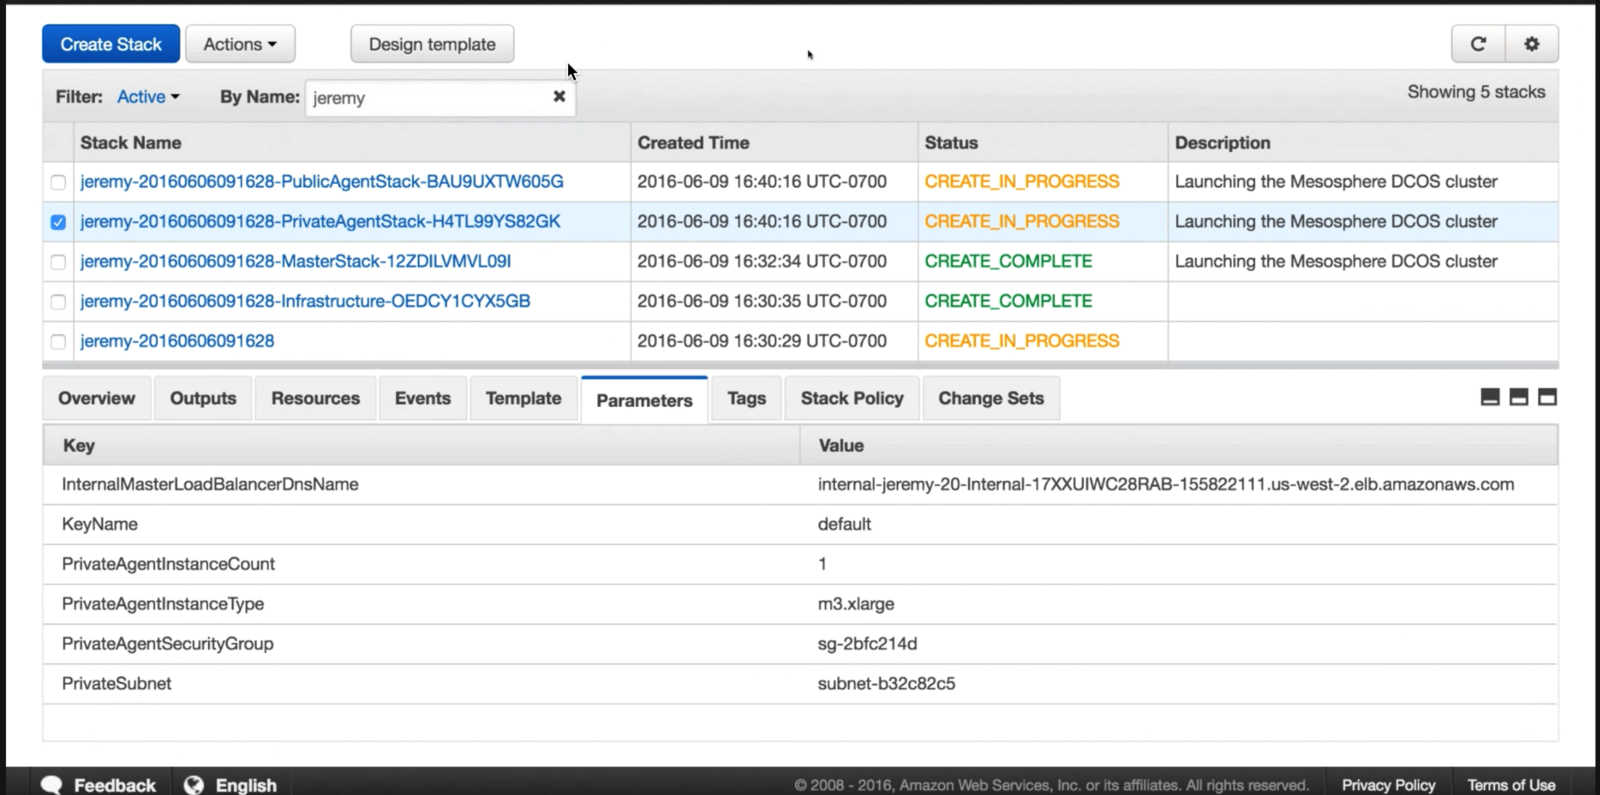
Figure 2. AWS Stack details
- Zen template:
<stack-name> - Public agents:
<stack-name>-PublicAgentStack-<stack-id> - Private agents:
<stack-name>-PrivateAgentStack-<stack-id> - Masters:
<stack-name>-MasterStack-<stack-id> - Infrastructure:
<stack-name>-Infrastructure-<stack-id>
- Zen template:
-
The status changes from
CREATE_IN_PROGRESStoCREATE_COMPLETE.
| Important: A ROLLBACK_COMPLETE status means the deployment has failed. See the Events tab for useful information about failures. |
Launch DC/OS
You can launch the DC/OS web interface by entering the master hostname. Follow these instructions to find our Mesos Master hostname.
-
From the AWS CloudFormation Management page, click to check the box next to your stack.
-
Click on the Outputs tab and copy/paste the Mesos Master hostname into your browser to open the DC/OS web interface. The interface runs on the standard HTTP port 80, so you do not need to specify a port number after the hostname.
Note: You might need to resize your window to see this tab. You can find your DC/OS hostname any time from the AWS CloudFormation Management page.
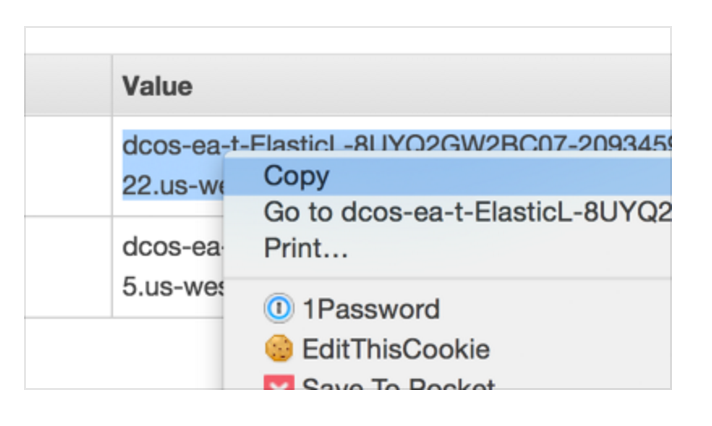
Figure 3. Mesos master hostname
-
Click Log In To DC/OS.
Important: After clicking "Log In To DC/OS", your browser may show a warning that your connection is not secure. This is because DC/OS uses self-signed certificates. You can ignore this error and click to proceed. 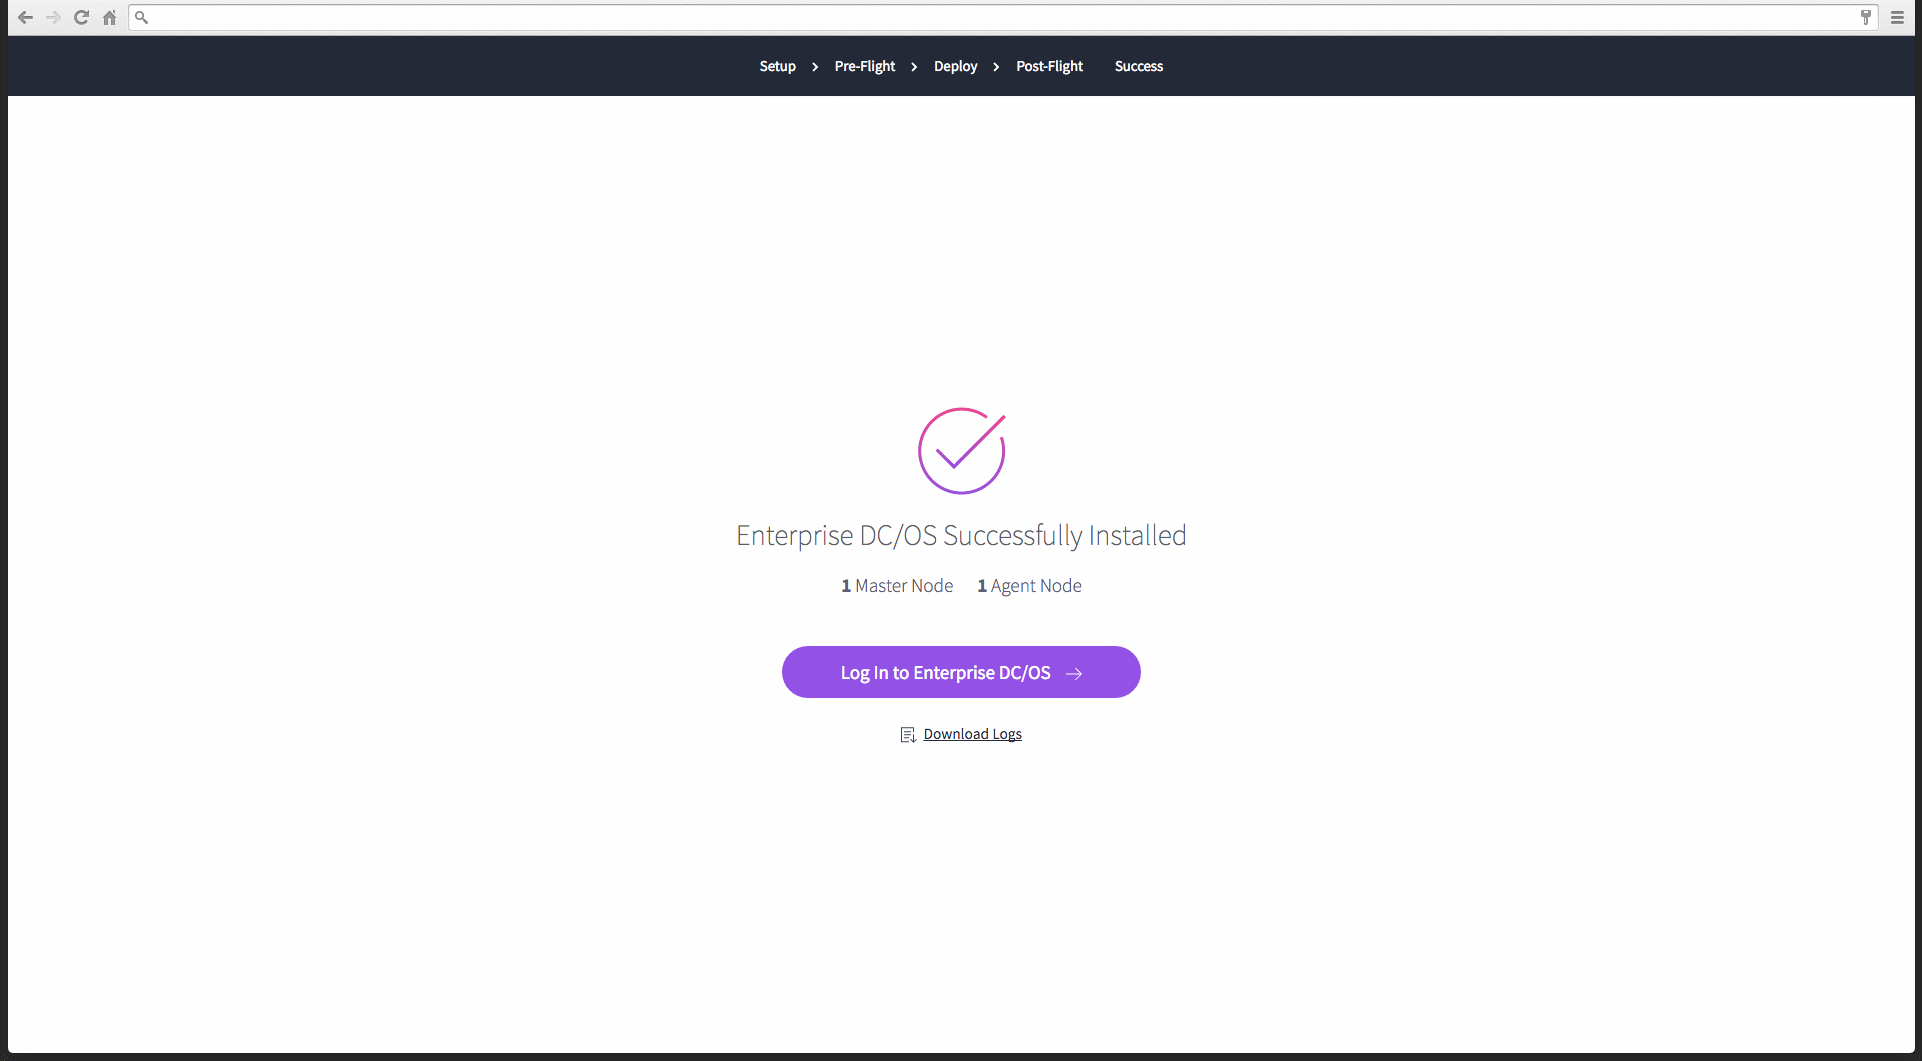
Figure 4. Success screen
-
Enter the username and password of the superuser account.
Note: The default username is
bootstrapuserand default password isdeleteme.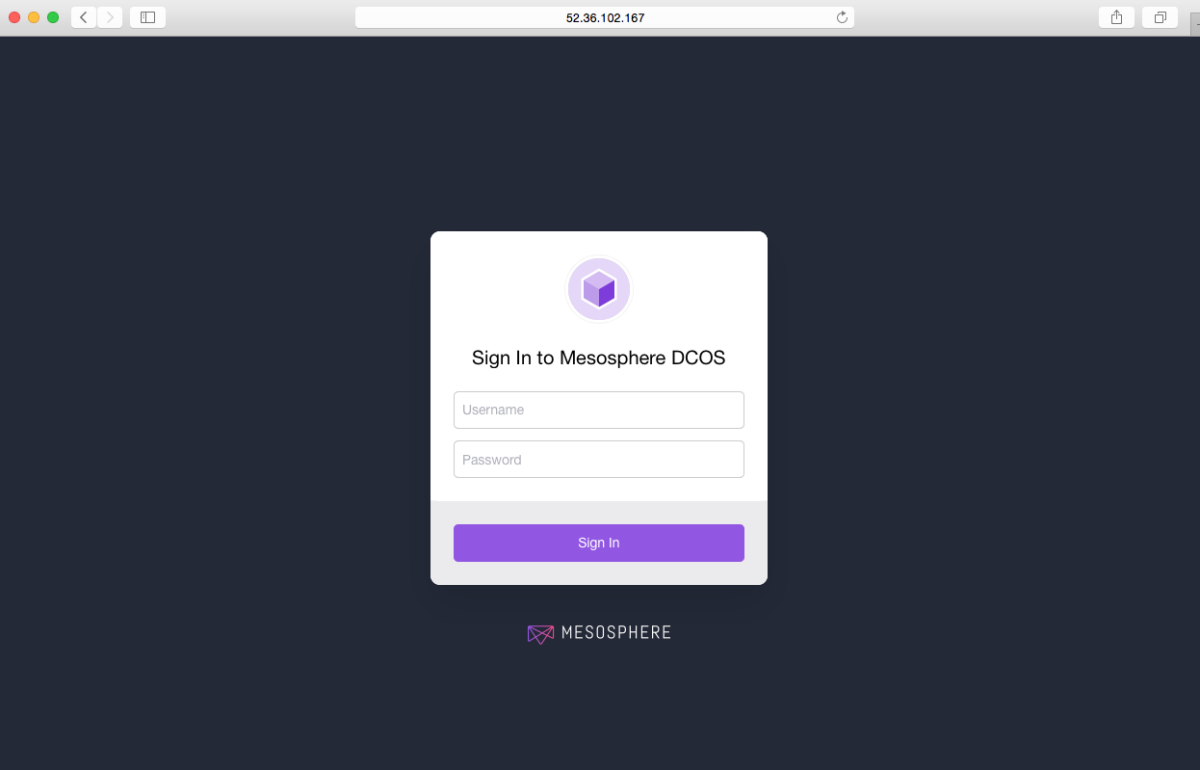
Figure 5. Sign-in screen
You are done!
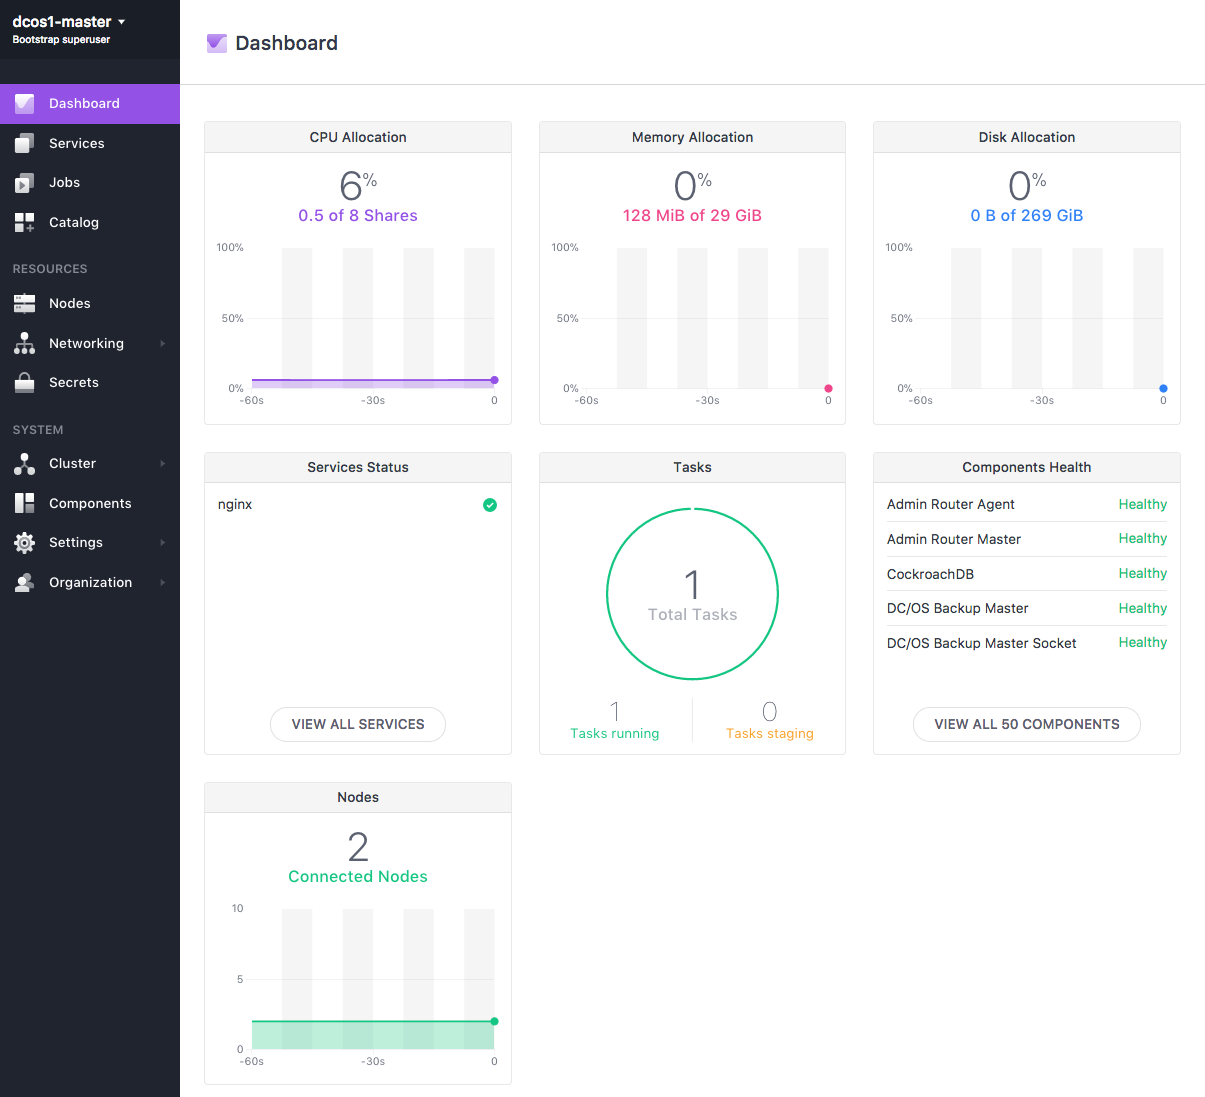
Figure 6. DC/OS dashboard
Next steps
Now that your advanced template DC/OS installation is up and running, you can add more agent nodes.
Add more agent nodes
You can add more agent nodes by creating a new stack. Use the advanced-priv-agent.json or advanced-pub-agent.json templates. These templates create agents which are then attached to the PrivateAgentStack or PublicAgentStack as a part of an AutoScalingGroup.
Use the output values from the zen.sh script and your Master and Infra stacks. These new agent nodes will automatically be added to your DC/OS cluster.
Private agents:
- InternalMasterLoadBalancerDnsName Specify the
InternalMasterLoadBalancerDnsNamevalue from your master stack (<stack-name>-MasterStack-<stack-id>). You can find this value in the Outputs tab. - KeyName Specify your AWS EC2 Key Pair.
- PrivateAgentInstanceCount Specify the number of private agents.
- PrivateAgentInstanceType Specify the AWS EC2 instance type for the private agent nodes. The m3.xlarge instance type is recommended.
- PrivateAgentSecurityGroup Specify the security group ID for private agents. This group should have limited external access. You can find this value in the Outputs tab of the Infrastructure stack (
<stack-name>-Infrastructure-<stack-id>). - PrivateSubnet Specify the
Private SubnetIdoutput value from thezen.shscript. This subnet ID will be used by all private agents.
Public agents:
- InternalMasterLoadBalancerDnsName Specify the
InternalMasterLoadBalancerDnsNamevalue from your master stack (<stack-name>-MasterStack-<stack-id>). You can find this value in the Outputs tab. - KeyName Specify your AWS EC2 Key Pair.
- PublicAgentInstanceCount Specify the number of public agents.
- PublicAgentInstanceType Specify the AWS EC2 instance type for the public agent nodes. The m3.xlarge instance type is recommended.
- PublicAgentSecurityGroup Specify the security group ID for public agents. This group should have limited external access. You can find this value in the Outputs tab of the Infrastructure stack (
<stack-name>-Infrastructure-<stack-id>). - PublicSubnet Specify the
Public SubnetIdoutput value from thezen.shscript. This subnet ID will be used by all public agents.
For all of the advanced configuration options, see the template reference documentation.
Limitations
- Modified templates are not supported for upgrades.
- Adding agents and task isolation is not supported.
- You cannot expand the master node size.
- You must be in a flat network space (this is controlled by our infrastructure template). If you can not use our infrastructure template, you can hack our template at your own risk. We may change the infrastructure template and you will have to support these changes downstream.
Template reference
For the complete advanced configuration options, see the template reference documentation.