
 DC/OS Documentation
In this tutorial, you will create a custom Docker image and deploy it to DC/OS.
Prerequisites
- Docker installed on your workstation
- Docker Hub account
- DC/OS installed
- DC/OS CLI installed
Create a custom Docker image
-
Create a file named
index.html. Paste the following markup intoindex.htmland save:<html> <body> <h1> Hello brave new world! </h1> </body> </html> -
Create a file named
Dockerfile. Paste the following Docker commands into it and save:FROM nginx:1.9 COPY index.html /usr/share/nginx/html/index.html -
Build the Docker image, where
<username>is your Docker Hub username:docker build -t <username>/simple-docker .The output should resemble:
Sending build context to Docker daemon 3.072 kB Step 1 : FROM nginx:1.9 1.9: Pulling from library/nginx 51f5c6a04d83: Pull complete a3ed95caeb02: Pull complete 640c8f3d0eb2: Pull complete a4335300aa89: Pull complete Digest: sha256:54313b5c376892d55205f13d620bc3dcccc8e70e596d083953f95e94f071f6db Status: Downloaded newer image for nginx:1.9 ---> c8c29d842c09 Step 2 : COPY index.html /usr/share/nginx/html/index.html ---> 61373621782c Removing intermediate container 225910aa385d Successfully built 61373621782c -
Log in to Docker Hub:
docker login -
Push your image to Docker Hub, where
<username>is your Docker Hub username:docker push <username>/simple-dockerThe output should resemble:
The push refers to a repository [docker.io/<username>/simple-docker]
6e2a0db36f4c: Pushed
5f70bf18a086: Mounted from library/nginx
49027b789c92: Mounted from library/nginx
20f8e7504ae5: Mounted from library/nginx
4dcab49015d4: Mounted from library/nginx
latest: digest: sha256:f733e23e1f5e83a29a223d0a7d30244b30c0d57d17aa0421d962019545d69c17 size: 2185
Create a Docker app and deploy to DC/OS
-
Create a Marathon app definition with the following contents and save as
hello-nginx.json. In theimagefield, replace<username>with your Docker Hub username. In thetypefield, specifyMESOSorDOCKERdepending on which containerizer runtime you prefer. This file specifies a simple Marathon application calledhello-nginxthat runs one instance of itself on a public node.{ "id": "hello-nginx", "container": { "type": "[MESOS | DOCKER]", "docker": { "image": "<username>/simple-docker" }, "portMappings": [ { "hostPort": 80, "containerPort": 80, "protocol": "tcp" } ] }, "networks": [ { "mode": "container/bridge" } ], "acceptedResourceRoles": ["slave_public"], "instances": 1, "cpus": 0.1, "mem": 64 }
-
Add the
hello-nginxapplication to Marathon by using the DC/OS command:dcos marathon app add hello-nginx.jsonIf this is added successfully, there is no output.
-
If you chose the MESOS runtime, you will see this when you verify that the app is added:
dcos marathon app list ID MEM CPUS TASKS HEALTH DEPLOYMENT WAITING CONTAINER CMD /hello-nginx 64 0.1 1/1 N/A --- False MESOS N/A -
If you used the AWS CloudFormation templates to expose the app to the port specified in your app definition (for example, port 80), you must reconfigure the health check on the public ELB.
- In CloudFormation, check the checkbox next to your stack.
- Click the Resources tab.
- Search for PublicSlaveLoadBalancer.
- Click the link in the Physical ID column.
- Follow the instructions in Update the Health Check Configuration.
-
Go to your public agent to see the site running. To find your public agent IP address, see Finding a Public Agent IP.
You should see the following message in your browser:
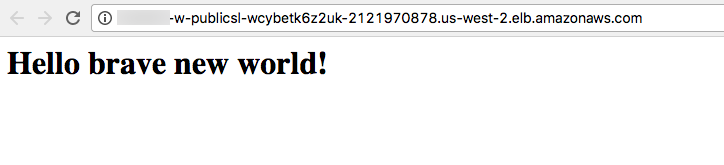
Figure1. Hello World message
Learn more
Learn how to load balance your app on a public node using Marathon-LB.