
 Kommander Documentation
In this tutorial you will learn how to create a second production cluster for your E-Commerce team. For example: to have a fallback or to migrate to a different cloud provider.
Before you begin
Ensure you have already set up a project for this team’s production clusters in a Development workspace.
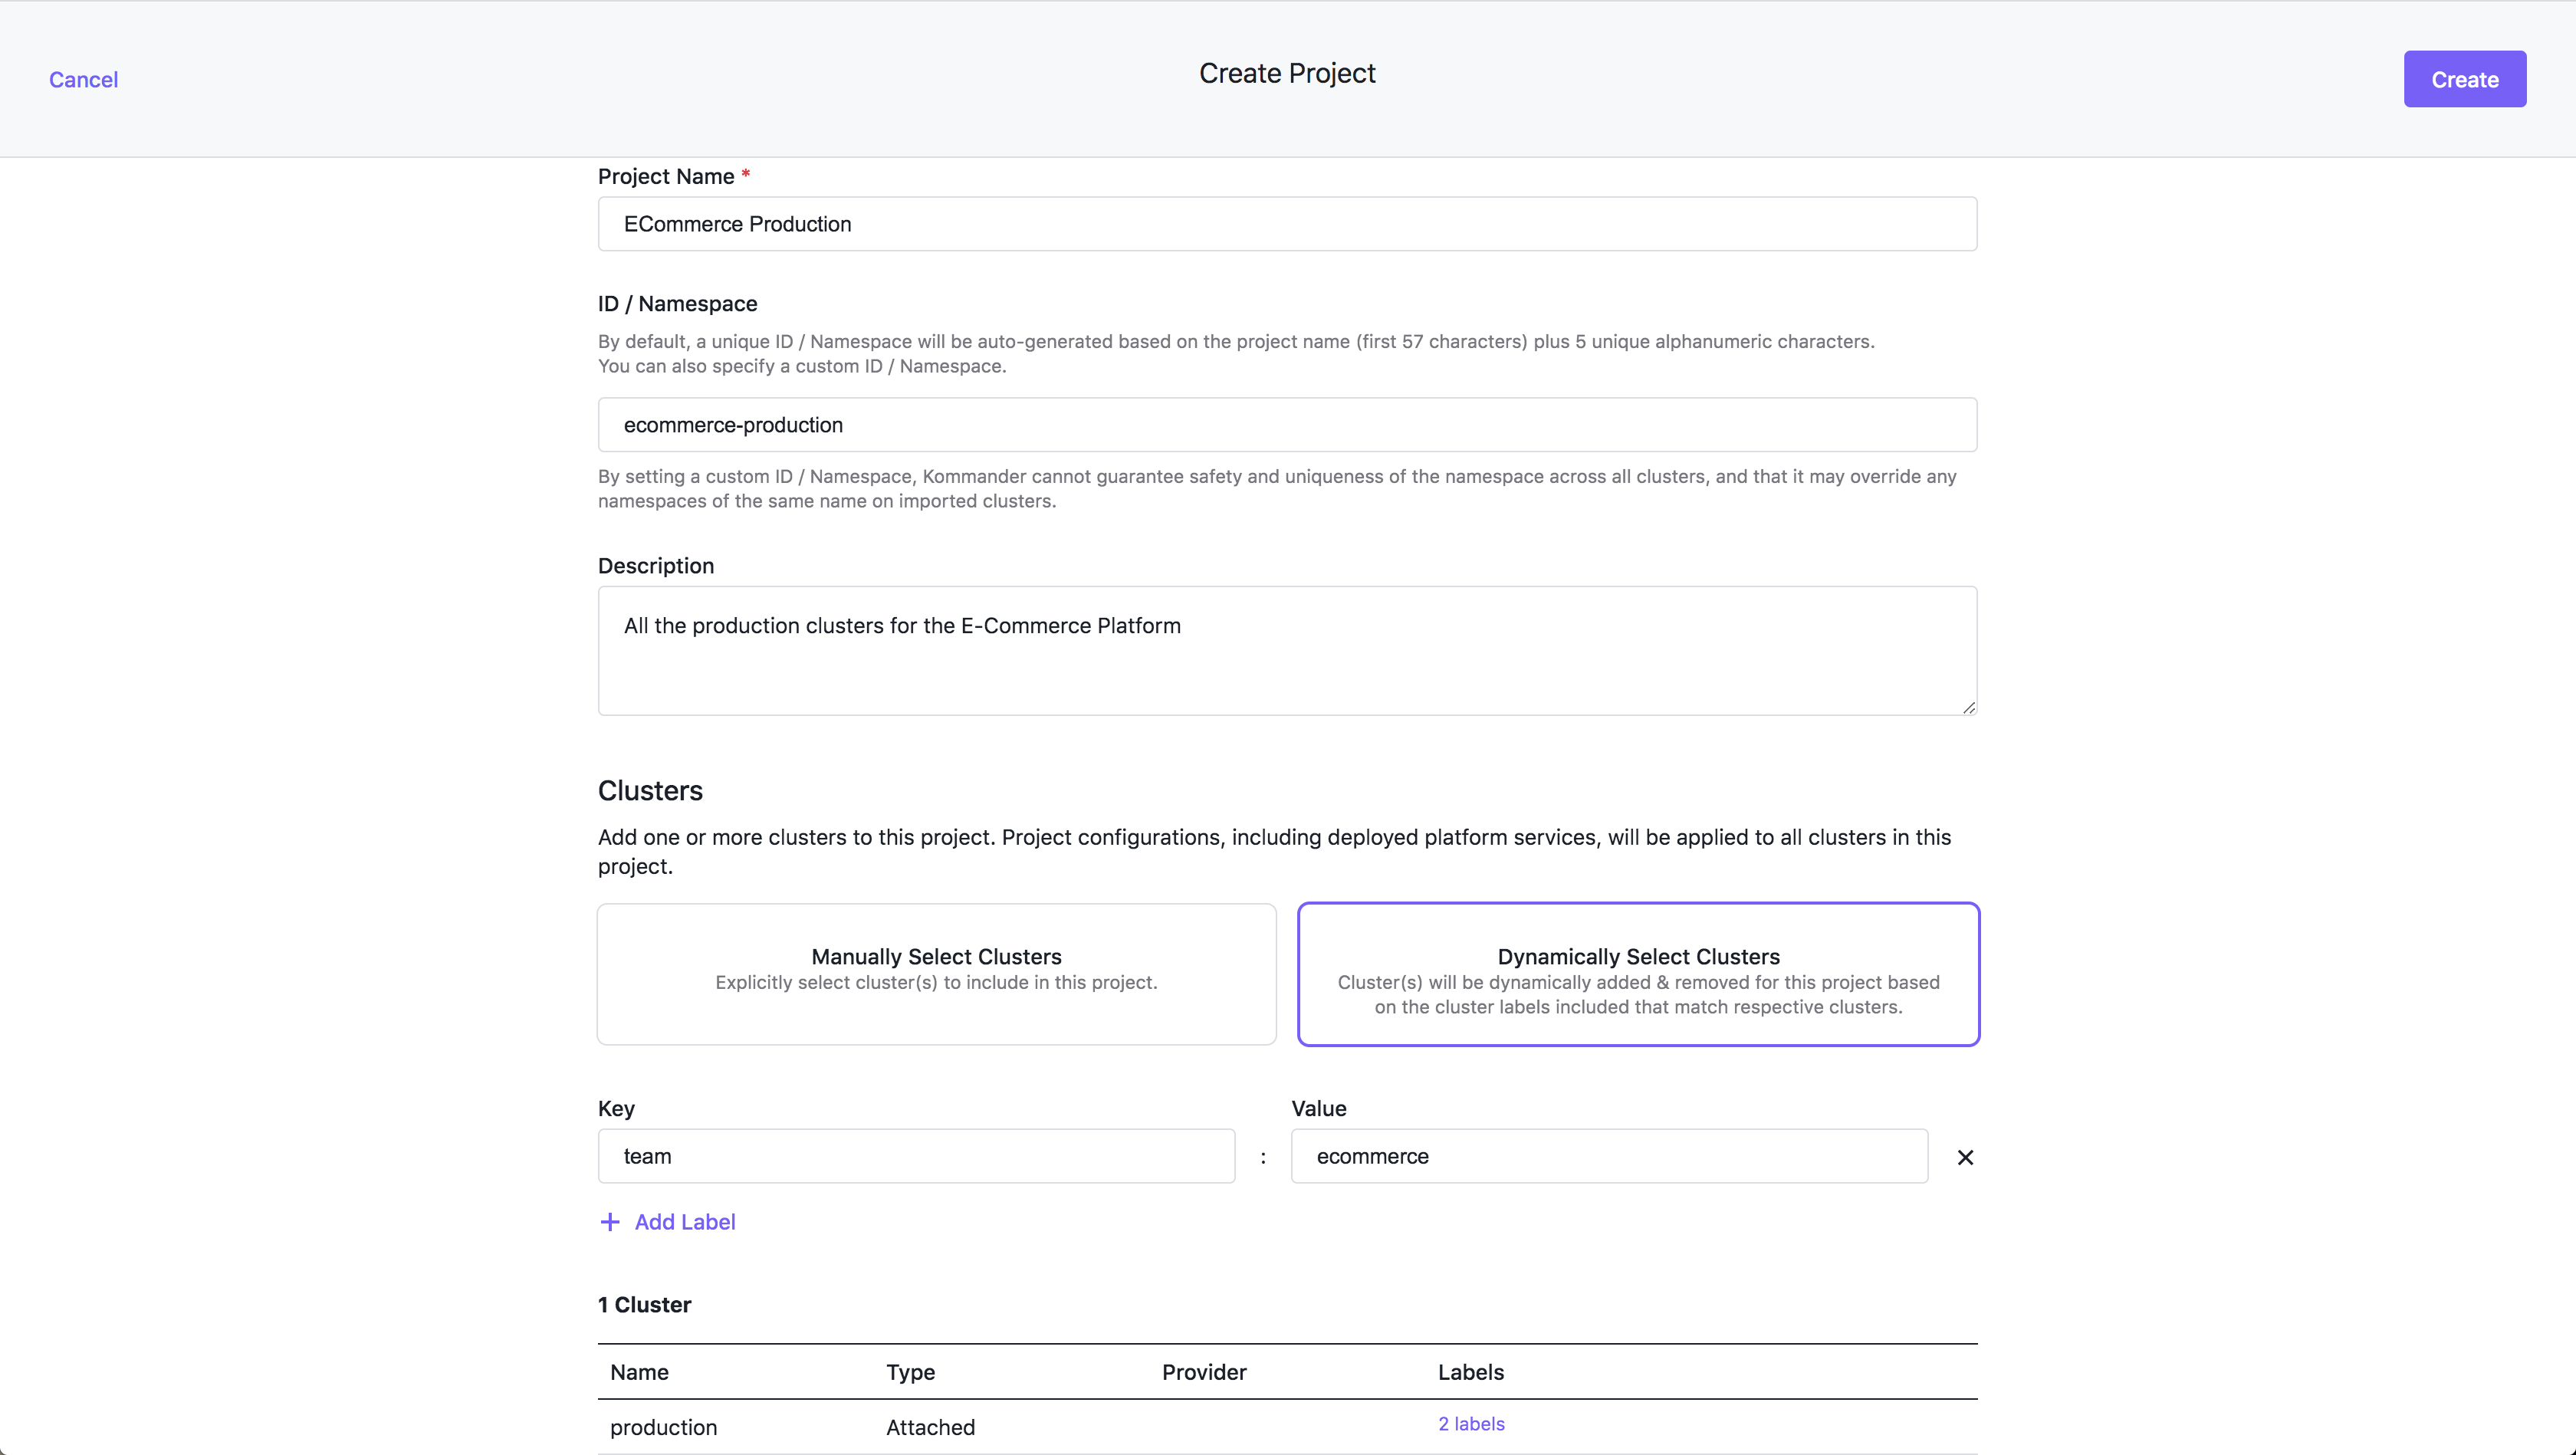
This project configuration ensures all E-Commerce team clusters have matching configurations. Next, give the team administrator access to the workspace. You have defined the developer access control group beforehand from the Identity Providers page at the global level.
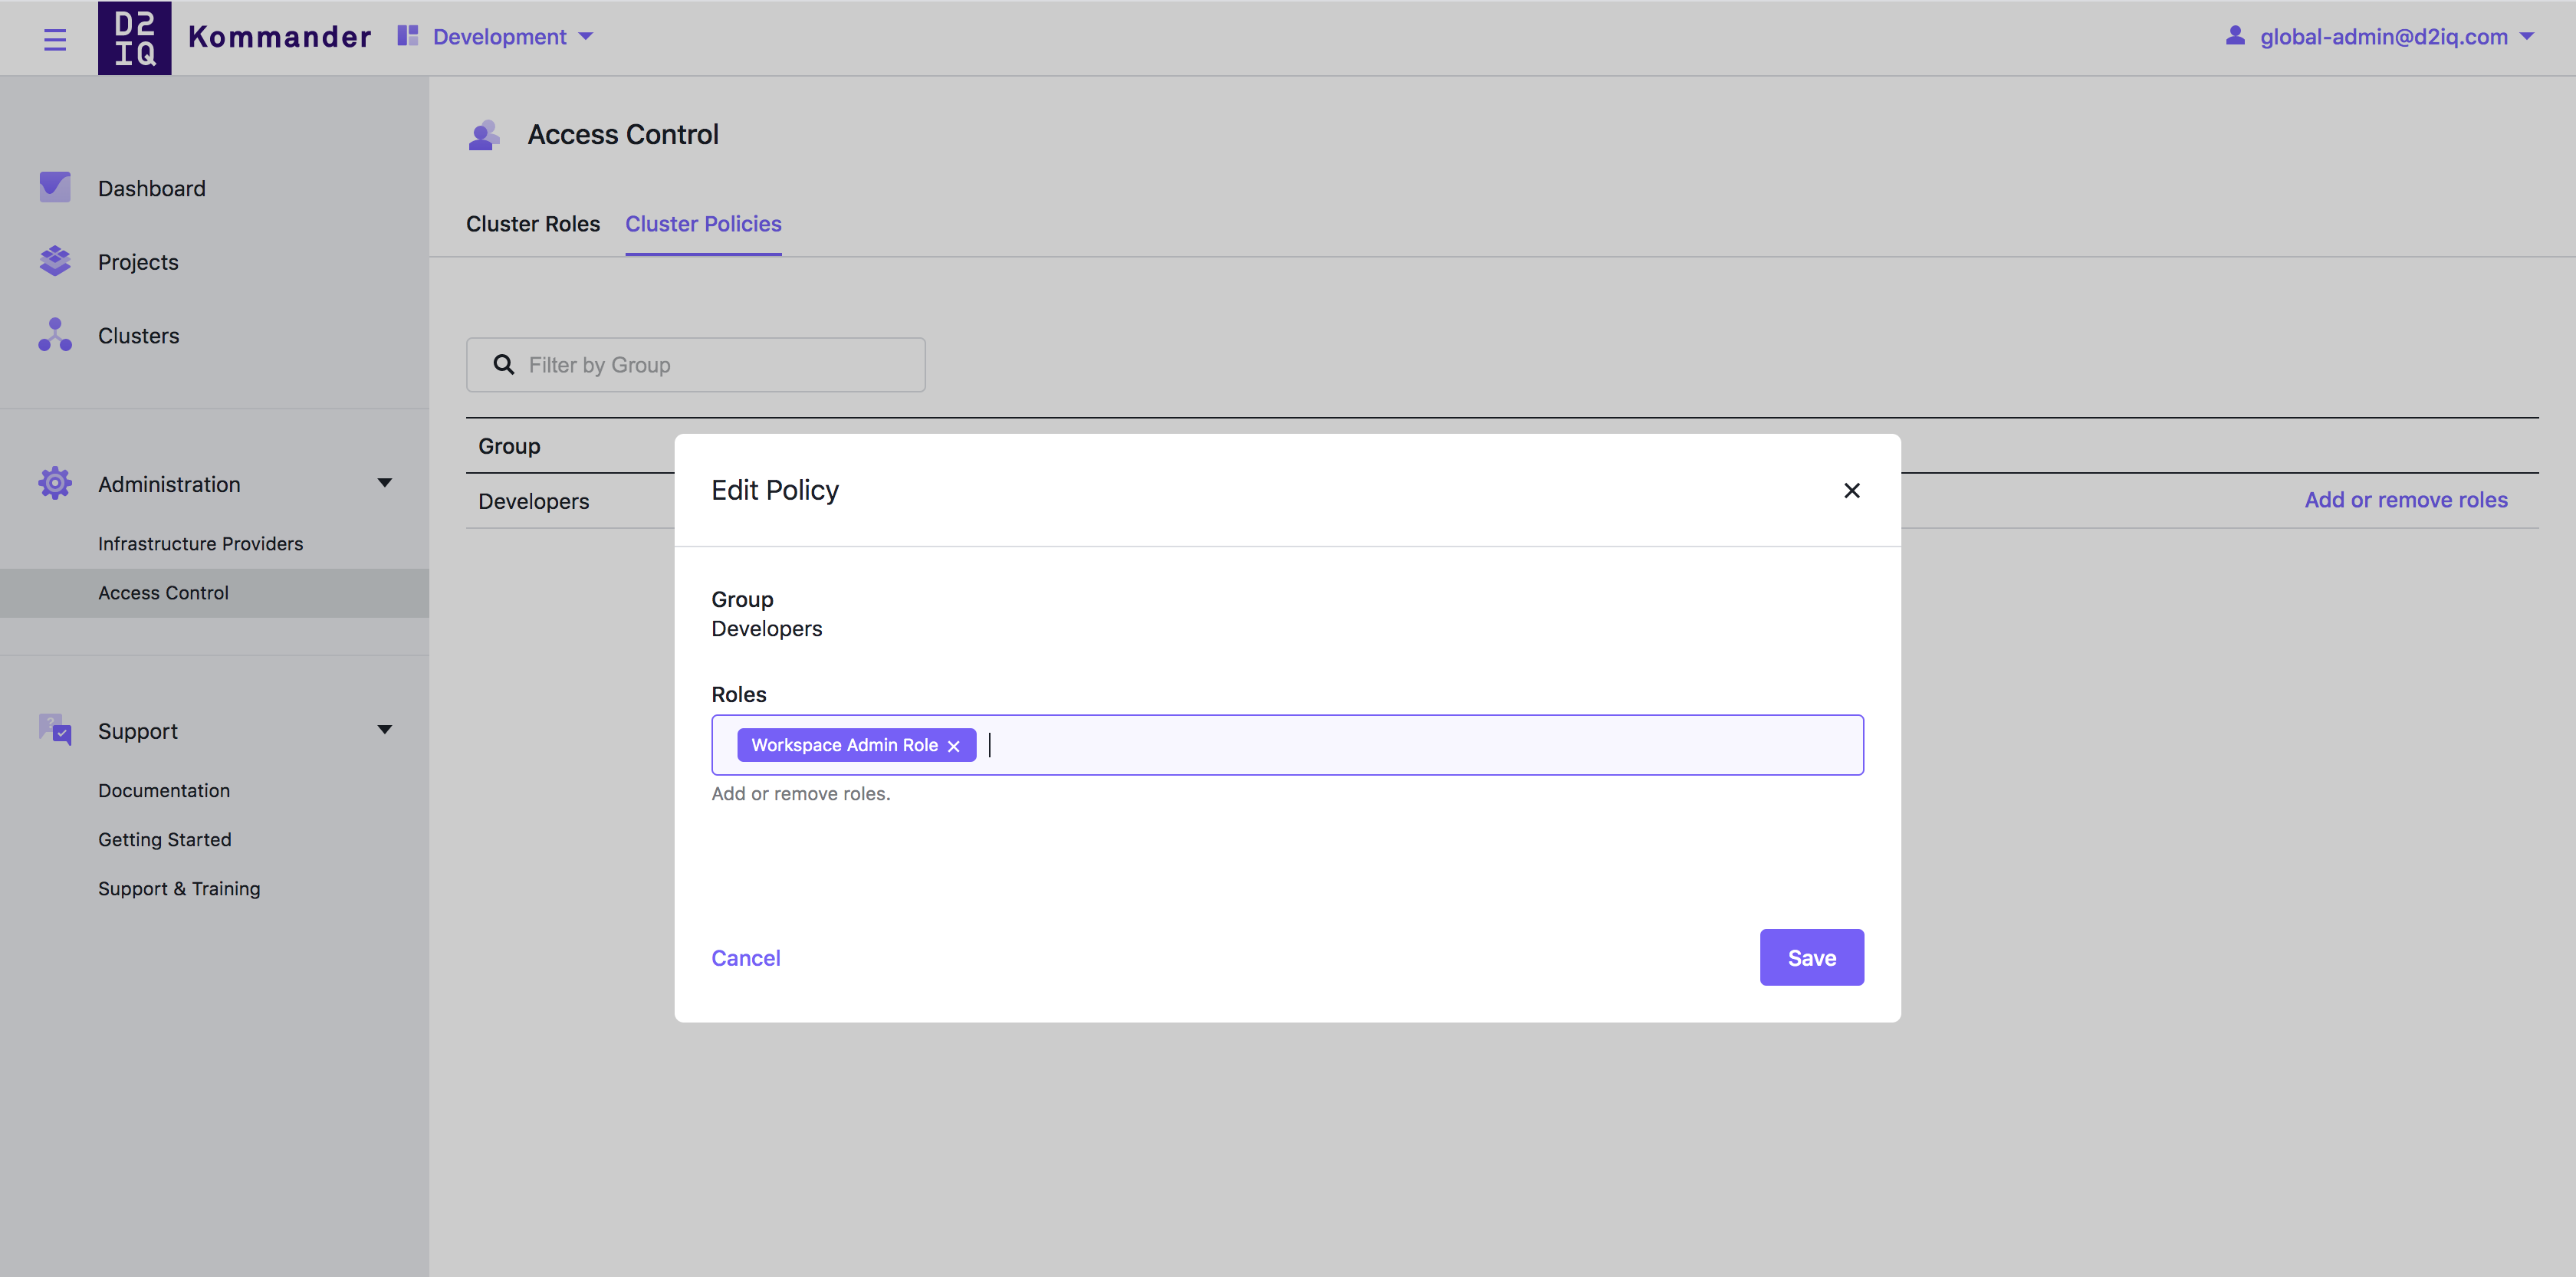
You will now create a policy to bind the developers group to the default Workspace Admin Role, which will give all developers access.
In the Kommander UI, do the following:
- Select Development in the workspace header drop-down.
- Select Administration > Access Control.
- Select the Policies tab.
- For the developers group, select Add or remove roles.
- Select the Workspace Admin Role role and select Save.
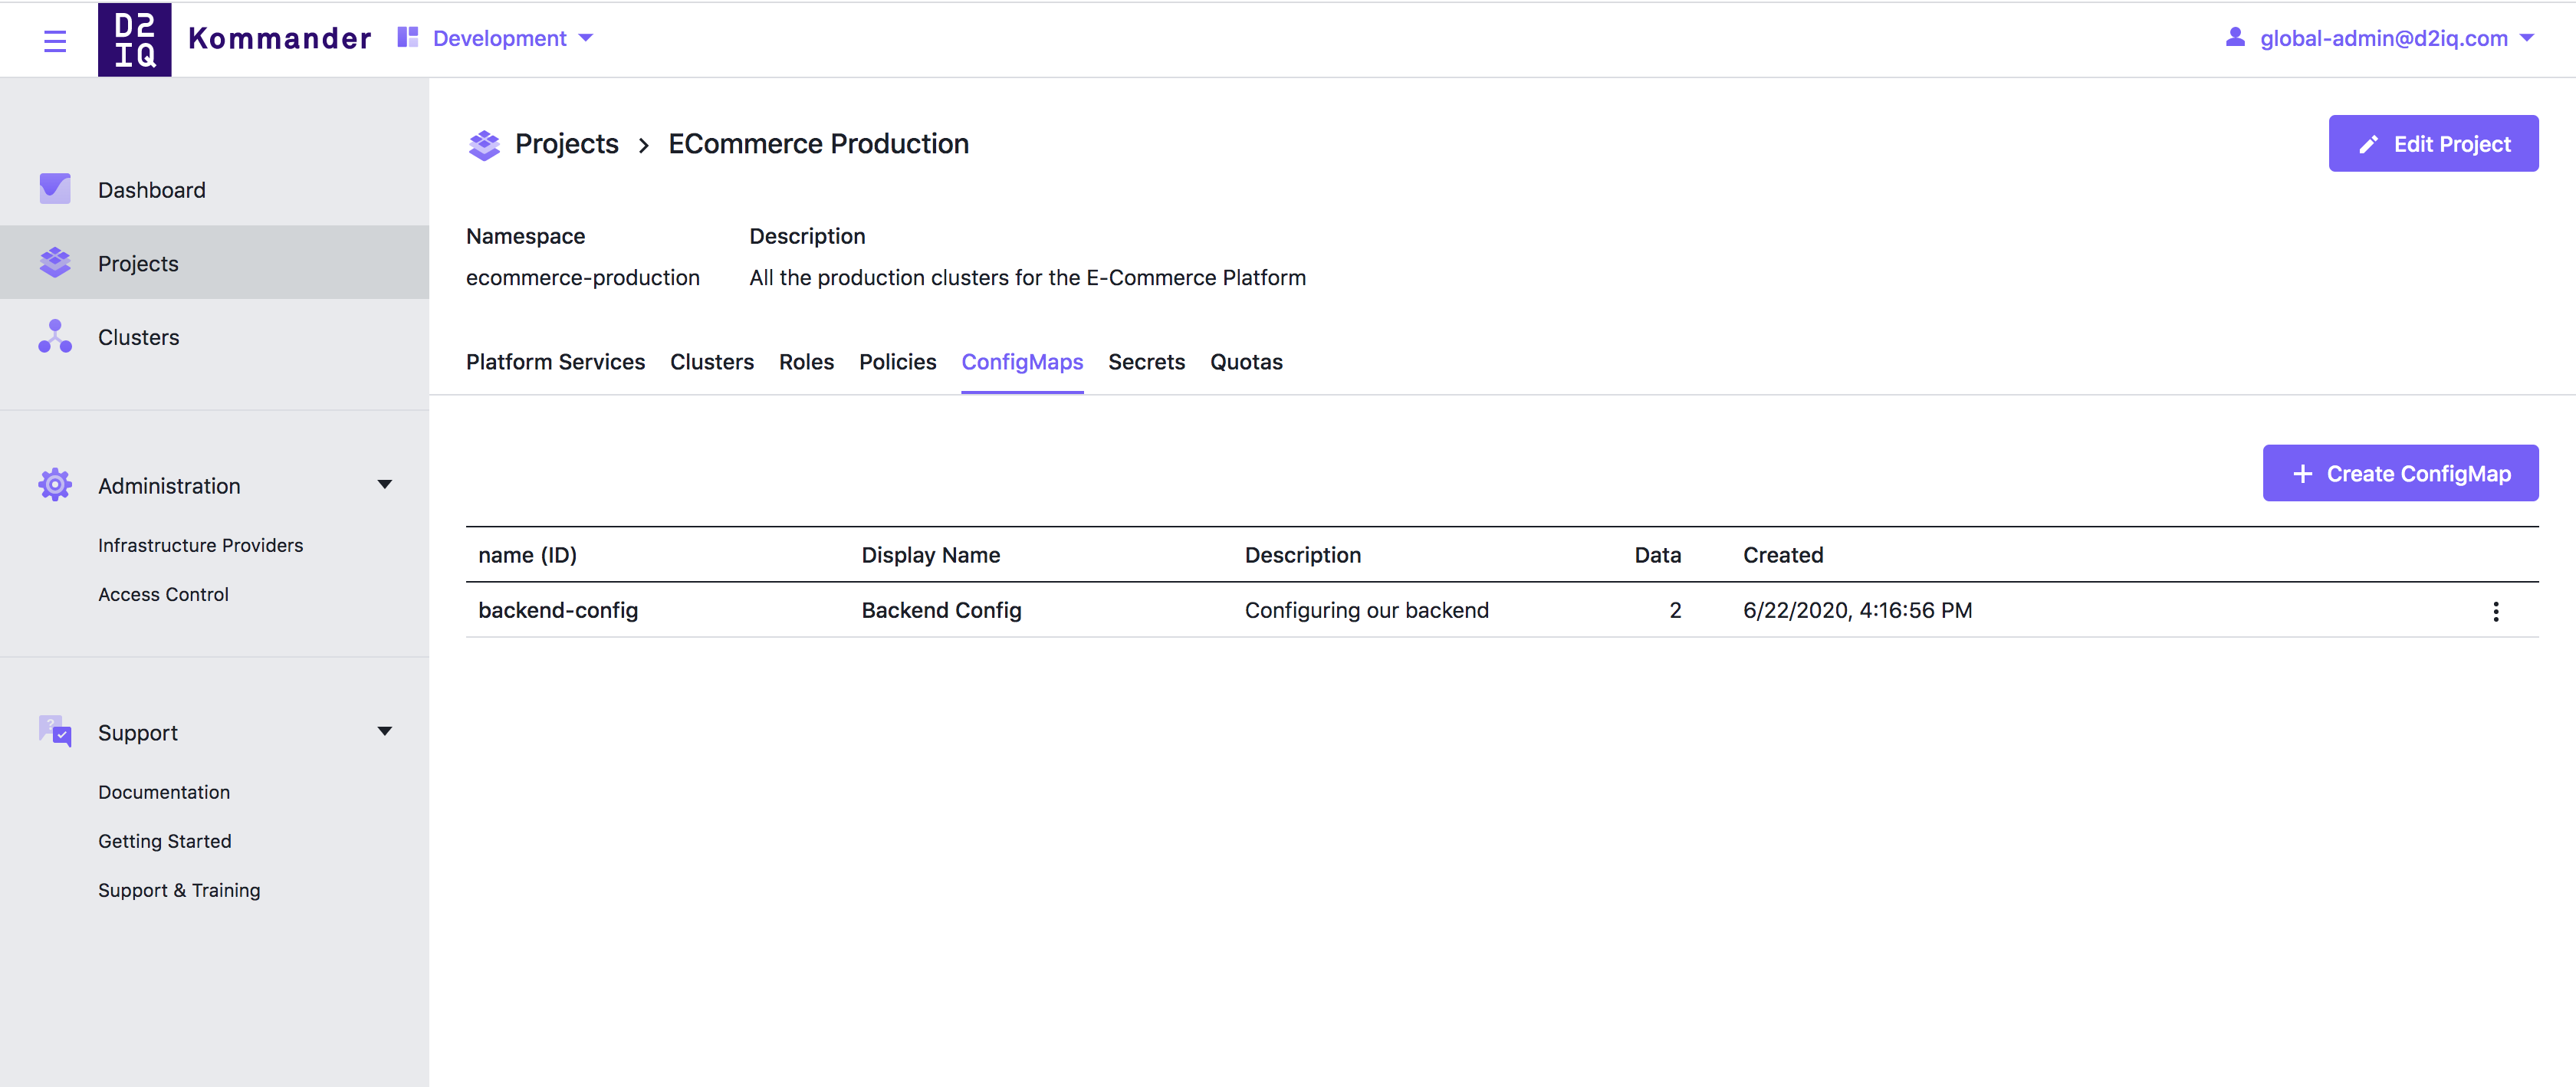
The E-Commerce backend your team will be using needs environment variables. Configure them through a config map in your project.
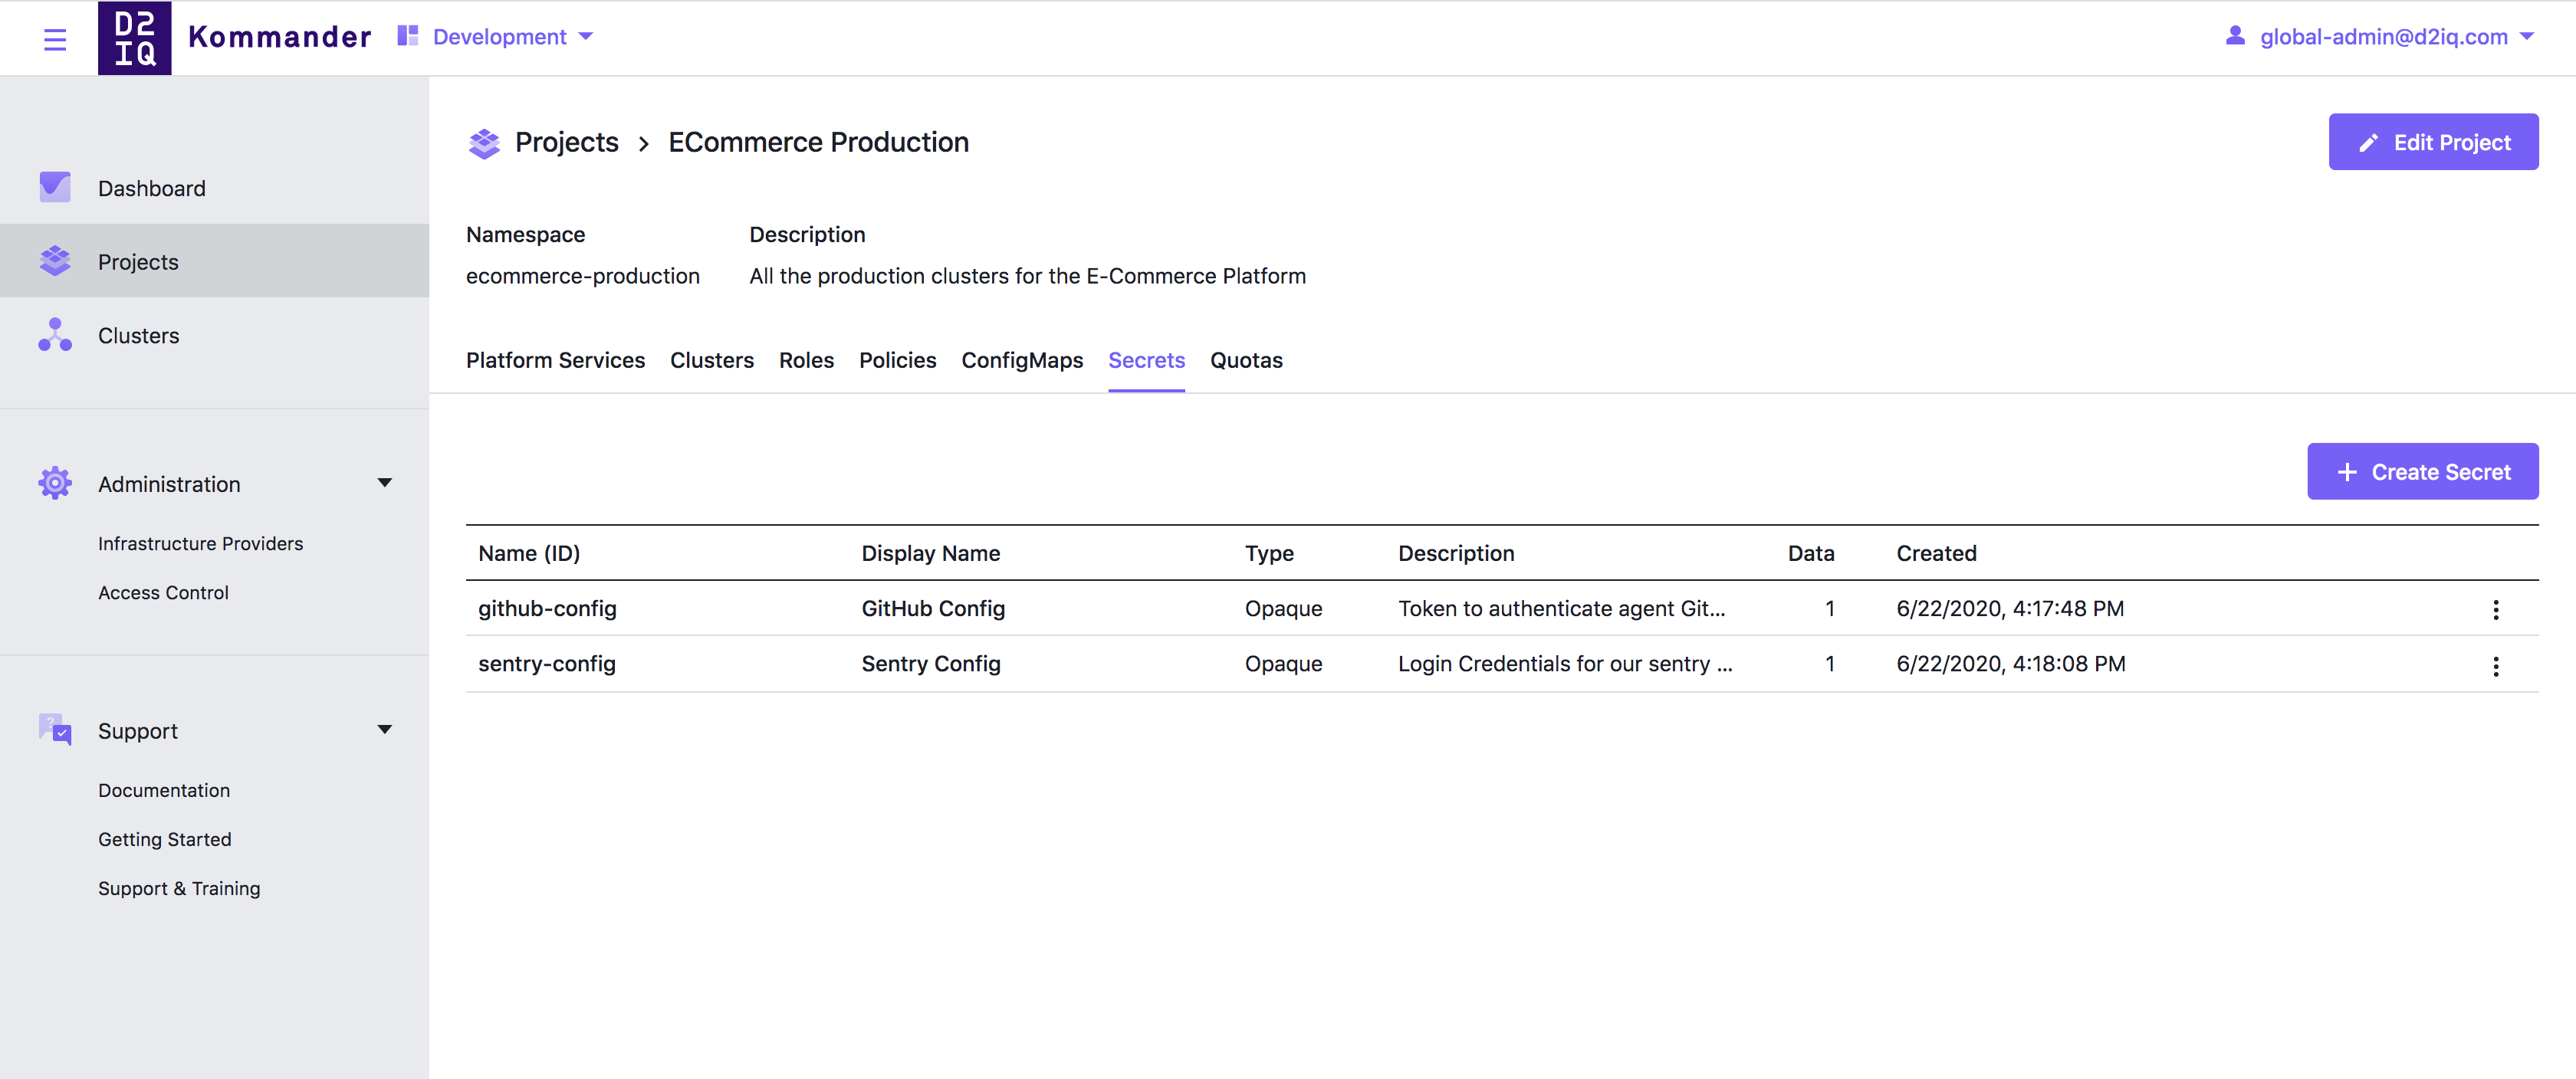
The backend also needs access to your AWS S3 Bucket and to GitHub, so create two secrets for this:
Create a second production cluster
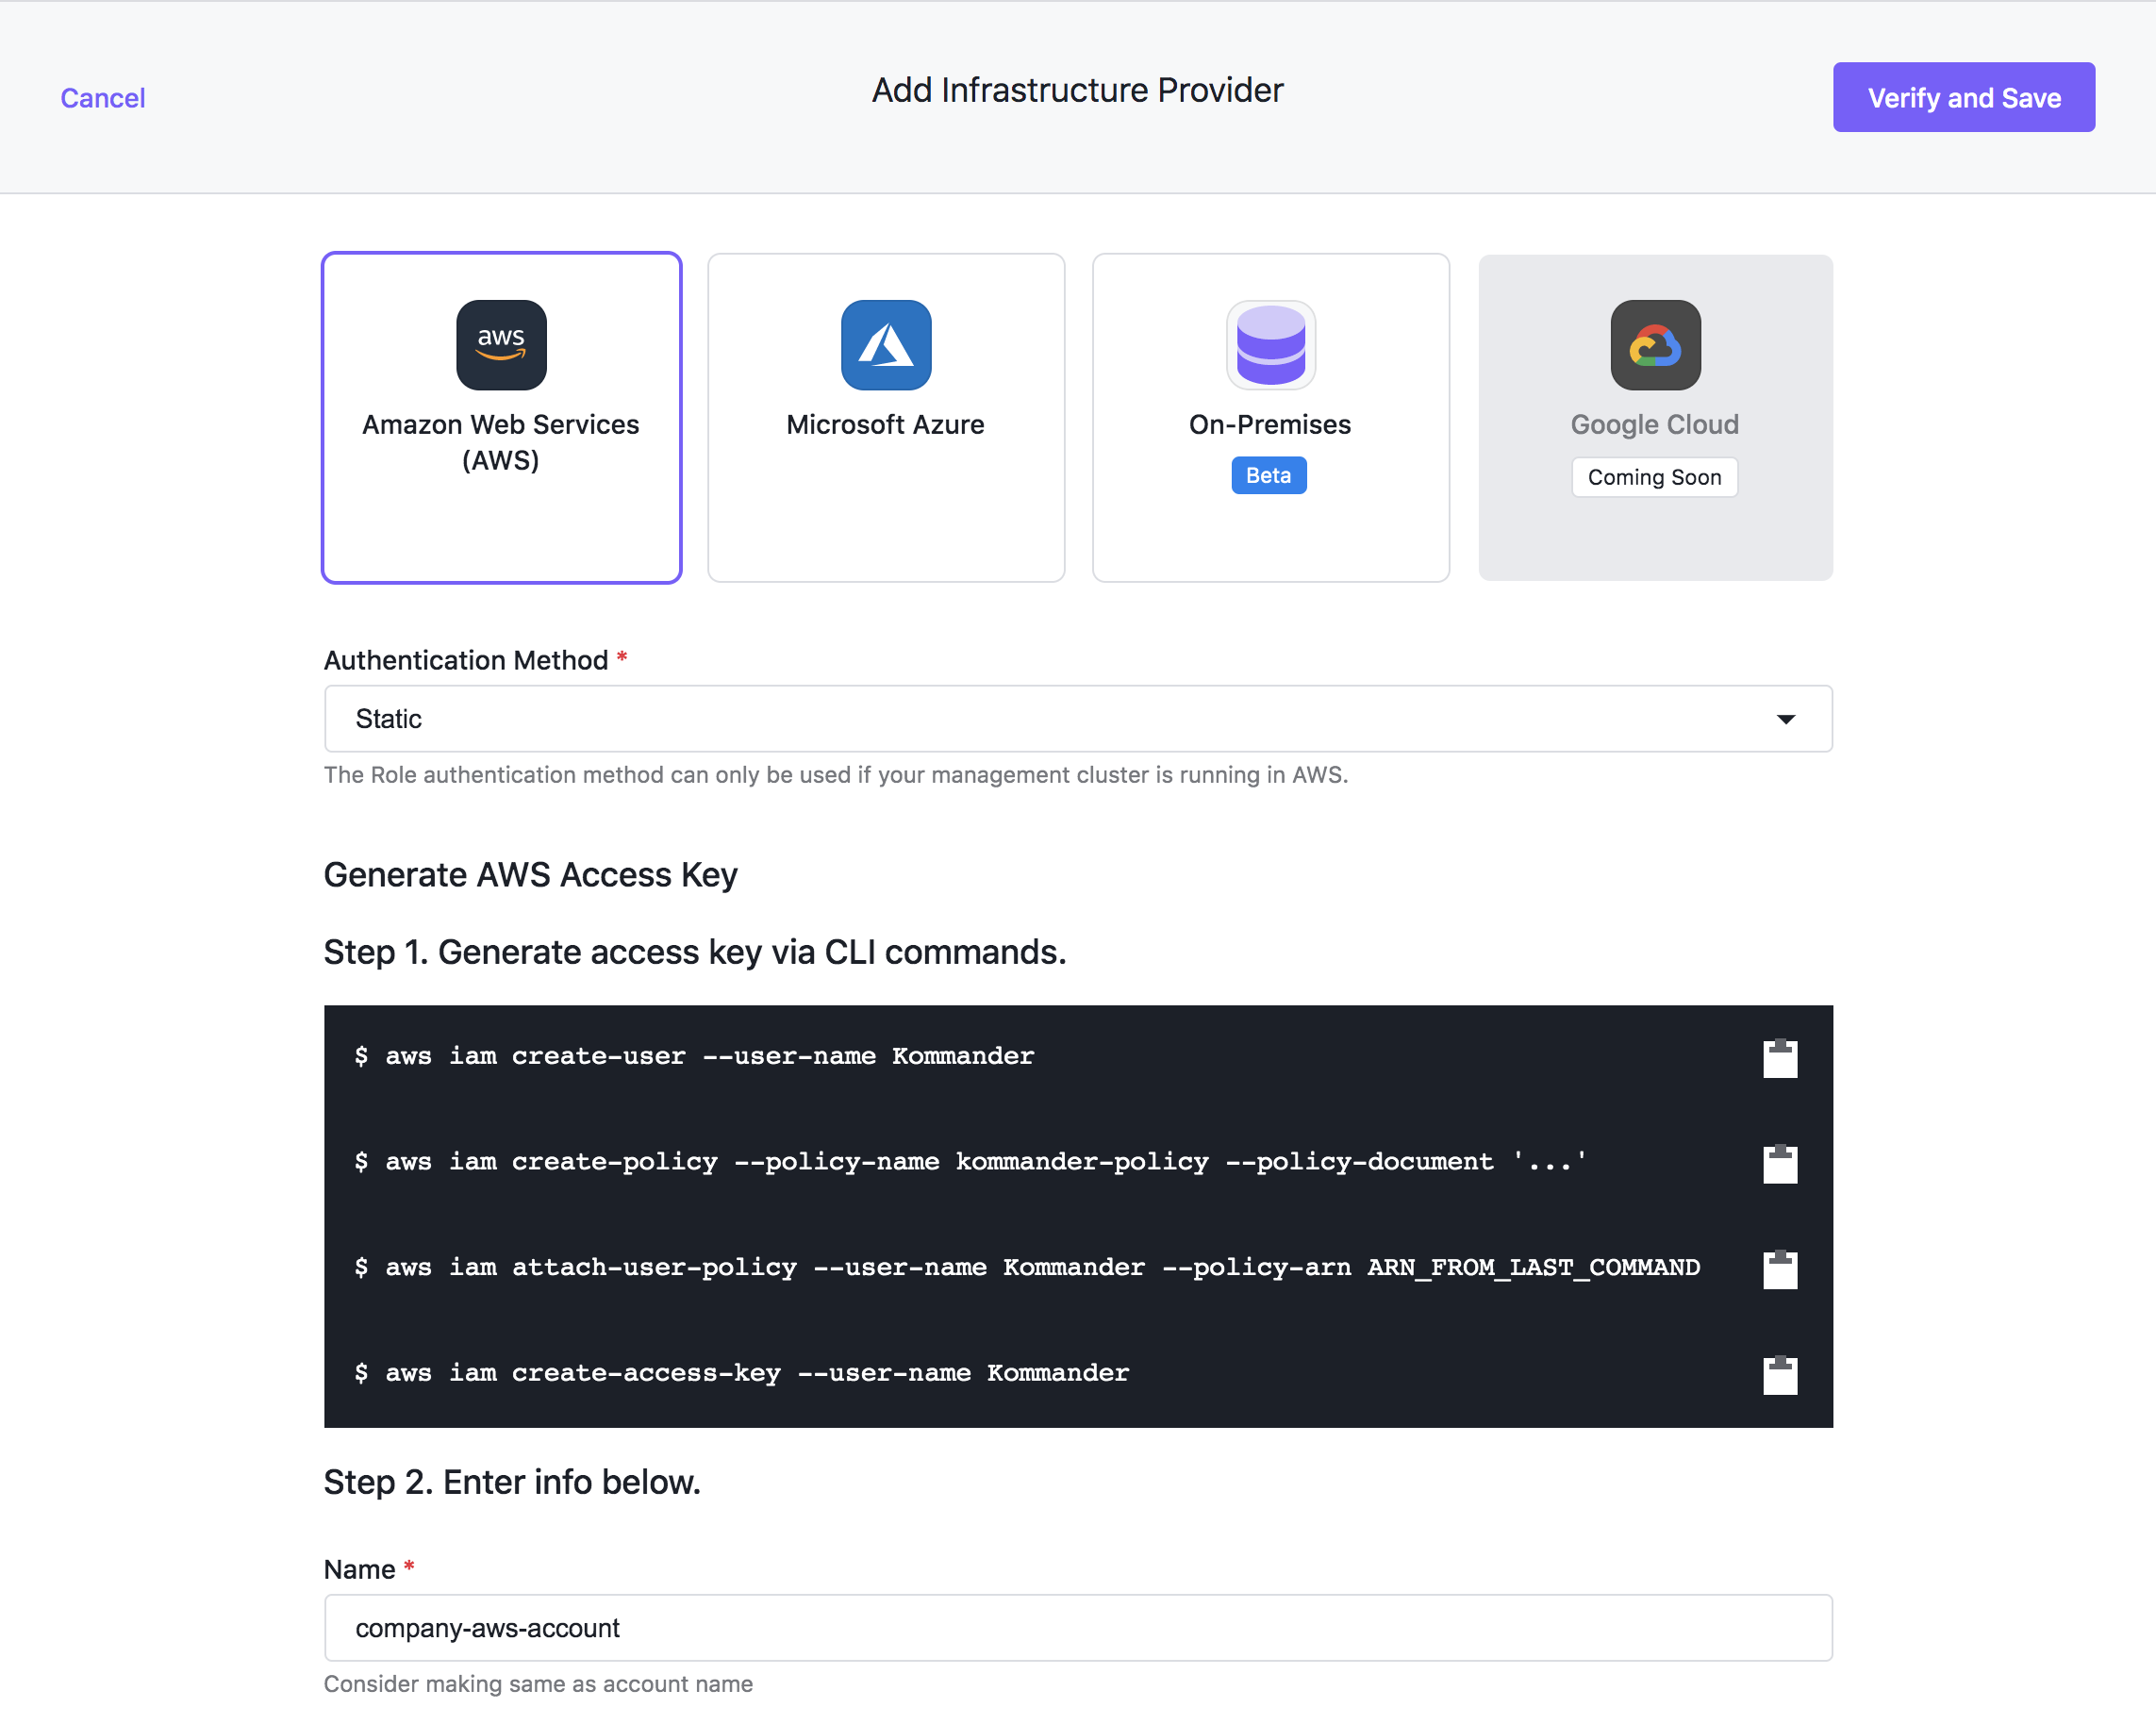
This project has one cluster attached to it, now you should create a second cluster. To provision another cluster on AWS, first set up an infrastructure provider.
To do this go to Administration > Infrastructure Providers and select Add. Then, add your AWS credentials into the form and save the infrastructure provider.
In the Kommander UI, do the following:
- Select Development in the workspace header drop-down.
- Select Administration > Infrastructure Providers.
- Select + Add Infrastructure Provider and select AWS as the type.
- Enter AWS credentials in the form and select Verify and Save.
Then go to the workspace clusters view, select Add Cluster > Create Konvoy Cluster.
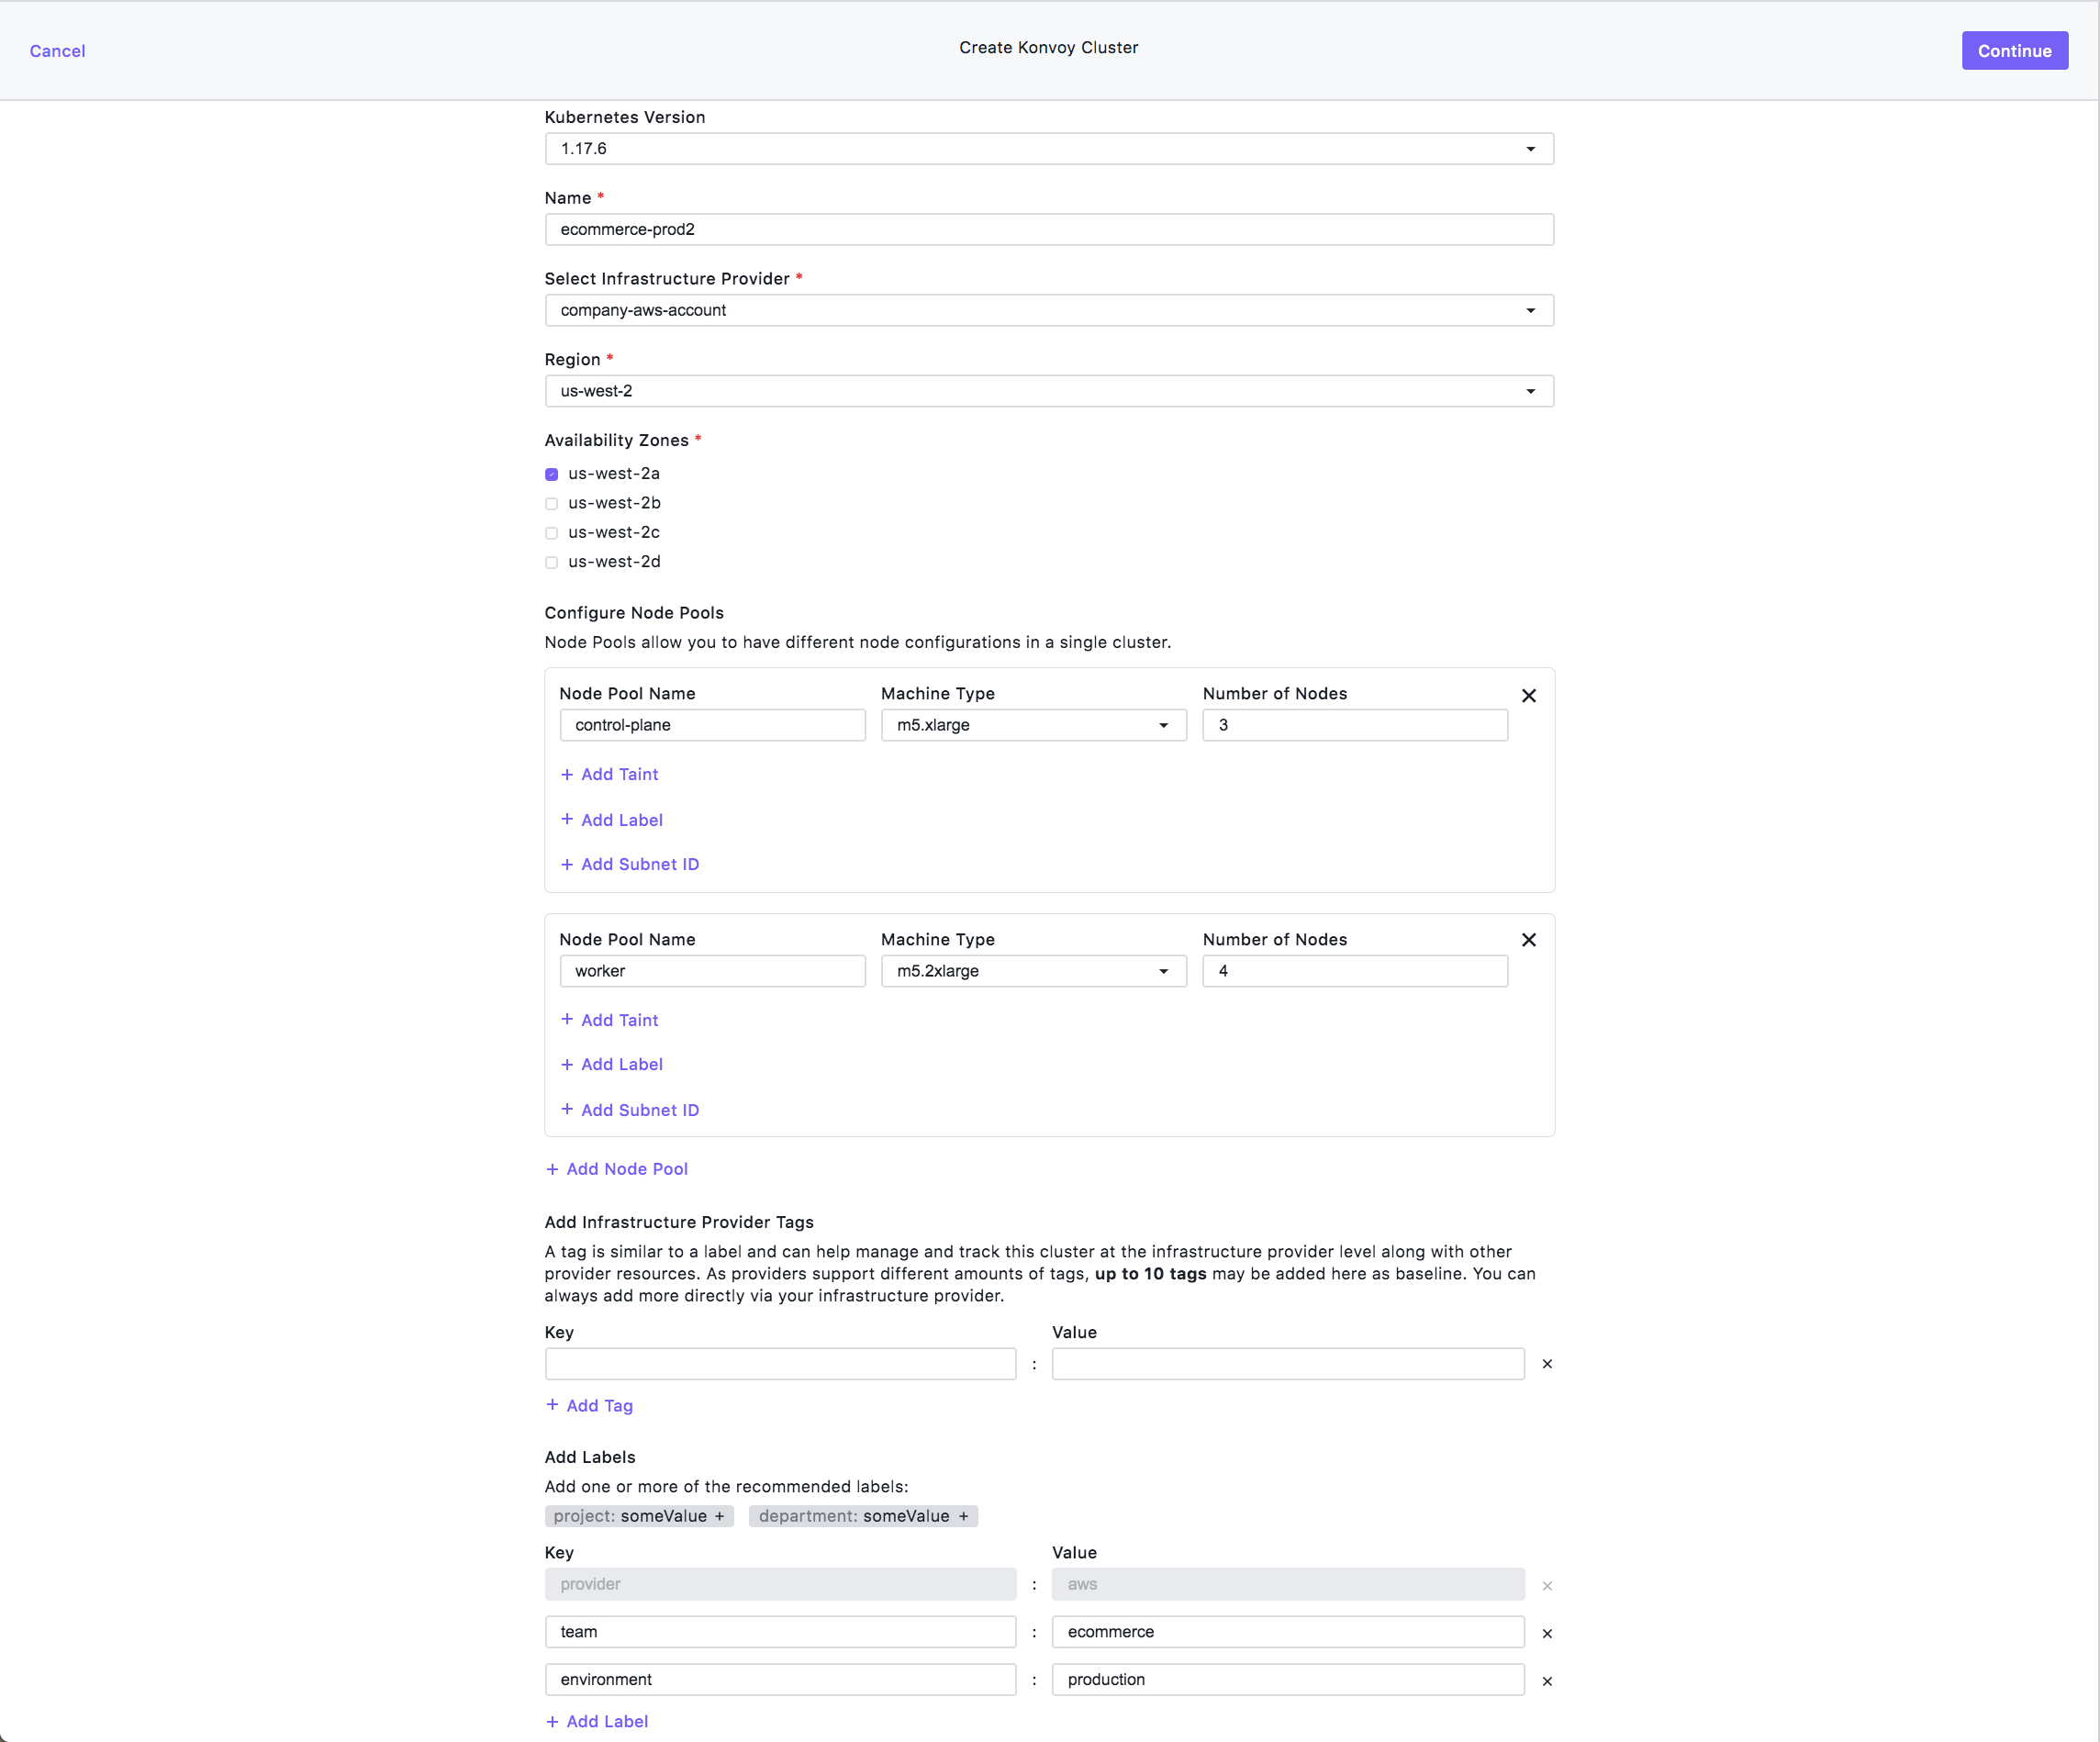
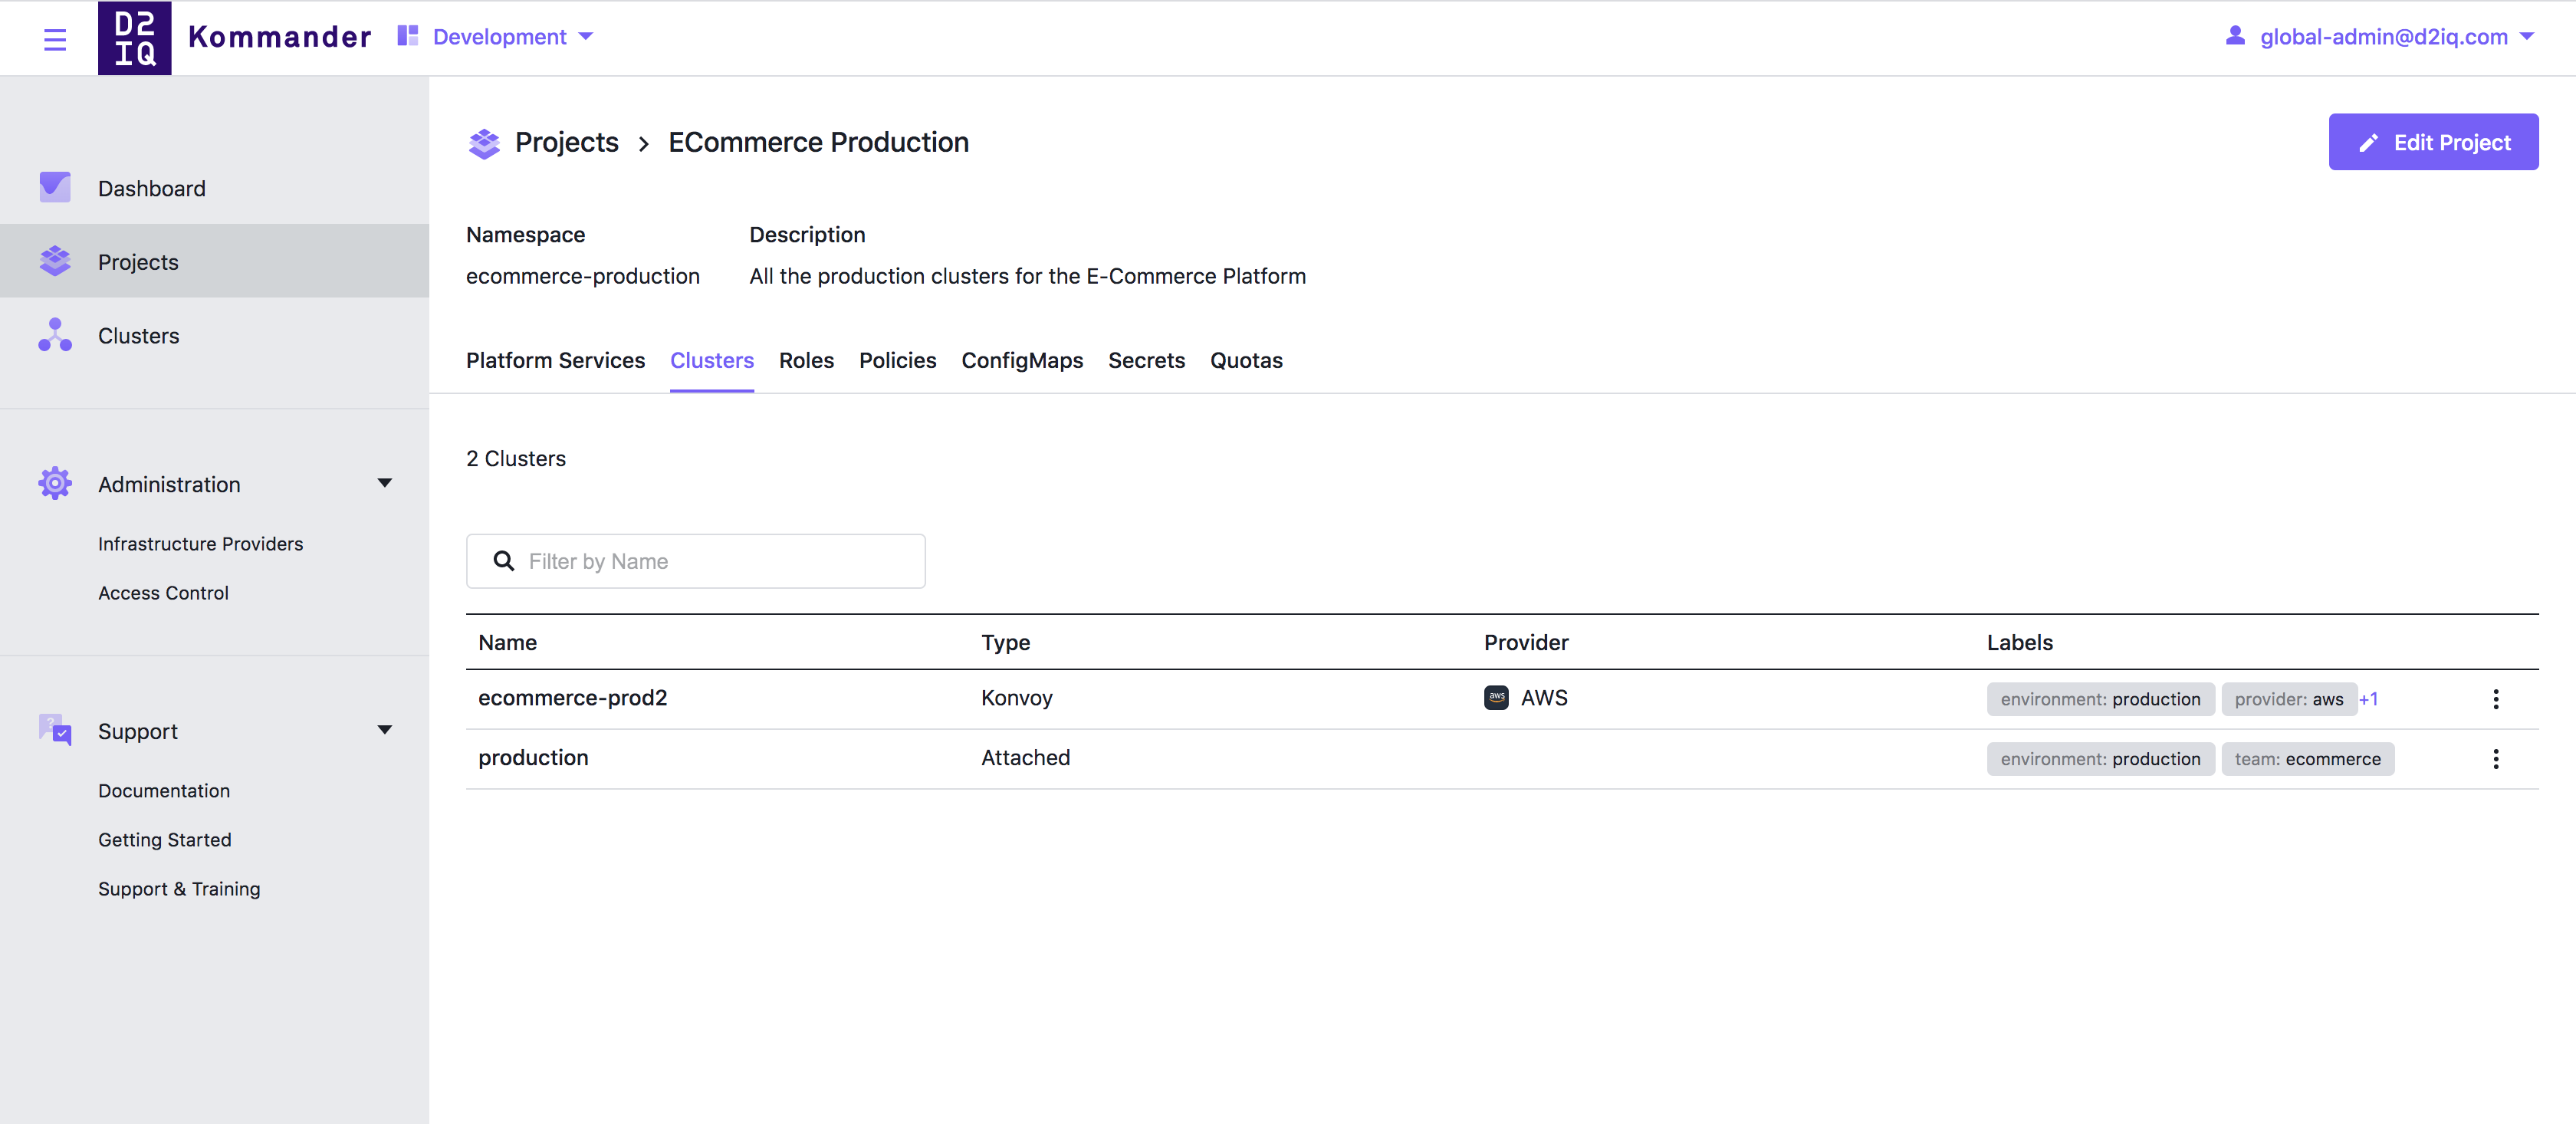
It is important to set the correct labels for the cluster, but you can still change them after creating the cluster from the Clusters tab in the project. You will see that it has been added since it has labels matching the ECommerce Production project.
You can also download the kubeconfig file for this cluster see what was created. To do this, install kubectl on your machine and set the KUBECONFIG environment variable to an absolute path to the downloaded kubeconfig file.
For example, check:
kubectl get secrets -n ecommerce-productionkubectl get configmaps -n ecommerce-production
Since the cluster was added to the project, the resources defined in that project are automatically federated to the cluster in the project namespace, so you are done creating a second production cluster.