
 Beta Jupyter Documentation
The examples in this section assume you are a data scientist using JupyterLab to pre-process and analyze datasets with Spark and TensorFlow.
The technologies used in this section are as follows:
-
Marathon-LB to expose JupyterLab externally
-
Estimated time for completion (manual installation): 20 minutes
-
Target audience: Anyone interested in Data Analytics.
Prerequisites
- A cluster running DC/OS 1.11 or higher, with at least 6 private agents and 1 public agent. Each agent should have 2 CPUs and 5 GB of RAM available.
- DC/OS CLI installed
Optional: Terraform
If you plan to use GPU support, you should use the dcos-terraform project to provision DC/OS. Please refer to the GPU Cluster Provisioning section in the README for more details.
Installation
This section will describe how to install the HDFS service and the Marathon-LB service.
HDFS
You can install the HDFS service from the DC/OS web-based interface or directly from the CLI. For example, run the following command:
$ dcos package install hdfs
To learn more about HDFS or advanced HDFS installation options, see the HDFS service documentation.
Marathon-LB
To expose JupyterLab externally, install Marathon-LB using the following command:
$ dcos package install marathon-lb
To learn more about Marathon-LB or advanced Marathon-LB installation options, see the Marathon-LB documentation.
JupyterLab
You can install JupyterLab from the DC/OS web-based interface or CLI. In both cases, you need to change two parameters:
- the virtual host (VHOST)
- the configuration file URLs
- Expose the service on a public agent by changing the
networking.external_access.external_public_agent_hostnamesetting to an externally reachable virtual host (VHOST).
For example, you might specify the Public Agent ELB in an AWS environment.
You can configure this setting using the DC/OS web-based interface or by customizing the JupyterLab configuration file.
For example:
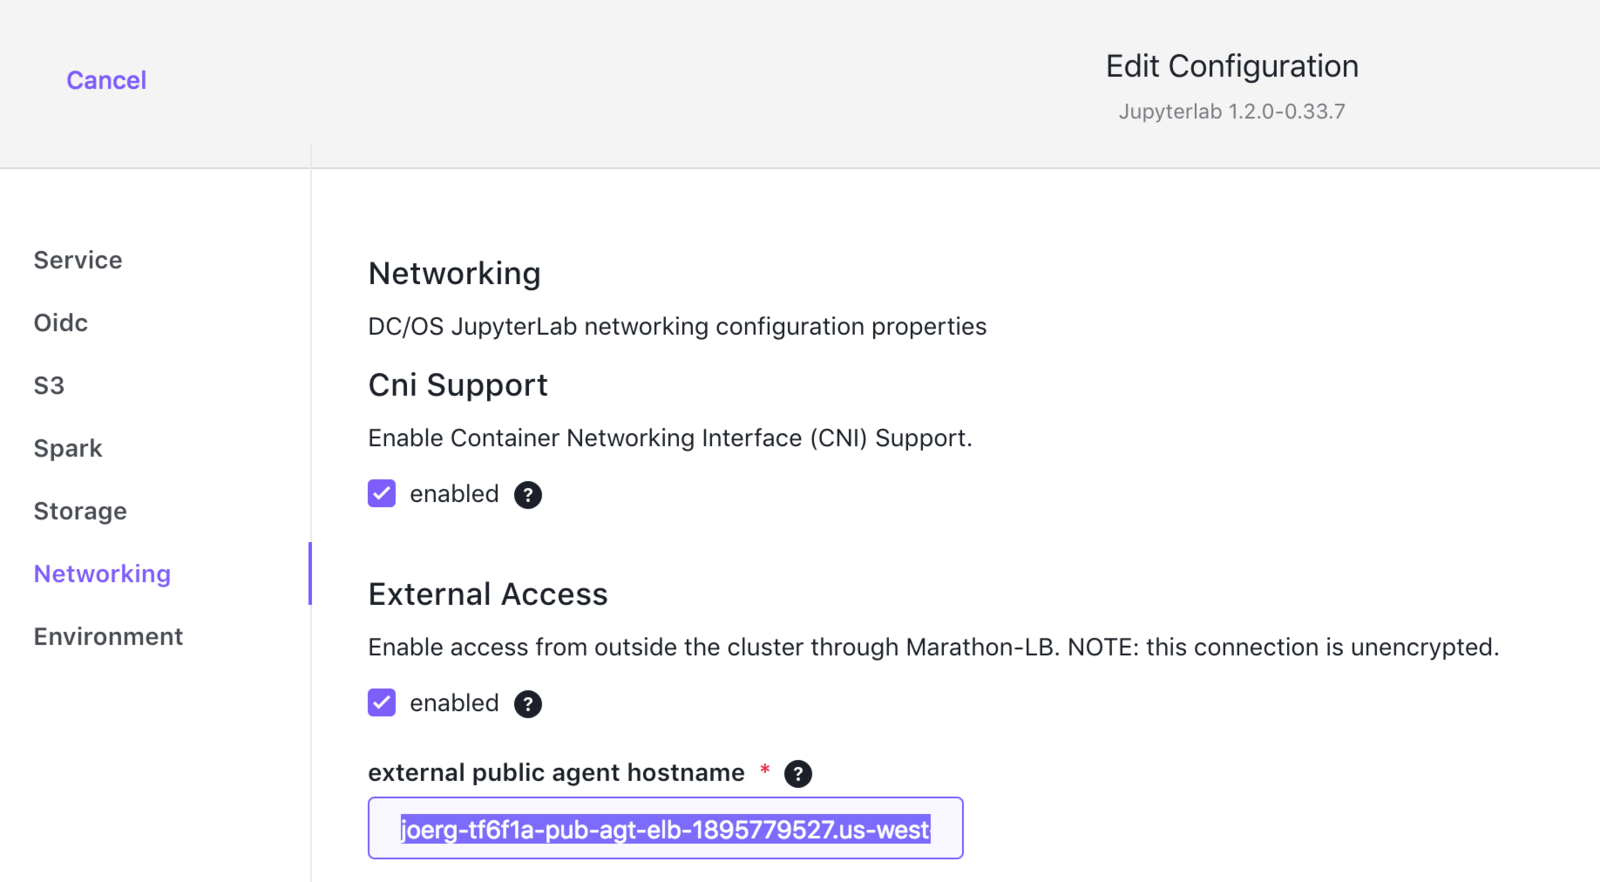
Figure: VHOST Configuration
If you are modifying the jupyterlabconfiguration file, modify the following setting;
```
"external_access": {
    "enabled": true,
    "external_public_agent_hostname": "<ADD YOUR VHOST NAME HERE *WITHOUT* http:// or the trailing slash (/)>"
}
```
- Specify the configuration file URLs.
For this demonstration, you are using the HDFS data set from the HDFS package you have installed.
From the DC/OS web-based interface:
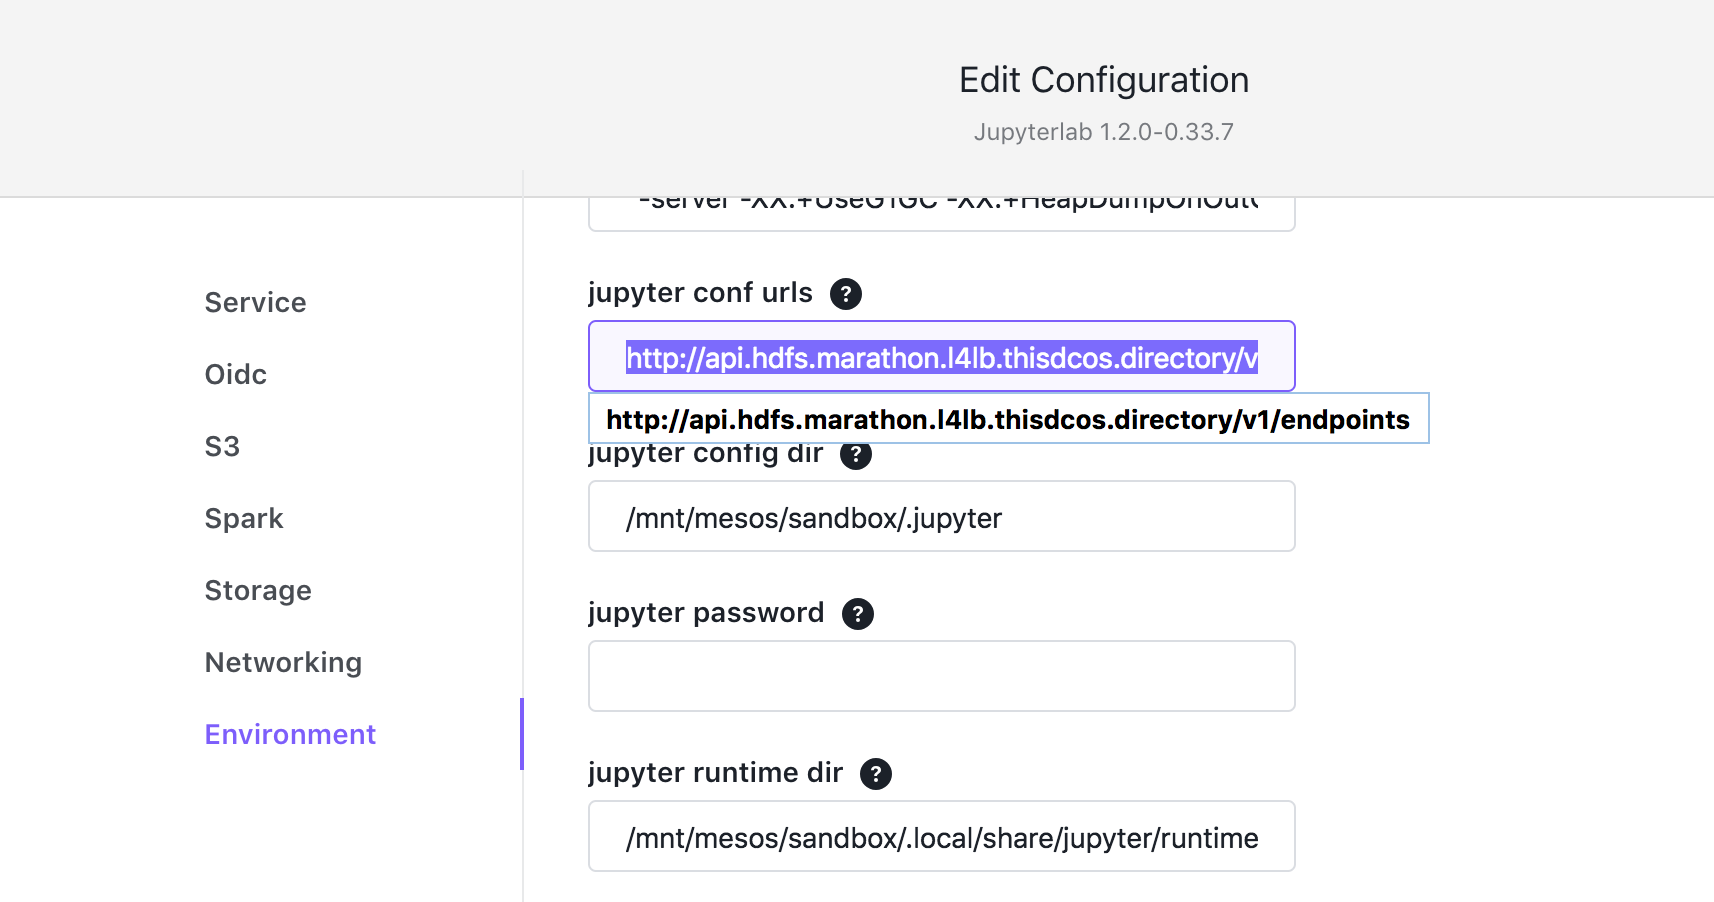
Figure: HDFS Configuration
Alternatively, you can modify the jupyterlabconfiguration file with the following setting:
```
"jupyter_conf_urls": "http://api.hdfs.marathon.l4lb.thisdcos.directory/v1/endpoints",
```
-
Enable the following two parameters for better monitoring and debugging using the DC/OS web-based interface or the jupyterlab configuration file.
For example, customize the configuration file with the following settings:
"start_spark_history_server": true, "start_tensorboard": true, -
Install JupyterLab either by clicking Run Service in the DC/OS web-based interface or from the CLI.
For example, in the DC/OS web-based interface:
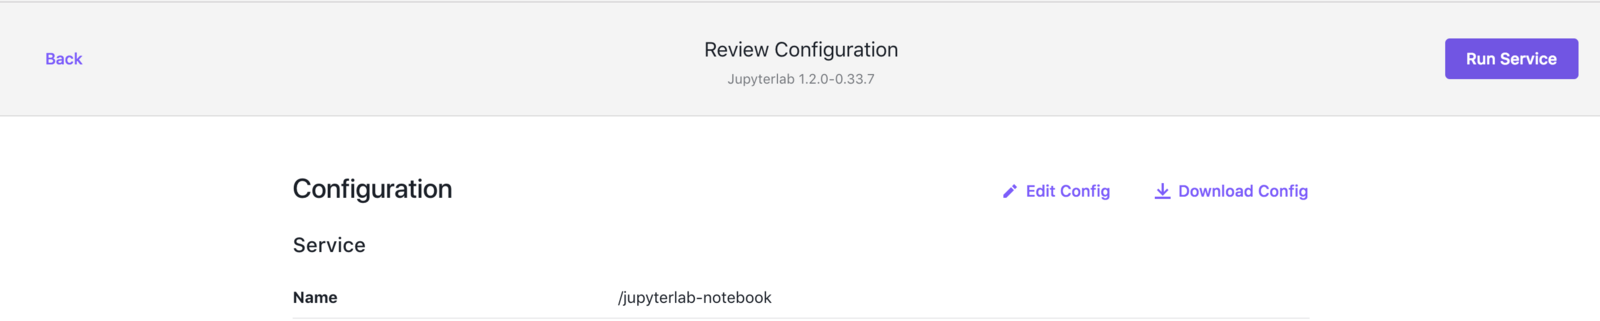
Figure: Run Service
Alternatively, install using the CLI and a customized configuration file by running the following command:

```
dcos package install jupyterlab --options=jupyterlab_options.json
```
For more information about the options for installing JupyterLab, see installation.
Demo
Login
- Log in to JupyterLab. If we have used the default name and VHOST setting above it should be reachable via
<VHOST>/jupyterlab-notebook.
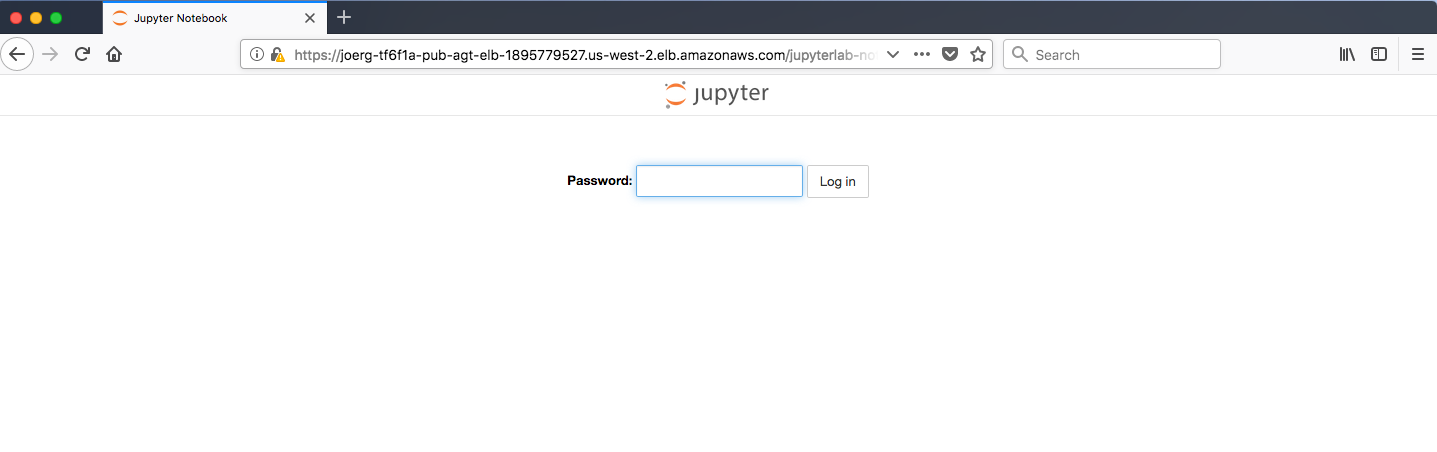
Figure: JupyterLab login
The default password with the above settings is jupyter.
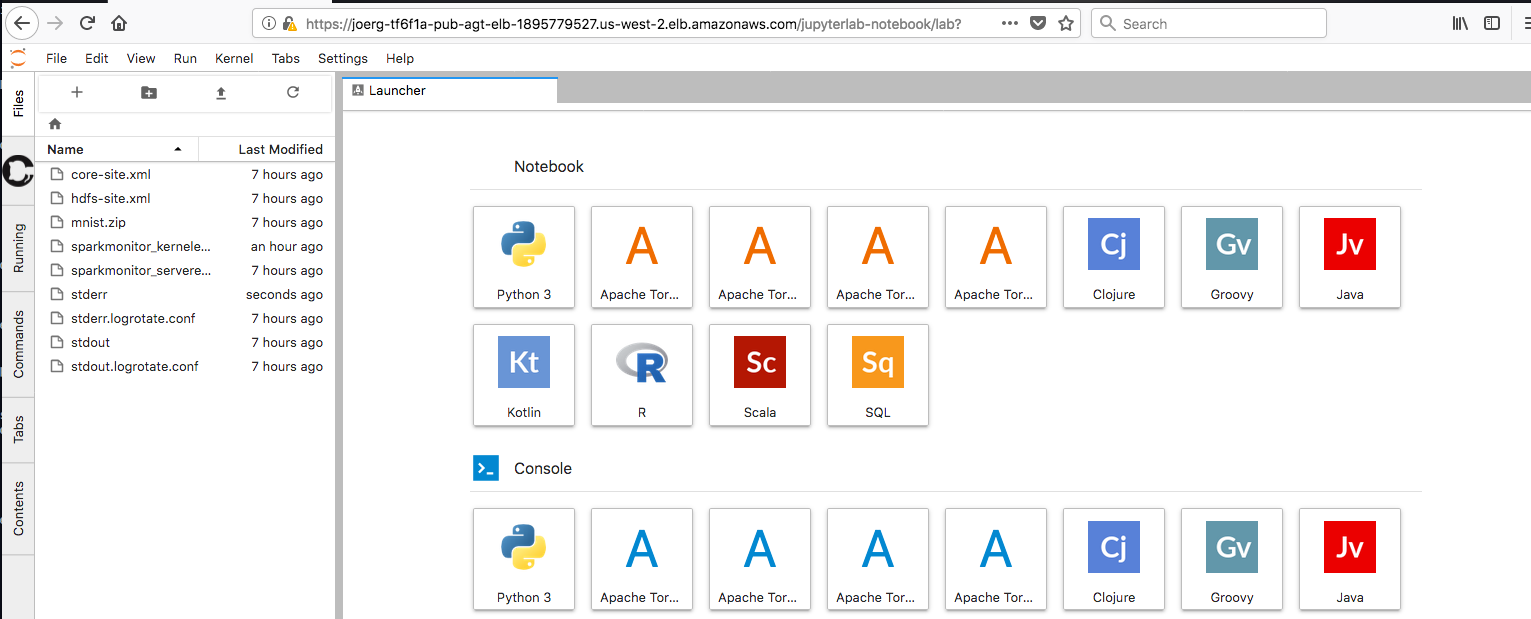
Figure: Default password jupyter
- After logging in, you should be able to see the JupyterLab Launcher:
Figure: JupyterLab launcher
SparkPi Job
As a first test let us run the SparkPi example job.
- Launch a Terminal from inside the notebook and then use the following command:
eval \
  spark-submit \
  ${SPARK_OPTS} \
  --verbose \
  --class org.apache.spark.examples.SparkPi \
  /opt/spark/examples/jars/spark-examples_2.11-2.2.1.jar 100
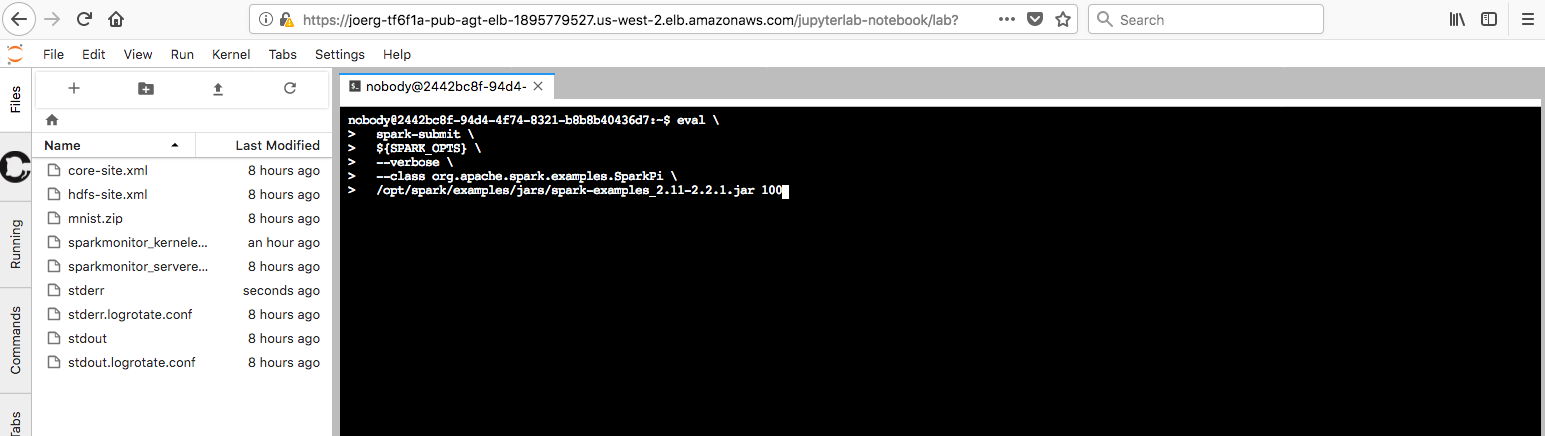
Figure: SparkPi on JupyterLab
- You should then see Spark spinning up tasks and computing Pi. If you want, you can check the Mesos web interface via
<cluster>/mesosand see the Spark tasks being spawned there.
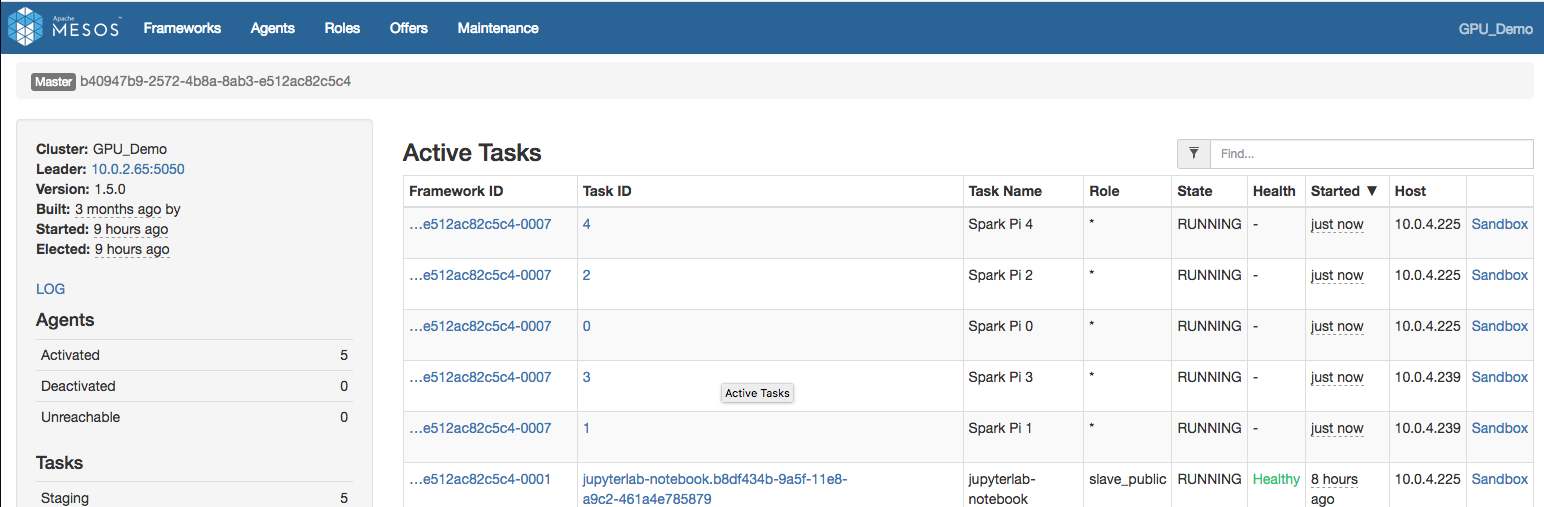
Figure: SparkPi Mesos on JupyterLab
Once the Spark job has finished, you should be able to see output similar to Pi is roughly 3.1416119141611913 (followed by the Spark teardown log messages).
SparkPi with Apache Toree
Let us run the SparkPi example as well directly from a Apache Toree notebook.
- Launch a new notebook with an
Apache Toree ScalaKernel - Use the Scala code below to compute Pi once more:
val NUM_SAMPLES = 10000000

val count2 = spark.sparkContext.parallelize(1 to NUM_SAMPLES).map{i =>
  val x = Math.random()
  val y = Math.random()
  if (x*x + y*y < 1) 1 else 0
}.reduce(_ + _)

println("Pi is roughly " + 4.0 * count2 / NUM_SAMPLES)
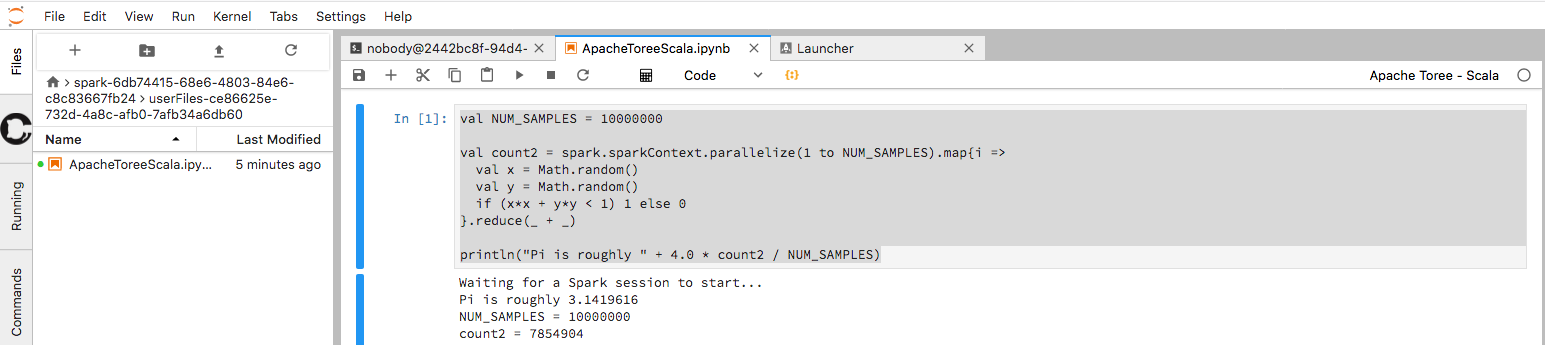
Figure: SparkPiToree on JupyterLab
Optional: Check available GPUs
For GPU enabled JupyterLab:
- Launch a new notebook with Python 3 Kernel and use the following python code to show the available GPUs.
from tensorflow.python.client import device_lib

def get_available_devices():
    local_device_protos = device_lib.list_local_devices()
    return [x.name for x in local_device_protos]

print(get_available_devices())
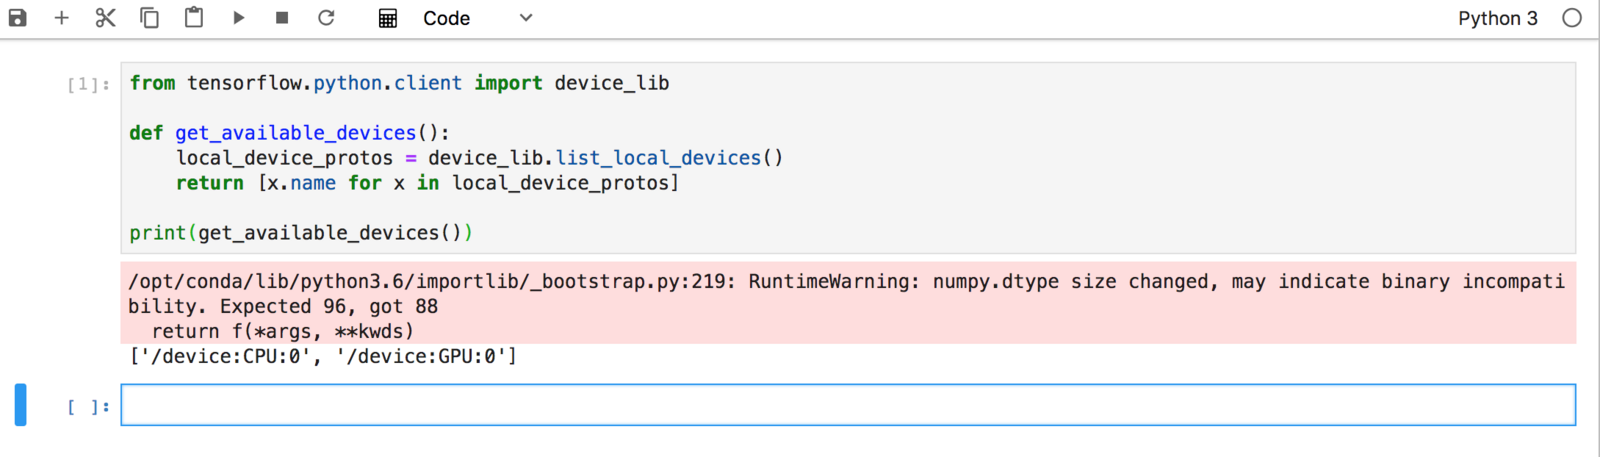
Figure: GPU on JupyterLab
MNIST TensorFlowOnSpark
Next let us use TensorFlowOnSpark and the MNIST database to train a network recognizing handwritten digits.
- Clone the Yahoo TensorFlowOnSpark Github Repo using the notebook’s Terminal:
git clone https://github.com/yahoo/TensorFlowOnSpark
- Retrieve and extract raw MNIST Dataset using the notebook’s Terminal:
cd $MESOS_SANDBOX
curl -fsSL -O http://downloads.mesosphere.com/data-science/assets/mnist.zip
unzip mnist.zip
- Check HDFS
Let us briefly confirm that HDFS is working as expected and the
mnistdirectory does not exist yet from the notebook’s Terminal:
hdfs dfs -ls  mnist/
ls: `mnist/': No such file or directory
- Prepare MNIST Dataset in CSV format and store on HDFS from the notebook’s Terminal
eval \
  spark-submit \
  ${SPARK_OPTS} \
  --verbose \
  $(pwd)/TensorFlowOnSpark/examples/mnist/mnist_data_setup.py \
    --output mnist/csv \
    --format csv
- Check for
mnistdirectory in HDFS from notebook’s Terminal:
hdfs dfs -ls -R  mnist
/drwxr-xr-x   - nobody supergroup          0 2018-08-08 01:33 mnist/csv
drwxr-xr-x   - nobody supergroup          0 2018-08-08 01:33 mnist/csv/test
drwxr-xr-x   - nobody supergroup          0 2018-08-08 01:33 mnist/csv/test/images
-rw-r--r--   3 nobody supergroup          0 2018-08-08 01:33 mnist/csv/test/images/_SUCCESS
-rw-r--r--   3 nobody supergroup    1810248 2018-08-08 01:33 mnist/csv/test/images/part-00000
-rw-r--r--   3 nobody supergroup    1806102 2018-08-08 01:33 mnist/csv/test/images/part-00001
-rw-r--r--   3 nobody supergroup    1811128 2018-08-08 01:33 mnist/csv/test/images/part-00002
-rw-r--r--   3 nobody supergroup    1812952 2018-08-08 01:33 mnist/csv/test/images/part-00003
-rw-r--r--   3 nobody supergroup    1810946 2018-08-08 01:33 mnist/csv/test/images/part-00004
-rw-r--r--   3 nobody supergroup    1835497 2018-08-08 01:33 mnist/csv/test/images/part-00005
...
- . Train MNIST model with CPUs from the notebook’s Terminal:
eval \
  spark-submit \
  ${SPARK_OPTS} \
  --verbose \
  --conf spark.mesos.executor.docker.image=dcoslabs/dcos-jupyterlab:1.2.0-0.33.7 \
  --py-files $(pwd)/TensorFlowOnSpark/examples/mnist/spark/mnist_dist.py \
  $(pwd)/TensorFlowOnSpark/examples/mnist/spark/mnist_spark.py \
  --cluster_size 5 \
  --images mnist/csv/train/images \
  --labels mnist/csv/train/labels \
  --format csv \
  --mode train \
  --model mnist/mnist_csv_model
eval \
    spark-submit \
    ${SPARK_OPTS} \
    --verbose \
    --conf spark.mesos.executor.docker.image=dcoslabs/dcos-jupyterlab:1.2.0-0.33.7-gpu \
    --conf spark.mesos.gpus.max=2 \
    --conf spark.mesos.executor.gpus=1 \
    --py-files $(pwd)/TensorFlowOnSpark/examples/mnist/spark/mnist_dist.py \
    $(pwd)/TensorFlowOnSpark/examples/mnist/spark/mnist_spark.py \
    --cluster_size 2 \
    --images mnist/csv/train/images \
    --labels mnist/csv/train/labels \
    --format csv \
    --mode train \
    --model mnist/mnist_csv_model
As we configured TensorBoard to be enabled, we can go to <VHOST>/jupyterlab-notebook/tensorboard and check the Training progress.
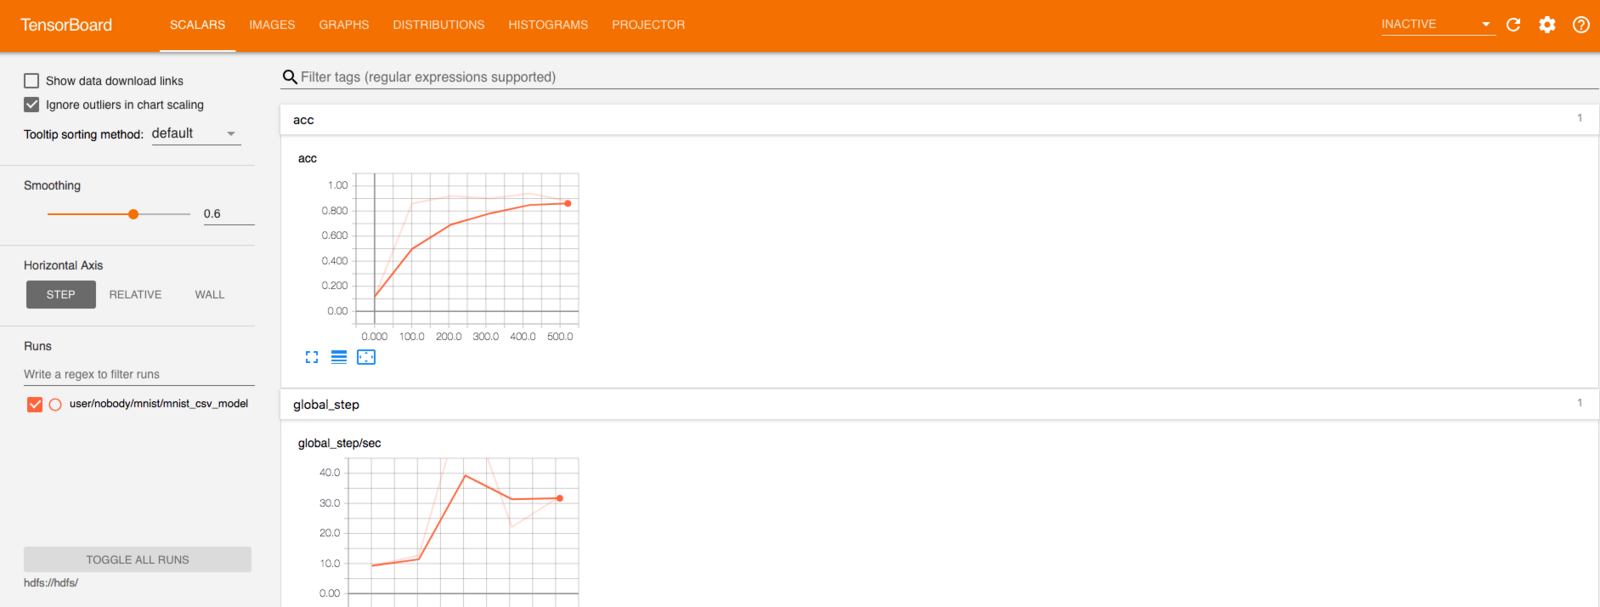
Figure: TensorBoard on JupyterLab
- Verify that the trained model exists on HDFS using the notebook’s Terminal:
nobody@2442bc8f-94d4-4f74-8321-b8b8b40436d7:~$ hdfs dfs -ls -R mnist/mnist_csv_model
-rw-r--r--   3 nobody supergroup        128 2018-08-08 02:37 mnist/mnist_csv_model/checkpoint
-rw-r--r--   3 nobody supergroup    4288367 2018-08-08 02:37 mnist/mnist_csv_model/events.out.tfevents.1533695777.ip-10-0-7-250.us-west-2.compute.internal
-rw-r--r--   3 nobody supergroup         40 2018-08-08 02:36 mnist/mnist_csv_model/events.out.tfevents.1533695778.ip-10-0-7-250.us-west-2.compute.internal
-rw-r--r--   3 nobody supergroup     156424 2018-08-08 02:36 mnist/mnist_csv_model/graph.pbtxt
-rw-r--r--   3 nobody supergroup     814168 2018-08-08 02:36 mnist/mnist_csv_model/model.ckpt-0.data-00000-of-00001
-rw-r--r--   3 nobody supergroup        408 2018-08-08 02:36 mnist/mnist_csv_model/model.ckpt-0.index
-rw-r--r--   3 nobody supergroup      69583 2018-08-08 02:36 mnist/mnist_csv_model/model.ckpt-0.meta
-rw-r--r--   3 nobody supergroup     814168 2018-08-08 02:37 mnist/mnist_csv_model/model.ckpt-600.data-00000-of-00001
-rw-r--r--   3 nobody supergroup        408 2018-08-08 02:37 mnist/mnist_csv_model/model.ckpt-600.index
-rw-r--r--   3 nobody supergroup      74941 2018-08-08 02:37 mnist/mnist_csv_model/model.ckpt-600.meta